Pages

Friday 4 December 2015

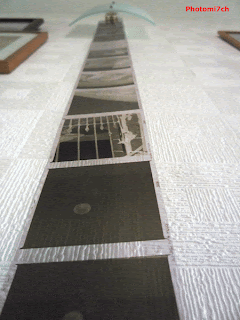
Redeveloping the negative.


You will at some point in your developing career, come across a negative(s) that has so much contrast that no matter what you do, you cannot get a decent print. There is a method you can use to retrieve the situation by redeveloping the negative(s).

To start with you will need to make up a solution of halogenizing bleach as follows:

  • 10 grams of Potassium permanganate.
  • 10 grams of Potassium Bromide.
  • 1 litre of cool water.
  • Stir this until all is dissolved in the water.

This can be carried out in a normally lit area so you can see the change in the negative. It takes about 5-7 minutes for the black silver on the film to be converted to a yellowish precipitate. You can remove the film from the bleach when the strongest high lights have gone a pale grey and wash well in running water. Now place in a soft compensating developer. When the highlights return to a greyish yellow remove the film and place in an acid stop bath for 30 seconds. Then fix, wash and dry as you would normally. This should produce a softer easier negative to print.

It is probably better to use a farmers reducer which subtracts the density from a
processed negative.They come ready mixed, you only add the right amount of water. This process can be repeated as many times as needed to get the right density; it's not a one shot approach. Allowing you to do a test print at each stage. There are three to types:

  • Kodak R-4a is best used for over exposed negatives and is easy to control. Acts on shadows first, then mid-range and then highlights. Mainly used for clearing fog from film and reducing prints.
  • Kodak R-4b is best for over developed negatives; it removes equal amounts of deposited silver from the highlight and shadow areas.
  • Kodak R-15 This is a super reducer, striping the highlights and not the shadows. For seriously over developed negatives and is the most difficult to control.

This is just a basic outline on the subject and will require further reading.
Saturday 14 November 2015

RO9 and the lens less camera.

All the photo's side by side
Over the last few months it looks like I have gone RO9s mad. I have! it is the new toy in my developing arsenal. I'm enjoying the quality of the negatives and not having to make up developer every time I want to process a film. It is still new enough for me to think I have forgotten to do something as I pour the liquid in the developing tank. With all this effort being spent on this developer it has made me think about its brother RO9 and it's attributes in connection with pinhole photography.

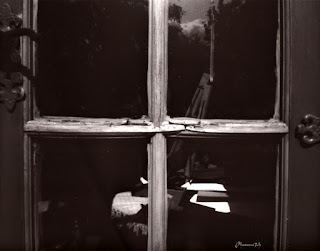
Image from PMK Pyro developed negative printed
on Ilford multi grade RC gloss.
Let me explain: RO9 is described as having a number of qualities, the main one here being, high acutance producing a very sharp looking image - a bit like sharpening a digital file in Photoshop. The idea that this developer may do this to the processed negatives has been a splinter in my mind for sometime, that I have been compelled to dust off my Zero pinhole camera to find out if it does make a difference.


Image from RO9 developed negative.
Printed on Kentmere RC gloss
I always feel very relaxed after I have spent time making images with this camera, I should use it more often. Anyway I loaded it with Fomapan 100 set to a 6x6 negative size.

 With the twelve images made it was into the darkroom to process the film. It was developed in the RO9 for thirteen minutes. The density of the negatives was as expected. With the new crisp looking negatives hanging up to dry what should I compare them with? After searching back in my archive of negatives it looks like the only other developer I have used when making images with the Zero is PMK Pyro. This developer is not known for it's sharpness but at least I did not follow the method through by using an afterbath. Which can add a further softening of the image by adding tone.

Zero pinhole set to 6x6 120 negative size

My comparison was never going to be very scientific. It was always going to be a case of would I be able to see a difference with the naked eye. You may feel that the comparison is unfair and to a certain extent you are right. To counter this I will compare the RO9 negatives with those produced with a lensed camera. If the RO9 is a sharpening developer it should be noticeable.


Image made using a camera lens.
35 mm Agfa APX 100 developed ID11

When looking down the focus finder at the different developed negatives the difference in grain structure jumps out at you. The PMK Pyro neg's are so smooth it is difficult to bring the the grain into sharp focus. Where as the RO9 grain looks like boulders. So does this defined structure indicate that the negatives will be sharper?

I enlarged the negatives to fill the 9 x 12 Kentmere RC gloss paper, instead of the smaller 6X6 square format of the negative. I wanted to see if the grain would be more exaggerated by doing this. To my surprise they lack the graininess I was expecting. In fact they are very smooth and defined.

RO9 developed negative printed
on Kentmere RC gloss
Conclusion:

With all the photographs laid out side by side is there a visual difference in sharpness? The straight answer is Yes but not enough to say if you want sharper lens-less images use Ro9. When you compare the PMK negatives with the RO9 ones there is slightly better definition to the edges of the subject giving you the sense that the pictures are sharper. It does not take away that distinct soft focus you get with pinhole cameras. If you then put a lensed print beside the RO9 developed picture you can see that it is very soft in the pinhole tradition. It shows that when using RO9 there is a sharpened quality to the photographs.


PMK Pyro developed image printed on Fomaspeed
Variant 131