Pages

Wednesday, 17 September 2014

My new print washer at last.


When I started looking for a new print washer I did not think it would take the best part of two years for it to arrive. Basically I was looking for a new way to wash multiple prints at once without having to stand there and agitate them. Giving me more time to print. It would have been quite easy to go down the road and buy one off the shelf, but I wanted to put some of the knowledge I had gained into building my own.


I was not expecting it to take so long to arrive at a design I was happy with. It was always going to be a slot style washer which meant it would be a little more complicated to build. I was up for the challenge. The easy part was choosing the materiel it would be made from one of two plastics I had in mind. The next was settling on the size, it had to be the same as my slot processor 18” (460 mm) by 14” (360 mm). When starting a project like this you do not realise how many questions need to be answered before the project get off the page. For example: How many prints did I want to wash at once? How far apart should the slots be? What style of slot divider? For each set of questions I solved so another set would take their place. The most difficult ones to answer were what tooling would be needed.


Making sketches of what the washer should look like helps no end in solving some question quite quickly. By doing this it gives an insight as to what will be the difficult parts to put together. One of the difficulties turned out to be the design of the dividers and how they would be put together. This question remained a sticking point right up to the point of having to make the divides. In the end I settled for ones that could be removed, just as well I did because I'm not happy with the design. Having said that they work really well.


Since it's completion it has been in regular use and now I would not be without it. It has done what I wanted it to do - free me up from having to stand and wash each print by hand.


This post looks into Print washing

Tuesday, 9 September 2014

Loading a Bronica film back

college still life
On one particular trip I made into college I was met by my tutor who placed in my hand a Bronica 6x45 camera and a roll of film in the other. Then told me to go into the studio and make pictures of the still life he had set up. Wow! I had wanted to try out one of these cameras for ages, part of this enthusiasm was when I found out that the lenses were made by Nikon. Sadly later models used seiko lenses. This is not to say the quality is any less. At one time I was very keen on all things Nikon.


I placed the camera on the tripod and released the film door to load the film. Which stopped me in my tracks. “How the hell do you make this work” I was expecting it to load the same way as other 120 format cameras that I had used. A short time later the tutor came in to see how thing were going. As he approached he smiled and said “It does not matter how many students I give this camera to you are all stumped by the film loading”. He took the film back and reversed the backing paper over the pressure plate round and onto the other reel. It was that simple.

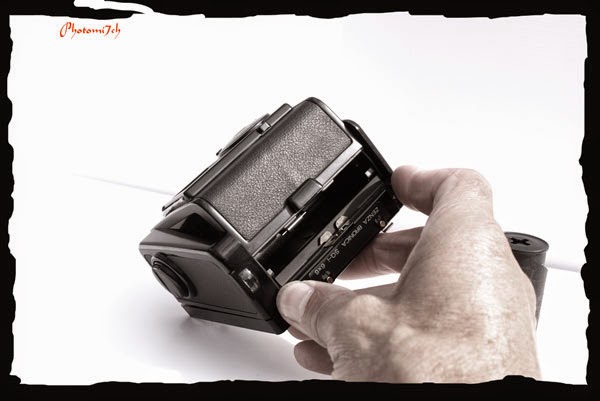
For those who are not familiar with the way you load film into the Bronica here are a few pictures to point the way.

Film backs can be loaded on or off the camera body.

To open the film back compress the two clips on the top. The door will spring open

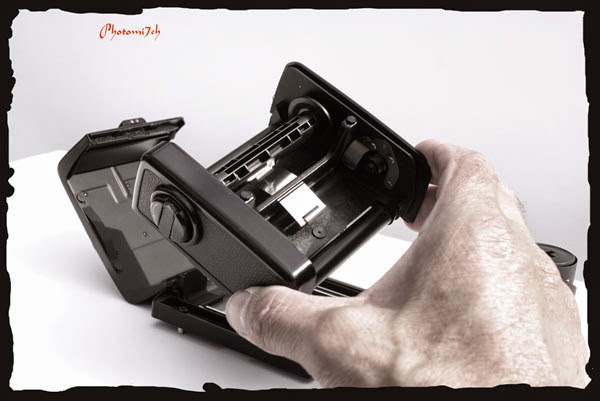
Remove the film holder from the case.

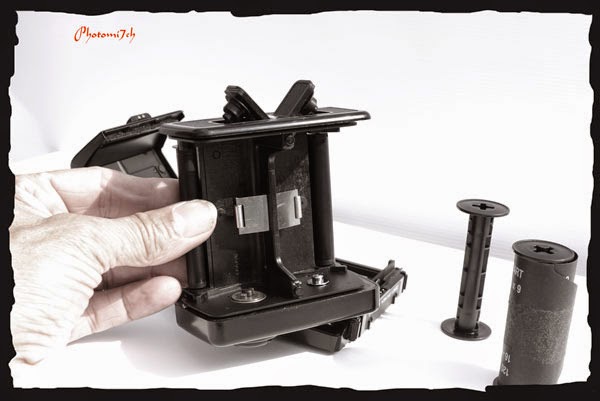
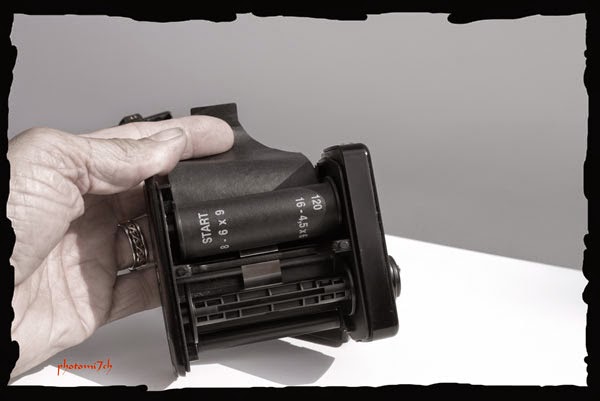
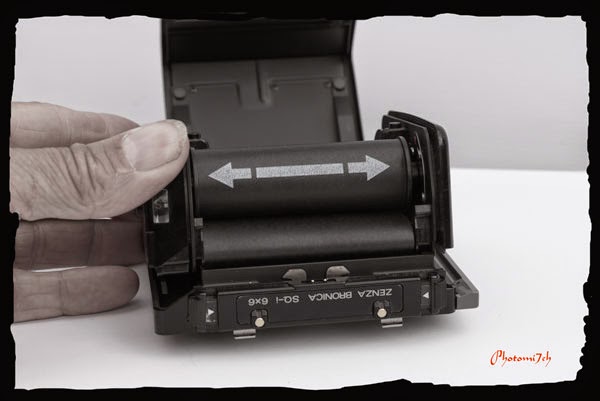
Push open the film spool holders.

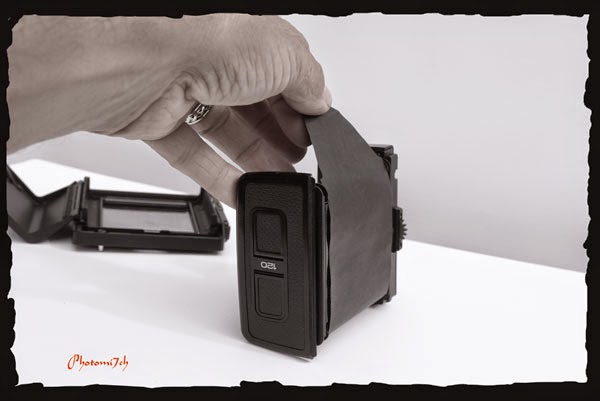
Place the empty spool in the lower holder this is the one with the winder on the side. With the fresh film in the top as shown pull the paper backing over the top.

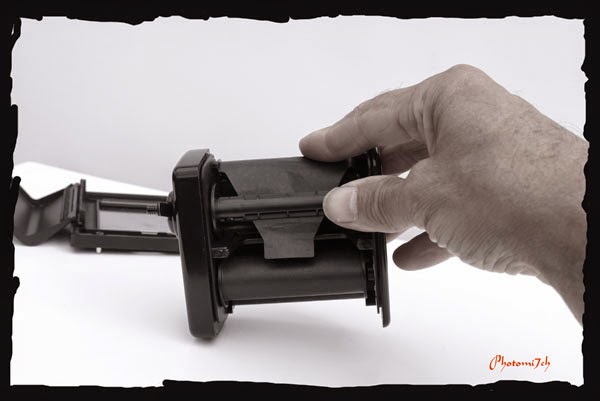
Pull the paper backing all the way up and over the top

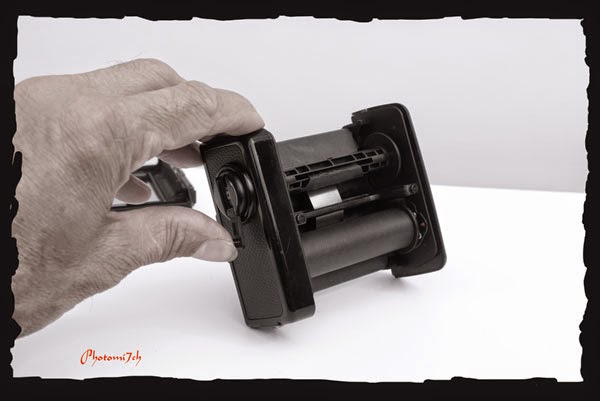
Thread the paper backing into the empty spool as shown

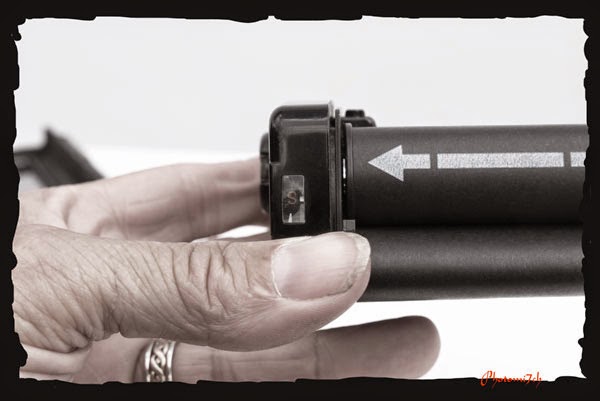
Using the winder on the side of the film holder wind the paper on

Keep winding the paper backing until the arrow shows and stop 

Place the film holder back in its casing and close.

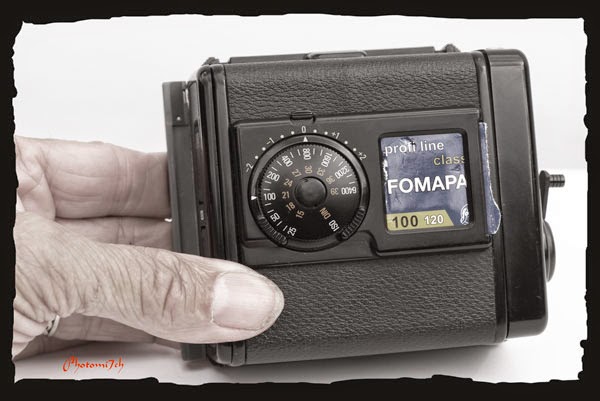
Do not forget to set the ISO. If you use a number of different film tear off the top of the film box and slide it in to the window.