Pages

Showing posts with label photography. Show all posts

Wednesday, 23 February 2022

Understanding how to keep Dust at bay.

Have you ever sat and looked at that shaft of light streaming into the room revealing all those microscopic particles dancing in the air. Then blowing in that direction to watch them swirl around. It always makes me think how is it that our lungs do not fur up like that of untouched dust on a flat surface. 

With all those bits hanging around it is a wonder that the film photographer produces any sort of fine-looking photograph. What with having to check and clean inside the back of the camera where the film sits, the camera lens, the film when processed, the enlarging lens, the negative carrier with glass it just wares you out just thinking about it.

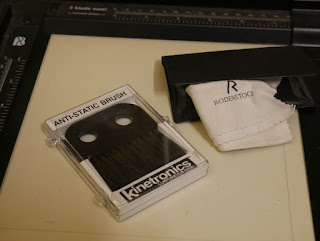
But we don't think about it seriously enough that is why we end up buying all these lens cloths, antistatic brushes, compressed air cans. The amount of time spent on blowing, wiping and brushing only to end up with more dust stuck to our optical surfaces than when we started. It is a wonder that a picture is produced at all.


What is it we need to understand? That the human body is a massive generator of static electricity. We have all experienced at some point walking up to the car and just as we are about to open the door, we get a shock off the car. Wrong you have just shocked the car it is an overload of static in your body grounding itself hence the shock as it leaves you. Yes! You.

The static builds up in us because of the manmade fibers rubbing against our bodies (plastic) acting as an insulator. If you have not earthed yourself, say by washing your hands and or walking around in bare feet. The static continues to build in extreme cases you can get fly away hair. This is where your hair starts to lift up from your head. Before it gets to this point most of us earth ourselves in some way dissipating the static before we get to that shock the car.

Some years ago, I spent a lot of time try to remove some spots of dust from the glass of the negative carrier, having removed it, to have it all come back tenfold as soon as I touched it with my bare hand. The air was blue with my frustration. 

Slowly the penny dropped I was the problem I was magnetizing the glass with the excessive static in my body. Time to sort this once and for all. I had sitting in a draw an earthing band that I used when building a computer. 

The earthing strap was set up by the enlarger where it has remained. It has put in sterling service over the years it's still a wonder, to watch the dust fall off the glass of the negative carrier when I touch it to it. It is also one of the first things I do when entering the darkroom is to touch the earth before I start setting things up. 

Occasionally you get a stubborn particle needing wiping off but nowhere near as much trouble to remove. Once done a touch to earth again making it ready to load the film that is earthed just before loading. 


This article is the copyright of Mitch Fusco 2022 all rights reserved 


Tuesday, 21 December 2021

Trouble in the darkroom


My darkroom is a very personal space, the only acknowledgement to it being standard is the separation of wet and dry working areas. It is just big enough for one person to work in comfortable. A bit of a glorified closet really! which has meant I have had to find ways of making the space work hard to meet the needs of both wet-and dry sides working areas.


One of the things I have had to do is to put the 12 x16 paper processor under the work top on a pull out shelf. It was done originally to save space but has proved to be inspired in a way I had not foreseen. Being able to look down on the print process has made it a more relaxed way to work. Keeping the work top clear for other wet side needs has not worked so well, the top is being dominated by the tray I use to put the tube covers that keep the chemicals fresh in the slot processor. It was a large tray so that the tops could be spaced far enough apart to stop cross contamination. 


However, it all came to a head when I wanted to try a new print developer and use it with a tray so I could monitor when the first signs of the image appeared, then transfer it to the processor for stop and fix. I should explain that the darkroom does not have running water. I usually part fill a tray with water to put the fixed photographs in then wash them at the end of the session in the bathroom. Anyway I had the water tray precariously balanced on top of the slot covers in their tray as the rest of the top was taken up with the developing tray. It must have been a good day as I did not manage to tip the whole lot over myself. 

I now seriously considered ways of storing the slot tops that would keep the worktop clear. It came to me that the best way was to stand them on end. My first thought was to use a number of metal clips attached to the wall. I cannot understand why I had not come to this conclusion sooner. Once I had thought about it. It was not such a good idea as fix attacks metal. I decided it would be better to use plastic, so took some measurements, sat down and did a number of drawings of a tray that would hold the tubes upright. Then thought about how to stop cross contamination, so added sections to the base. Once I had refined the basic look and measurements I showed the idea to my mate at Plasweld, he helped to simplify the design and added a splash back to stop chemicals running all over the place when loading the tops into the stand. 


A few weeks later the stand is finished. It works very well and has freed up lots of space on the worktop allowing me to work more safely. Such a simple idea that has made a big difference.


A typical layout for a darkroom

Tuesday, 19 October 2021

lost and found

 It has been a very tiring year. One that has knocked out of me any notion of making photographs in any shape or form. I have not wanted to do any of it - not make, print or talk about it. My interest has been rubbed out to such an extent that I have wondered whether I was ever a photographer.


The writing of this article is the first time I have given photography any serious thought recently. I have noticed over the past few weeks that my interest has started to re-assert itself here and there. I have never found it easy to write about my love of photography and the scrapes I manage to get myself into. This blog still remains a mystery to me as to why I started it.


I am still surprised at how popular it is. I know a lot of you judge popularity by comment and the number of likes, but I do not. For me it is the number of visits and also the number of other blogs carrying some of the themes I have talked about long with the odd magazine article. That in itself is all the incentive I need. 


So, to the year ahead. I’m hoping I will be able to get on with all the things I have been meaning to, including making more magazines, selling more prints etc. Will just have to wait and see.


I’m going to end with a big thank you to all those who have been reading the blog in these barren times with few new posts. To all of you, I wish a very creative future.


The articles that follow this post were, in some cases. written before my creative slump and are now being published.


A big thank to our new editor for getting things rolling again.


Tuesday, 16 February 2021

Zero double take project first results.


Zero 6x9 pinhole camera.


As I sit here reviewing the first batch of photographs from double take, the wind and the rain is still lashing the property - something it has been doing for the last twenty four hours. I'm pleased to be inside in front of a warm fire with Tabatino who is stretched out in front of it like a rug. 


Zero 6x9 pinhole camera.


The contact print shows that the second exposures are quite weak and will require dodging and burning to make their presence felt. With this in mind I  have been using half page test strips  so I can see how much more exposure is needed to bring out the weaker parts of the negative. This has given me a better overall idea of how much extra time the weaker parts of the picture need so I can get as close as possible to what the final print will look like. Having  chosen to use 6x6 negatives I find myself cropping them to a landscape frame size giving me more choice over which parts of the negative make the final composition and partly to get the best use out of the paper size. I'm using Silverprint's gloss proof paper mainly because I believe it has added something to the overall expression of the photographs.


Zero 6 x 9 pinhole camera.


The results of this first film have been a pleasant surprise in that most of the negatives have produced picture combinations that work well. Whether this is down to luck or the pre-planning in the picture combinations only time will tell. The day I took the pictures was a challenge in that it was windy with a broken cloud sky that was fast moving making metering each shot difficult. By the time I had worked out the shutter speed and opened it the scene in some cases had gone from bright sunshine to dull and overcast or vice versa. It just goes to show how forgiving film is when it comes to exposing it in rapidly changing light conditions over extended periods. These were printed at grade 3 and not my more common split procedure.


Technical data: 

Film 120 FP4+ set to 6 x 6 negative size, developed in PMK Pyro, Printed on silverproof paper, developed in Ilford warmtone developer.

Saturday, 3 February 2018

Kiroku by Dadio Moriyama.

I was flicking through some book reviews, when I came across one about Daido Moriyama's new book 'Record' known as Kiroku in Japanese. It is the collection of the first 30 issues of his personal magazine dating back to 1970s. Basically it chronicles his image making and some thoughts over the time period.

After reading the revue I had an irresistible feeling that I should obtain a copy. Although I am interested in Japanese photography I cannot say I know anything about Moriyama's work apart from he is a street photographer, which has a strong appeal.

 With a copy of Record in my hand and weight being the measure of quality, this is in the five star category. When you slide the book out of it's slip case you are presented with black edged pages and flush black edge hard cover something I have not seen before. This in itself brings a drama to what is to follow. 


When you open the book you are presented with silky smooth gloss white pages that keeps you in suspense as Mark Holborn introduces you to Daido Moriyama and sets the stage for the images to come. 

Wow! And what a shock they are! pulling no punches in their very high contrast look making full use of the term black and white. It takes time for your eyes to adjust to the rich black, making it difficult to see what the images are about. This is partly because these images are made on film at night without the use of flash making them very grainy. This graininess has been translated to the gloss pages by the printing technique making the pages gritty to the touch and adding a textural impact to the pictures.

He does not just use monochrome film there are some magazines in colour where he plays with the vibrancy of the colour. 


For a book that I decided to obtain on a whim, I have been very impressed by the images within. Yes the blackness, odd angles and graininess of the images are an assault on your sensibility's but that is what makes his work different.

It is a book to be enjoyed at leisure over many days and not all at once.


Saturday, 20 January 2018

Photography a bit of a strange fish.

Nowadays photography is referred to as a visual art bringing it into line with the more traditional painting, drawing and sculpture, to name some of the most obvious visual art forms.


What confounds me with photography is the obsession with the equipment and processes to the detriment of the image. After all, the camera is only the paint brush that allows the artist to convey their vision of the world, and yet photographs get bogged down in all the beguiling wizardry of what is essentially a little black box with or without a lens attached at one end and some light sensitive material with a switch that lets the light flood in when pressed.


The most important part of this symbiosis is the eye and mind behind the box. Without it, these boxes are fancy bits of sculpture sitting on a shelf and yet we talk non-stop about this feature or other. That at the end of the day the image you make will not throw it's hands up in the air and stamp it's feet because you are not using the latest most expensive technology!

 If you have one of these wonderful bits of wizardry, should you not do it justice and make wonderful compelling images? The real crime is that most of these pictures languish on a computer or photo sharing site are not necessarily the best you can produce? - those you feel are really well crafted will they ever see the light of day as a print or photograph hanging on the wall or better still someone else's?
 
The images that appear here are a mix of digital and film.  

Sunday, 6 March 2016

H.CB words of wisdom.

Nikon F5 80-210 zoom. Agfa APX, ISO 100, developed in RO9s.

Time runs and flows and only our death can stop it. The photograph is a blade that captures one dazzling instant in eternity.


Henri Cartier-Bresson

Thursday, 18 June 2015

Spiraling trouble?

Putting this lot back together was fun.
Y eh! right, there is no way I'm going to start separating a plastic spiral once the film had been processed. I was of that mind set until I started to use medium format film. In the old days I would gently unpick the 35mm film from the spool unwinding it slowly so as not to damage it. Then I was confronted with having to reset the spiral so it would take 120 film and because this film has a larger surface it is very easy to damage as I have found out.

Looking back I have to say what was all the fuss about. I think it is a lot to do with the unknown. If I take it apart will I ever get it back together? I will, just takes a bit of time. In my case the first time was easy I just gripped both sides of the spiral and twisted till it went click. Then gently pulled it apart until it reached the top slot and twisted it back the other way. Done! There that was not so bad. Huh! Not quite as clever as you thought, when it came to doing it again! I couldn't get it to go back together again no matter what I tried. It took ages to get those slots to meet up the right way and then they were backwards. Just before exasperation set in I put them down. Made a cup of tea and chilled. What makes it more maddening is when I went back to the spiral it went straight together with out a hitch.

Now a days it is second nature, don't be fooled it does not always go right first time.

Friday, 1 May 2015

Beaten badly? The filter is stuck.

OH NO!!!
If you are of a delicate disposition you should not be reading this post. It shows pictures of unbelievable brutality towards a camera lens. It had to be done so the lens could be cleaned we make no apologies for the blunt force trauma needed to remove the filter.

Away from the sensational introduction the facts are more prosaic. When I have not used a camera for an extended period I generally give my cameras a good clean; in the case of my Bronica SQAi this means taking all the main components apart for checking. When I looked at the lens I noticed that the UV filter on the front was slightly out of round and there was a chip at the edge of the filter glass. I can not remember how this damage happened but it must have been something quite dramatic.

Most of my film camera lenses have a protective filter on the front, an expensive exercise now-a-days, as I have discovered. But not having the filter there in the first place would have cost a new lens. So you could say that it has been a good investment over the years. You only have to drop it once to get a good return or in this case twice, from what I remember?

O ugh that hurts!!!
It is quite surprising how brutal you need to be to remove a lens filter that has become distorted. I tried to remove it by hand but was unable to get a good enough grip to release it. So in came the meanies - my name for the over-sized water pump pliers used. The pliers are about 400 mm long, they needed to be this size so the jaw would extend to the 67 mm filter size with ease and not squeeze the filter out of shape any more than what it was. With a gentle grip on the filter and a small amount of pressure it unscrewed in a trice. Allowing for a gentle grip leaving no marks on the lens or damaged filter. Once the filter was free I checked for damage to the thread on the lens and found none. 

Ahhhh! that's better.
With the front element of the lens clean I attached the new filter. This was a gentle soothing exercise for the lens after all that brute force of earlier. All's well for the new season of picture making.

The writer of this article would like to assure the readers that the camera lens was not hurt in anyway and a stunt double was used for the photos that accompany this post.


Friday, 17 April 2015

RO 9 Special developer.

Recently, I had an unexpected back log of film to process It can be difficult to find the time to do them especially when it is more than a couple of rolls. Anyway a gap opened up so I dived into the darkroom to load two of the rolls ready for development. As I reached for the RO9 my attention was attracted to a couple of bottles of developer standing behind it. RO9 Special and Studional which as it turns out are one and the same along with Rodinal Special. While I was boxing up the first couple of film I had a rush of blood to the head and decided to give the RO9 Special a try. There was method in my madness.

At the time of my decision I had no background knowledge of this developer apart from how it was marketed and the information on the side of the bottle which is sparse to say the least. The blurb stated that RO9s was the finer bread brother of RO9 which was what attracted me to it in the first place. Part of my madness had been influenced by a cassette of HP5+ I had been given to process.

120  FP4+ Negs Developed in RO9s
In stead of jumping in at the deep end with both feet, I thought it prudent to check the very short developing times printed on the side of the bottle by processing a roll of 120 FP4+. Because I have a tendency to slightly under expose my negatives the suggested time of three and a half minutes at a dilution of 1 to 15 was increased to four. I used my standard agitation method of twelve inversions for the first thirty seconds and then four every minute. As there was no indication to the contrary. As soon as the fix was poured out of the tank I checked to see if they had developed properly. From what I could see they looked perfect. I had not intended to do a grain comparison for this film, it was purely to see if the times on the bottle worked in my favour.

The info on the side of the bottle for HP5+ suggested four minutes at 1+15 - I processed the film for five; as it turns out it was a good move. I think the negatives would have been a bit thin otherwise.

I have now researched process times and developer information for RO9s Something I should have done first with a visit Digital truths Dev chart for more times. They tell you to look at Studional.

HP5+ Negs developed in RO9s
 
Something else I had not been aware of was once the developer had been made up you could use it again. I had a suspicion it could be used again because the concentrate had a syrupy look when I poured it out. In fact you can process up to twelve rolls of mixed formats per litre. The most interesting thing about this developer is that there is no time compensation if you do more than one roll of film on the same day. You only add a compensation factor the longer the working developer in stored. Up to three months.


Developer Data:

RO9 Special/Rodinal Special and Studional.

Characteristics: Fine grain sharp negatives with good contrast. Once diluted can be stored for multiple use. Short process times.

Mixing instructions: Dilute concentrate with water 1+15

Number of Film per Dilution: 10-12 35mm or 120 format per Litre.

Temperature: Is best kept between 18 C and 24C with + or – adjustments as needed to the length of the development time.

Agitation: Tilt the tank for the first minute continuously and then once every minute. You should avoid developing times under three minutes.

Shelf Life: Concentrate should last 2 years in original bottle with no air gap. Once Diluted it should last 3 months without air gap in it's own container.

Time increases for multiple use: To keep speed yield and contrast consistent the diluted developer should be kept in brim full tightly capped bottles if this is achieved the following will apply:

Idle time between
two batches
Development lengthened
by
few hours (but development none *on same day)
None *
1 – 3 days
5.00%
4 – 8 days
10.00%
1 – 2 weeks
15.00%
over 2 weeks
20.00%

* with Atomal FF: + 10 %.

The extra times given above do not change if several films are simultaneously processed in one batch.

Suggested development times for use with RO9 special, Rodinal Special and Studional:


Film type
Time *
Speed
Agfapan APX 100
4 min
ISO 100/21°
Agfapan APX 400
6 min
ISO 400/27°
Fuji Neopan 400 Prof.
3 min
ISO 320/26°
Fuji Neopan 1600 Prof.
3 min
ISO 800/30°
Ilford PAN-F Plus
3 min
ISO 50/18°
llford FP 4 Plus
3.5 min
ISO 100/21°
Ilford HP 5 Plus
4 min
ISO 400/27°
Ilford Delta 100
3.5 min
ISO 160/23°
Ilford Delta 400
4.5 min
ISO 400/27°
Ilford Delta 3200
6 min
ISO 1250/32°
Ilford SFX 200
4 min
ISO 125/22°
Kodak Plus-X
5 min
ISO 125/22°
Kodak Tri-X
3.5 min
ISO 400/27°
Kodak T-MAX 100
5 min
ISO 80/20°
Kodak T-MAX 400
5 min
ISO 400/27°
Kodak T-MAX p3200
6 min
ISO 1250/32°
Kodak Recording 2475
6 min
ISO 640/29°

  • Small tank or tray processing at 20 °C.
  • Information above supplied by Agfa.

Almost forgot the reason for the rush of blood to the head if you had not already guessed it was to do with the 35 mm HP5+ I find that this films emulsion tends to produce rather grainy negatives with standard RO9. As I intend to enlarge these negatives to 9 x12 the finer developer should make the prints less grainy. I am pleased to say the strategy worked, the negatives have a much finer grain than the standard RO9. The proof of the pudding will be in the printing of the FP4+ and HP5+ negatives. I will share more prints in another post.

9 x 12  photograph from 35mm HP5+ negatives developed in RO9 special


Sunday, 22 February 2015

Green Developer?

 ID11 used with Fomapan
In the normal run of things the colour of your developer as you pour it out at the end of the developing period is nothing out of the ordinary. You just get on with the next stage of the process. That is until it comes out emerald green!. What was just another film processing session has just thrown up a number of questions of doubt, or has it? This is possibly the first time for quite a while that you have taken any notice of what colour the used developer was supposed to be. So what changed? Your film make?

Basically what you are seeing, if you have not used a pre-soak, is the anti-curl and/or the antihalation coatings, washing off in the developer. It has no affect on the developing process which is the first thought most of us have when presented with something out of the ordinary. Different developers can present varying colours depending on which film manufacturer you use.
RO9 used with Fomapan

Why add these dyes?

The halation dye is added to the back of the film base to stop reflections coming off the backing (Acetate or Polyester) into the emulsion, causing exposure affects, usually visible to the eye as halos around areas of brightness. Sometimes the halation coating is sandwiched between the film base and the emulsion or added to the film base itself giving it a slight tone. This in no way alters the way the film acts with the printing process.


So which film developer combination gives you this wonderful Green?


Fomapan is responsible for the green tinting of the used developer. The developers I have used - ID11 and RO9 have produced this colour, so suspect that this film may affect other developers. Although Foma produces the most striking colour, other makes also add a tint to varying degrees to the developer during the process.

Friday, 16 January 2015

Thinking in Black and white?


I don't know about you, but I find it difficult to get back into the swing of things after a break. I find it hard to get my brain out of park. It would seem that the longer I get in the tooth the more likely I am to make the silliest of mistakes. Take earlier in the year for instance.


One Sunday afternoon we thought we would take a trip out to the Humber bridge. The day had turned very warm with a light breeze and rolling clouds. Ideal for making pictures. Earlier that day I had cleaned my SQAi and loaded up all my film backs with fresh film. Not unusual in it's self, except one of the backs was loaded with an out of date colour film. I placed this back on the camera and thought no more about it.


It was a great day to walk across the bridge and along the way I made pictures of whatever took my eyes fancy, happy in the knowledge that they would make good mono-prints. After making twelve pictures I changed the film backs with one loaded with FP4+ and continued on my merry way.


When unloading the film backs at home I discovered that the unmarked back had colour film in it and not the Foma 100 I thought I was using. Ah! How would these pictures work in colour? The reason I ask this is because I think and see differently when using black and white film. Or do I?


An unexpected chance to test what I have been saying and doing. When the pictures came back from the lab, the first thing I noticed was the way they had been composed. In fact the colour does not add anything to some of the pictures. I would not have made any of these pictures in this way had I known it was colour film. It would have been a different set of pictures altogether. 


Saturday, 3 January 2015

FADU 2014

The year book is out.

Hopefully this is the start of a new era of year books from the film anddarkroom users forum (FADU). Earlier in the year Ian a member of FADU expressed his desire to have the year book started again and enquired if any of the other members would be interested in taking part. To his surprise there was a ground swell of enthusiasm for it to be reinstated. A boost to its reincarnation was Les Mclean's offer to curate and edit the book on behalf of the members.

This is the first book since Dave Miller the forums owner bowed out of producing the book back in 2012. There have been a number of calls by different members to get it going again but were not able to find anyone who had the time to get it off the ground. One of the main differences is that a number of members have gotten together to form a group to over see the submission process for the year book.

What makes this year book different from others, and the forum for that matter, is it's strict adherence to all pictures being scanned from photographs. Likewise for a picture to be included in the book, each associate was allowed to submit up to four photographs no larger than 8 x 10 in size. To be mailed to the submissions member no later than the end of October. They were then sent on altogether to Les Mclean for editing.

Another good thing about the submission process for the book was any member no matter what his or her level of experience, was invited to take part. I have to add that FADU is a very friendly welcoming forum who's members are always very willing to share their knowledge no matter who or where you are in your analogue journey.
So to the 2014 edition of the year book, i have to say there is a wonderful selection of photographs reproduced in the book. In the end, nineteen FADU supporters provided work for inclusion in the book. Not as diverse as previous years editions but a good number to start things going again. Of the seventy six photograph’s entered forty have been chosen. Representing all genre of photography.


Thanks goes to all the members who helped to make it a reality and a special thanks to Les McLean for taking on the editorial role. I think his involvement gave the project the impetus it needed to make it a reality.