
I have been having a clear out in the darkroom. More like seeing what printing paper I have in stock and how close to date they were getting. While checking I came across a pack of Ilford multigrade 4 peal RC 20 x 24 to large to miss but I have managed not to notice it for a long time.
It has been over looked all this time partly because it is pearl paper and that I am unable to use paper this size. I know why, then why have you not cut it down to size? Without trying to make excuses it is difficult to cut any size papers when you only have enough space on the dry side of the darkroom for your enlarger and I did not want to waste it if I could help it. A sort of unintended waiting game for the right project only I did not think it would take about 15 years.
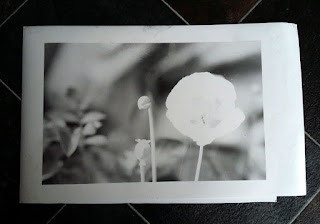
A few days ago I was setting up the enlarger to make some 9.5 x 12 prints from Kentmere 100 35mm film. That had some images of poppies made in the garden. All though they all turned out well. I had noticed, I was loosing about an inch or so off the side of the negative.
I started to speculate wouldn't it be nice to include that missing edge at the same ratio of enlargement without having to down size it to make it fit. This idea was going to be difficult to fulfill as my main sizes are 8 x 10 and 9.5 x 12. This left the 20 x 24 this maybe it's finest hour.

After a certain point in time old paper starts to increase their latency. This means you need to start adding more exposure time (light ) to the paper to receive the same results you would get with the fresh stuff.
With paper this old you may as well chuck it in the bin. Yes! it is coming, if it was this article would be at an end. But! while I am processing anyway I may as well see if I can get any sort of image.

Where to start? a Segmented test print. Where you increase the amount of exposure at set times. The problem with this is you have no idea how many increments of light will be needed to arrive at the exposure. I short cut it by using the exposure time from the negative already set up using that exposure time as a starting point.
Fortunately the developer was fresh in that it had only half a dozen prints through it. To allow for the sluggish latency I would develop the print for two minutes. Twice normal for RC papers to give it a chance to produce tones.
Before we go any further we need to look at the negative I was using. It had been exposed to Foma 311 RC paper. It took 27 seconds at grade 3 with the lens set to F5.6. This would be the starting point then with one change the enlarger had to have the filter setting changed for multigrade 4.
After a little bit of contortionist cutting, the paper was in two bits of equal size well almost and the easel adjusted to allow for the new size, the paper was exposed.
Surprisingly when I remove the paper from the processor after 2 mins there was a soft image, emboldened I increased the exposure to 30 secs. A slight increase but not enough. Time to get radical and doubled the light by opening the enlarging lens to F4.
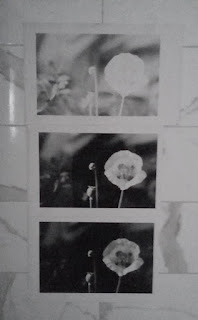
The print was darker again but not enough to get a good black, so I opened the lens to f 2.8 at 30 secs. Effectively four time the light from when I started. When the print came off of the processor this time it was nearly perfect. I did another print adding 15 sec burn to the highlighted poppy. Done.
I did consider pre-flashing the paper this is where you add light to the point just before recording a tone to overcome the latency. I explain how it is done in a previous article link at the bottom of the page. You will properly have to make time changes from part seconds to seconds in the case of old papers. A case of testing to see what works to get the right result. There is also double grade printing a link at the bottom of the page explains this method as well.
A note of caution what works well for one pack of paper may not for another keeping your grey matter on its toes. It will be the case that no matter what is done you will not get the result you are looking for it is at that point a decision needs to be made to bin it.
I am pleased that I had a go with this paper. It has introduced me to a new format size for 35mm printing. I feel it is more pleasurable to look at with that bit of extra width. A sort of shortened panoramic feel.

When the same image is compared with the Foma 311 version it has a slight warmth to it which could be down to its age, if anything this adds to it. Making the Foma composition a little clinical looking. It is a unintended consequence of mixing different papers and throws up a question about creative choice. Which I'm go to leave you with to ponder.
All the photographs were reproduced using a phone camera and edited in Photoshop.
The first four pictures were made using Ilford multigrade 4 pearl RC.
The fifth is on Foma 311 gloss RC.
Links


