Pages

Showing posts with label comparison. Show all posts

Saturday, 14 November 2015

RO9 and the lens less camera.

All the photo's side by side
Over the last few months it looks like I have gone RO9s mad. I have! it is the new toy in my developing arsenal. I'm enjoying the quality of the negatives and not having to make up developer every time I want to process a film. It is still new enough for me to think I have forgotten to do something as I pour the liquid in the developing tank. With all this effort being spent on this developer it has made me think about its brother RO9 and it's attributes in connection with pinhole photography.

Image from PMK Pyro developed negative printed
on Ilford multi grade RC gloss.
Let me explain: RO9 is described as having a number of qualities, the main one here being, high acutance producing a very sharp looking image - a bit like sharpening a digital file in Photoshop. The idea that this developer may do this to the processed negatives has been a splinter in my mind for sometime, that I have been compelled to dust off my Zero pinhole camera to find out if it does make a difference.
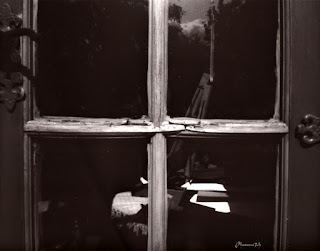


Image from RO9 developed negative.
Printed on Kentmere RC gloss
I always feel very relaxed after I have spent time making images with this camera, I should use it more often. Anyway I loaded it with Fomapan 100 set to a 6x6 negative size.

 With the twelve images made it was into the darkroom to process the film. It was developed in the RO9 for thirteen minutes. The density of the negatives was as expected. With the new crisp looking negatives hanging up to dry what should I compare them with? After searching back in my archive of negatives it looks like the only other developer I have used when making images with the Zero is PMK Pyro. This developer is not known for it's sharpness but at least I did not follow the method through by using an afterbath. Which can add a further softening of the image by adding tone.

Zero pinhole set to 6x6 120 negative size

My comparison was never going to be very scientific. It was always going to be a case of would I be able to see a difference with the naked eye. You may feel that the comparison is unfair and to a certain extent you are right. To counter this I will compare the RO9 negatives with those produced with a lensed camera. If the RO9 is a sharpening developer it should be noticeable.


Image made using a camera lens.
35 mm Agfa APX 100 developed ID11

When looking down the focus finder at the different developed negatives the difference in grain structure jumps out at you. The PMK Pyro neg's are so smooth it is difficult to bring the the grain into sharp focus. Where as the RO9 grain looks like boulders. So does this defined structure indicate that the negatives will be sharper?

I enlarged the negatives to fill the 9 x 12 Kentmere RC gloss paper, instead of the smaller 6X6 square format of the negative. I wanted to see if the grain would be more exaggerated by doing this. To my surprise they lack the graininess I was expecting. In fact they are very smooth and defined.

RO9 developed negative printed
on Kentmere RC gloss
Conclusion:

With all the photographs laid out side by side is there a visual difference in sharpness? The straight answer is Yes but not enough to say if you want sharper lens-less images use Ro9. When you compare the PMK negatives with the RO9 ones there is slightly better definition to the edges of the subject giving you the sense that the pictures are sharper. It does not take away that distinct soft focus you get with pinhole cameras. If you then put a lensed print beside the RO9 developed picture you can see that it is very soft in the pinhole tradition. It shows that when using RO9 there is a sharpened quality to the photographs.


PMK Pyro developed image printed on Fomaspeed
Variant 131


Wednesday, 1 July 2015

Fomatol PW paper developer.

Fomatol PW paper developer.
This small pack of paper developer has been sitting on the shelf patiently waiting for me to use it. I'm told it will produce some very rich brown looking prints. I think the time has come to try it.


The information on the packet:

    
Same size different amounts.
The developer is a slow working Hydroquinone that will produce warmtone images that verge on brown when used with Fomatone papers. This varies depending on manufacturer. You can get a bit more information about the developer 
from the Foma web site.


Mixing instruction: Dissolve big bag first in approx 750 ml of water at 20 c with continuous agitation. Then add small bag while continuing the agitation.
This makes no sense as both bags are the same size!!?

Figure 1
Ilford multigrade RC paper, developed in Multigrade.
Development: 2-3 minutes at 20 C depending on dilution. The more dilute the developer the stronger the image tone will be. The developing time is dependent on how many more parts of water you add to the stock solution. I.E Stock 2-3 mins, 1+1 4 to 6 mins, 1+3 8 to 12 mins. To keep the results consistent the developer should not be stored for the longer term.


Capacity:
 
 One litre of developer should develop 2- 3 sq meters of photographic paper. This translates to approx 210 sheets of 8 x 10. The number of pictures produced is dependent on the types and makes of paper used e.g. resin coated and or fibre base.

This little pack of powders makes up a stock/working solution of a litre. Which will mean for larger sheets of paper you may need to use two packs or dilute 1+1, this will extend the developing time and increase the tone of the final image.

Figure 2 Ilford multigrade RC paper,
 Developed  in Fomatol PW

The only bit of controversy with this developer is to determine which is the smaller of the two same size packs. If you lay the packs side by side it is easy to see which of the packets in fuller than the other or to be absolutely sure use a scales then there are no doubts. They could quite easily mark them A and B.

Making the developer up is straight forward:

Fill a mixing jug up with 750 mls of water at 20 degrees C. while mixing in the larger of the two packets make sure you constantly stir it. As you mix it in it will have quite a gritty feel to it turning the water white, this is normal. It will start to go clear as you stir in the the smaller pack. The gritty feel to developer will start to disappear as well. Once both the powders are mixed together add a further 250 ml of water making it up to a litre. Keep agitating the water until all the powder has dissolved. You should now be left with a clear slightly tan tinted liquid. This is classed as the stock solution and is ready to use as it is. You can if you wish dilute it 1+1 or 1+3 for greater colour.

Large pack of powder
added first.

I'm going to compare Fomatone PW against a semi fresh Ilford multigrade developer already in the slot processor. I am curious to see how much tone, different makes and types of photographic papers would show at stock strength. I poured the developer into a tray ready to use.

 I set the enlarger to grade 3 and the lens to F8 after exposing two sets of test strips the base exposure was set to twenty two seconds with a further forty seconds of burning in. I should have chosen a more straight forward negative for this comparison.


Figure 3 Adox MCC FB paper developed in
Fomatol PW for 5 Minutes
The first paper into the soup was Ilfords multigrade RC gloss into the slot process ( Fig 1) for comparison. Figure 2 went into the tray of Fomatone PW. Would the developer tone this paper? Resin coated papers can be difficult to tone.

Fomatone PW is billed as a slow working toning developer and at stock strength it was suggested that the image would take two to three minutes to reach full exposure. The Ilford paper was near enough spot on to the second of three minutes and has a warmth to it. Don't forget that RC papers tend to reach full development far quicker than it's FB brother.

Figure 4  Adox MCC FB paper developed in
Fomatol PW for 12 Minutes.
So I upped the stakes with Adox MCC FB paper this would really test how long the image would take to appear. Figure 3 shows what happened when I took the paper out after 5 minutes. I should point out that MCC is not a warm tone paper and yet here it exhibits a light chocolate brown colour.

I changed tactics for figure 4 it is the same paper as 3. FB paper can be manipulated far more than RC papers. So for this print I doubled the exposure time by adjusting the aperture to 5.6. I could shorten the developing time by pulling the paper out early. It should mean that the blacks in the image appearing more quickly. As it turned out it took twelve minutes for the image to be fully produced. If I had not increased the exposure I suspect that it may have taken a further twelve minutes to reach the same point of development. Of all the pictures made this is my favorite as it comes closest to what I had in mind. So far PW has demonstrated it is a very slow developer and a test of how long I can stand still rocking the developing tray. It is a shame that my darkroom is not big enough to allow a chair. How slow the developer can be I'm about to find out.

Figure 5
   Fomatone MG classic matt - Chamois 542 11 
Developed in Fomatol PW for 20 minutes 
Being this is warm tone developer I am about to see how it enhances a warm coloured paper. I chose Fomatone MG classic matt - Chamois 542-11. The papers base colour is cream to start with so what would a warm tone developer do.? Twenty minutes later - yes you read that right! - it is still under developed for my taste, all though it is richly toned. (Fig 5) Even with the red light on the colour was striking. 


Figure 6 is the same paper developed in multigrade to show how much tone the Foma PW has added. I must admit I prefer it in it's natural state.

Figure 6.
 Things to note:

  • When mixing the developer up it will turn the water white.
  • It does not matter that the pack is out of date. In this case by four years! Powder chemicals have good keeping qualities.
  • It will significantly stain the tray you use.
  • It is a very slow working developer and will require patience.
  • I would suggest purchasing two packs at a time.

I like the tone that the Fomatone PW has produced and think it gives the paper a more contemporary warmth.


The developer will clear when
the smaller of the two
packets are added.
Figure 6 with 5 over laid to show tonal difference


Since writing this article Foma has discontinued its classic matt Chamois 542-11 which is a shame. The closes paper to it is Ilfords Art 300 it is slightly more tinted look.  


Wednesday, 4 June 2014

Four film how well did they develop.

Film development.

It has taken quite a time to reach this point. There have been numerous interruptions, not all of them good, but the results are in and there are some surprises.

The different makes side by side
All the films are 120 format and 6x6 negative size. They were exposed at box speed and developed in the same way with the same thirty month old batch of stock ID11. When I checked the date I was Shocked. It did explain the slightly wheat looking tone to the developer. To be honest I did not give a second thought as to whether it would work or not. The developer was diluted 1+1 and used only once at a temp 20c, No pre-soak was used. All inverted for the first thirty seconds this is equal to twelve inversions and then four inversions every minute this is equal to ten seconds. Then stopped, fixed and washed as normal.

FP4+ negs

I chose to develop the FP4+ first. This is the film all the others are going to be judged against, so there was no pressure to get the development spot on. The suggested time by the manufacturers is eleven minutes, but I find my negatives tend to be a bit thin so process for fourteen minutes. While the negatives were drying I looked over them to see how well they had turned out. I was surprised to find they are some of the best negatives I have produced. Let's hope I can keep this standard up for the rest.


Rollie 400s negs
The next film to be loaded into the developing tank was the Rollei 400s. This did not have a very auspicious start after loading the film into the back of the camera. I had mistaken the noise it was making for the film coming off the spool. I am so used to the sound FP4+makes when being wound on. I checked to see if it was OK in a blacked out darkroom and it was. This lead to four frames being lost. The suggested development time for this film in ID11 is eleven minutes. I must say I had my doubts but developed it for the said time anyway. Need I say they look thin; will have see how well they print!


Fomapan 100 negs
The five litre can of ID11 is getting very close to being used up and the developer is getting darker in colour each time I use it, could be a close run thing as to whether there is enough to do two more films. Next into the soup was the Fomapan classic exposed at 100 ISO. The suggested development time for this speed is eight to ten minutes. This is another film I have no previous knowledge of, so which is it 8,9 or 10 minutes?. With the thin looking Rollei negs at the front of my mind I've chosen ten minutes I feel it may produce better results and it did. My calculated gamble paid off this time. Producing the density of negative I like and very close to the FP4+ results.

Adox chs negs
The last one to meet the spiral was the Adox CHS exposed at 100 ISO. The suggested time for ID11 at this speed is 7.5 minutes. I took no notice of this time at all. Boyd by the results of the Fomapan I pushed the time to ten minutes. Where did this time come from? The previous results indicated that a longer development time would produce denser negatives so I decided to do the same for this. Was I right? NO! I should have gone longer. These are the thinnest negatives of the lot. Again, will have to see how they print.

Experience and knowledge has played it's part in the development of the Fomapan, 400s and Adox but even so the later two's results are 'off' by my standard. The times suggested for developing the films are from a trusted source. So I am a little disappointed that they did not turn out better than they did. Having said that it maybe the developer losing its potency as I start to scrape the bottom of the bottle. It is, to a certain extent, a gamble when using old material, combined with ones I have not used before. All is not lost, it just means that the thinner negatives will be a bit more of a challenge to print properly.

How are they going to print?


Finally the Id11 ran out before I had a chance to do another roll of the 400s. If I had, I would have extended the time by three minutes. With the Adox I would have increased the time by five minutes.

Monday, 26 May 2014

Four Film

The Plan.


This is the first time I have four different manufactures of black and white film in 120 format in stock. To mark the occasion I'm going to compare them to see if there is a noticeable difference between them. This comparison is not about which is the best film to use but to do with creativity and what each emulsion may bring to the party. Choosing a film in the first place is very subjective, you can ask as many questions as you like and look at loads of pictures that are the product of it's exposure but you will not truly know how it looks until you use it for yourself. FP4 was the first roll of film I chose to use and has remained my favorite ever since. At the time it was a close run thing with Kodak's offerings.


The protagonists are, of course Ilfords FP4+, Fomapan classic 100, Adox CHS 100 and Rollei retro 400s.


FP4+ has been the main stay of my median format work and therefore I know how to get the best out of it. The Rollei 400s and Fomapan classic are the two out of the four that are unknown quantities when it come to exposure and development. So to a certain extent the results will also have a first impressions flavour. Not always the best way to judge a product. I have used the Adox before in 35 mm format so I have an idea what to expect and in that case was not favourable but I will not let that taint the use of its bigger brother. I am also aware when loading Adox film it needs subdued lighting as it fogs easily in bright conditions. The Fomapan classic when processed with certain combinations of fix and developer can be susceptible to pinholes appearing in the emulsion but then I have had this with FP4+ in the past.


All the pictures will be made on a Bronica SQAi. I will not be replicating the same twelve views across all the films. I prefer to make pictures when the opportunity arises. They will all be exposed at box speed and developed in ID11 and processed as normal, then printed on an RC paper that will be chosen at the time of printing. I decided to keep things simple and use materials that I have a good understanding of, making it easier to tell how well the two unknown films have been exposed and developed.

All we need now are the exposed and developed film. The links below will take you to the follow up posts.


The links below are the follow ups to this post.
The developed film

The prints


Friday, 1 November 2013

PMK Pyro negative comparison.

Fg 1
Over the past several weeks I have been tidying up and cleaning out the darkroom making it ready for the winter season.  I don't know about the rest of you but I end up with a number of storage leaves full of negatives hanging around from previous printing sessions. While sorting them into order I noticed that a number of them were marked PMK Pyro afterbath. Wait a minute, these negs look more tanned than when I first processed them!. I did mention in another post that on first comparison the differences were slight and therefore not worth doing. On comparing the negatives now, the afterbath tinting stands out. ( see Fg1) Which would suggest that the developer continues to oxidise over time to some degree.

After giving this some thought I wondered if there would be any differences in how they printed, the only way to find out would be a practical comparison. I didn't think it would be enough to judge PMK against its self so I introduced a set of ID11 processed negatives to the equation. Both developers produce a fine grain just how fine I was not sure.

Materials for the comparison.

ID11 negative.
All the negatives are FP4 + 120 format and 6x6 in size. (the 6 x 4.5 negatives in Fg 1 were substituted for another set) Surprisingly they were all developed for 14 minutes in their respective developers. The afterbath neg's were exposed using a Zero Pinhole camera and to be honest is the only time I have used the afterbath. All the negatives are printed on Ilford Multigrade RC gloss  and processed in Ilford MG developer using the split grade printing method.


In the darkroom.

The first thing I noticed was the difference in the clarity of the grain in the focus finder. The ID11 negatives were easy to focus, they had a defined grain pattern. The next neg I looked at was the PMK without afterbath these had a smoother looking grain pattern making it a little difficult to focus. The afterbath negatives had an even finer grain pattern, taking longer again to bring into sharp focus.

PMK Pyro negative without afterbath
The printing of each negative was straight forward. Once the pictures were completely dry I placed the three of them together in front of the window on a bight day to study them.  The first thing I noticed was that the PMK negative prints looked warmer than the ID11 print; had a cooler more black and white look. I find that Ilford papers tend to have a warmer feel in comparison to the Foma papers I use. Next I noticed that the ID11 print looked crisper, sharper perhaps than the others this maybe be because the contrast was more defined or as other people have suggested that PMK negatives are softer due to the staining affect this developer has. One thing is for sure the afterbath neg is softer contrast wise, this was noticeable when it was being printed; as a rule of thumb I have found when setting the contrast part of the split grade method the timing is about half the time needed for the toned section. In this case it needed more and still looks soft. 

Conclusions.

PMK Pyro negative with afterbath
It would be unfair to conclude that the afterbath negatives were less sharp as they were taken with a lens-less camera and softer to start with. But when considering the other PMK Pyro negative I can say that it appears to be softer in sharpness when compared to the ID11 picture. With that in mind you could conclude by association that they would have been softer again. Therefore adding credence to those claims that PMK Pyro used with afterbath are less sharp but more subtly toned. When compared in isolation you would be hard pressed to notice a difference at all.


I believe that it is down to individual tastes when it comes to sharpness and if it was not for this comparison I would be none the wiser as far as my eyes are concerned. And that is all that counts.