Pages

Showing posts with label test. Show all posts

Saturday 14 November 2015

RO9 and the lens less camera.

All the photo's side by side
Over the last few months it looks like I have gone RO9s mad. I have! it is the new toy in my developing arsenal. I'm enjoying the quality of the negatives and not having to make up developer every time I want to process a film. It is still new enough for me to think I have forgotten to do something as I pour the liquid in the developing tank. With all this effort being spent on this developer it has made me think about its brother RO9 and it's attributes in connection with pinhole photography.

Image from PMK Pyro developed negative printed
on Ilford multi grade RC gloss.
Let me explain: RO9 is described as having a number of qualities, the main one here being, high acutance producing a very sharp looking image - a bit like sharpening a digital file in Photoshop. The idea that this developer may do this to the processed negatives has been a splinter in my mind for sometime, that I have been compelled to dust off my Zero pinhole camera to find out if it does make a difference.


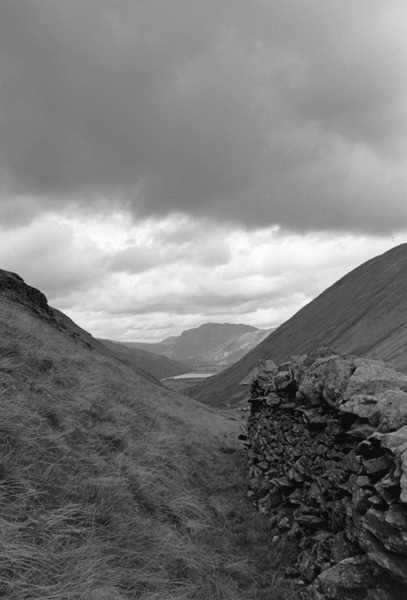
Image from RO9 developed negative.
Printed on Kentmere RC gloss
I always feel very relaxed after I have spent time making images with this camera, I should use it more often. Anyway I loaded it with Fomapan 100 set to a 6x6 negative size.

 With the twelve images made it was into the darkroom to process the film. It was developed in the RO9 for thirteen minutes. The density of the negatives was as expected. With the new crisp looking negatives hanging up to dry what should I compare them with? After searching back in my archive of negatives it looks like the only other developer I have used when making images with the Zero is PMK Pyro. This developer is not known for it's sharpness but at least I did not follow the method through by using an afterbath. Which can add a further softening of the image by adding tone.

Zero pinhole set to 6x6 120 negative size

My comparison was never going to be very scientific. It was always going to be a case of would I be able to see a difference with the naked eye. You may feel that the comparison is unfair and to a certain extent you are right. To counter this I will compare the RO9 negatives with those produced with a lensed camera. If the RO9 is a sharpening developer it should be noticeable.


Image made using a camera lens.
35 mm Agfa APX 100 developed ID11

When looking down the focus finder at the different developed negatives the difference in grain structure jumps out at you. The PMK Pyro neg's are so smooth it is difficult to bring the the grain into sharp focus. Where as the RO9 grain looks like boulders. So does this defined structure indicate that the negatives will be sharper?

I enlarged the negatives to fill the 9 x 12 Kentmere RC gloss paper, instead of the smaller 6X6 square format of the negative. I wanted to see if the grain would be more exaggerated by doing this. To my surprise they lack the graininess I was expecting. In fact they are very smooth and defined.

RO9 developed negative printed
on Kentmere RC gloss
Conclusion:

With all the photographs laid out side by side is there a visual difference in sharpness? The straight answer is Yes but not enough to say if you want sharper lens-less images use Ro9. When you compare the PMK negatives with the RO9 ones there is slightly better definition to the edges of the subject giving you the sense that the pictures are sharper. It does not take away that distinct soft focus you get with pinhole cameras. If you then put a lensed print beside the RO9 developed picture you can see that it is very soft in the pinhole tradition. It shows that when using RO9 there is a sharpened quality to the photographs.


PMK Pyro developed image printed on Fomaspeed
Variant 131


Sunday 30 September 2012

Alternative way to check your fix is still fresh.


Here are two simple and easy ways of checking that the fix is not exhausted. The bottom line is if in doubt, throw it out.

  1. Take a drop of fix and place it on some blue litmus paper, if it turns red the fix is still active, if the paper remains blue it is exhausted. Rapid acting fixes by their nature will get exhausted more quickly than an ordinary one. When fixing paper you may expect to get thirty to forty 18 x 24 cm ( 8”x 10”) sheets per litre.
  2. Take ten ml of fix and add ten drops of potassium iodide solution to the measuring jar and stir. If the milky solution does not clear after it has been shaken then the fix is exhausted and a new batch should be made up. If it clears the fix is OK to use. Make up your Potassium iodide solution from two point five grams of powder and add a thousand ml of water and mix. This method does not apply to rapid fixes.

These methods will work for your film fixes as well. But the milk test you do for film will not work with paper as you cannot see this stage with paper.

Saturday 30 June 2012

Adox in PMK Pyro results.

Test stips at twenty and ten
Minutes

The results are in! This has turned out to be one of the most exasperating tests to date. There have been problems all along the way from getting the exposures right to developing the film. Having said that there have been some surprises.

As with the Agfa test the film was exposed at box speed ISO 100 in the Nikon F5. This is where the process changes apart from the test method. The PMK Pyro used was one I made from raw material that did not include EDTA disodium in the mix and a reduced amount of Sodium Metaborate in solution B.

Sequence of development:

         Pre-soak - it makes no difference with this film. It is not prone to air bell/bubbles sticking to the film.
         Developer - to be made up immediately before use at 21 degrees C.
         Development times - for this test were 5, 10, and 20 minutes respectively.
         Tank inversions - continuously for the first minute and then once every fifteen seconds.
         Stop, Fix and wash - as normal.
         After bath - was not used and would have made little difference with this mix.
Notes:
Adox CHS 100 PET 35mm is not like other black and white film it has a noticeable thinner film base which is coloured blue. The cassette this film came in was not light tight which almost ruined the test. I only discovered this after the film had been exposed, when removing the film from the cassette it fell to bits. I have read a forum thread saying that the 120 roll film has the same problem. Adox you need to up your game! It is appalling quality control.


Pre-soak water after use
If you use a pre-soak the water will come out blue.


The ten minute development time is the one suggested by Digital truth, which made it the reference time the other test strips were to be judged against.


Results
All the test strips including the one thats a no show.
The test strip to show the best density of negative is the twenty minute one, having said that they are still a bit on the thin side. This does not take away from the fact that they are fully toned and well defined. There is no sign of grain when enlarged to 485 mm (19”) by 340 mm (13.5”). When printing the negatives I'm having to use grade three, normally I would expect to be using grade two, this could be due to the lack of EDTA in the mix of Pyro used. I'm also disappointed that the five minute test strip shows no negatives at all, from previous experience the shorter/half development times have a faint out line. In this case I can only put it down to the faulty film cassette. The ten minute test strip is very thin when compared to the Agfa test strips it is thinner than the half development time. Which suggests that normal development in this case should be greater than twenty minutes.

Over sized enlargment


With all the time and effort put into this test the last thing I was expecting was to be let down by bad manufacture. Of the thirty six exposures on the film around about  ten frames are unaffected by some light damage luckily the majority of these are from the test exposures that put in an appearance. If there was going to be any question marks I was thinking it would be from the developer but it did not disappoint, the only thing to note was when i poured it from the developing tank it was a lovely pink rose colour.

Will I be using the film again? Yes! only because I have a roll of 120 on the shelf if the negatives show any light damage then I will not use it again. How can I say that when I use a lot of out of date film? With out of date film at least you know that the results could be iffy. You don't expect it from new in date stock.
Used PMK Pyro.

Monday 4 June 2012

Adox art series to be developed in PMK pyro.


Adox art series CHS 100. ISO 100


It has been a long time since I mentioned that I was going to do a test development using PMK Pyro on Adox  CHS 100 art series. What with the weather being unseasonally wet and other things getting in the way I have not been able to do the test exposures. I prefer to take the pictures outside on a bright day without fast moving clouds. Something that has not been forthcoming. The light level needs to be constant for the eighteen frames it takes to produce three test strips of two F numbers over and two F numbers under the metered reading. 


I'm pleased to say that the other day, weather and time to expose the film coincided which has resulted in a film waiting to be developed. Something that requires a spare four hours to do whether all in one go or over several days. See Agfa test formethod.

Thursday 19 January 2012

Evaluating your print test strip.


low contrast
High contrast
correct contrast
Now that you have your test strip what are you looking for? You are looking to see which of the timed sections gives you blacks that are really black without making the whites look grey, with a good separation of the greys in-between. If the picture looks grey overall with no defined blacks then the paper grade is too soft, meaning lack of contrast. On the other hand if the blacks dominate the picture then the grade of paper is to hard - too much contrast! If you need to change the grade of paper you will need to make another test strip. It should be noted that test strip evaluation is best carried out when they are dry as wet ones tend to hold back some of the more subtle grey tones which may encourage you to pull or push the expose time needed. While checking this you should also be ensuring that the focus is accurate.

When your test strip is pin sharp with good clear highlights, defined shadows and the right amount of contrast, you are ready to make a print.

Wednesday 4 January 2012

Test strips before printing.


The test strip is the foundation to obtaining a good final print. Unless you have one of RH designs excellent Analsyser Pro enlarging meters. If not the most common way of producing a test strip is with a sheet of card moved at timed intervals across light-sensitive paper. There are several things you need to set before doing the test: the size of the print, the aperture of the enlarging lens and making sure you have sharp focus.

10 x 8 test strip.
Once all this is done how big should the test print be? This is down to personal choice but you should consider whether the use of whole sheet, half, third or strips give the best test results. If using a test strip of about two inches (50 mm) you need to make sure that each segment includes a full range of tones from the lightest to darkest so you can see at which timed interval gives the best high values and shadow areas. It is much easier to achieve this with the larger test strip.

What should the time separation be? A good starting point for prints around the ten by eight size is five seconds. These intervals will give you a rough idea of what the exposure should be. This can be refined with further test strips of two and/or one second if needed.

On what grade of paper should you make the test print? Grade one is standard practice. If the method you use places your negatives at a particular grade In my case it is grade three then you should do your test print at that grade unless you are using the split grade method.

Related posts:

Evaluating your test strips

Sunday 25 December 2011

Test results for Agfa APX 100.


When taking pictures for the test it is best to choose a subject that is evenly lit. This will make the light reading more representative of the whole picture area. Unlike a high contrast view with deep shadows and strong highlights forcing you to take several light readings to find the average setting. It also makes it easer to evaluate the negatives once processed.
The processing of the film went well having spent all morning shuffling developing tanks, measuring jugs and developer bottles, the three strips of film have all been consistently processed. I am very pleased with the density of the negatives, when dry I will do a contact sheet so I can judge how well they will print.

You can see from the picture above, that the 13 minutes development time that digital truths massive dev chart suggests, is spot on. The results also show that you really do need to make a total and utter mess of things before you get a negative that will not print.
The light meter read negative at the centre
of the test strip.
There is a general guide to check whether a film has been correctly exposed and developed it should produce a continuously toned negative. The subjects deepest shadow should be perceptibly heavier than the clear of the film base. The areas that represent the brightest important detail in the negative must not be so dark that you can not read the printed words of a book through them on a sunny day as shown right. Its a quick way of checking to see if your negatives have been correctly developed.


The picture below shows the prints produced by the light meter read negatives in the centre of each of the test strips.

The difference between the top and centre is one and a half stops. bottom and centre is three-quarters of a stop. It is obvious that the longer you develop the less return you get for the time spent. Meaning that you will only get a slight improvement in the quality of your negatives for each minute of extra process time you give them over thirteen minutes.
These tests represent my own personal experiences I strongly encourage each individual to check this film out for themselves. The experiments I have carried out are not exhaustive and should only be used as a starting point.


Related posts:

Sorting out the test strips

Wednesday 21 December 2011

Agfa APX sorting out the test strips for development..


With the test film exposed it's finding the time to process the strips. I have enough equipment that allows me to develop them one after the other. I will need at least a morning for cutting the film into lengths, setting out the chemicals and kit, develop,stop, fix and wash. Not forgetting that PMK Pyro developer can only be mixed in each case just before use.
The film was inserted into a Nikon F5 with automatic load which is a bit of a pain. If it was manual loading you would be able to mark the film before you shut the back and wind on to the first frame. I know from experience that the F5 has about 150 mm (6") lead before the first frame which would be an extra two shot if it was manually loaded making Agfa's APX a forty picture film. Each test strip is five frames long with two blanks to allow for error when cutting it to lengths of 235 mm (9").
This is the first time I have had to use my new darkroom in full black-out as I usually use a changing bag to load film into the process tank. I'm pleased to say there were no light leaks. So I could see where to cut the film in the dark I laid a rule on the work top with two bits of tape attached to it at 150 mm and 235 mm respectively. All I needed to do was pull the film from the cassette and cut to length at the tape marks. It surprised me how well this method worked. The remaining exposed film I wound back into the film holder to be processed later when I know the development time is right.
My working method for producing the test negatives:
  • Add Part A of the developer mix to 250 mls of filtered water (tap water will do) and wait till the temperature reads 21 degrees C.
  • Pre-soak for 1 minute. I have found that PMK Pyro developer is prone to air bells/bubbles forming on the film that are not always dislodged by taping the tank on the work top.
  • Add part B of the developer and make up to 300 mls in doing this it will bring the temperature down to its working level of 20 C. stir and pour into the processing tank.
  • Invert continuously for the first minute and tap tank on work top at the end.
  • Invert once ever 15 seconds. For 6.5 minutes.
  • Stop, fix and wash as normal.
  • Repeat the above twice more with developing times of 26 and 13 minutes respectively.
If all goes well you will get a set of beautifully toned negatives.


Related posts:

Test results

Tuesday 20 December 2011

Darkroom fog!? Safe light.


No I'm not talking about the weather but about the lighting in your darkroom. Is it safe? Is it the right colour? Is it to close to the enlarger or developing dishes? How do you find out?

There is a simple test, you will need to cut some photographic paper into about 6x6 (150 x150mm) and lay them flat in various places with the lights off around the darkroom with a small object like a coin on the top. Don't forget to mark each piece with the location you have placed it in. Switch on the safe light(s) and leave them for five minutes.

Then develop all the pieces as you would normally, if they all come out blank then there is not a problem. However if you can see the image of the object/coin on any of them you know that the light is too strong in that place and will fog any paper you leave out. You could move the light further away. Now if all the bits of paper show signs of an image it means that the safe light is the wrong colour and will need to be changed or your darkroom is not light tight.

Friday 9 December 2011

Checking development times?


How do you know that the negatives you are looking at are correctly developed and not under or over exposed. The only way to be sure is to do a test. What follows is a method to help you achieve this:
   Choose a subject like a view or still life to take a series of photographs.
   First you will need to determine what the correct exposure should be.
   Then set the camera settings to two stops under and take the picture.
   Follow this by setting it to one stop under and take another picture.
   Now enter the correct exposure settings and press the shutter.
   Next, one stop over and two stops over respectively.
   Once you have done this wind the film on two frames and repeat the procedure, once done do the same again with a two frame separation so you now have three test strips.
Once back in the darkroom cut the film into three strips. Give the first section of film half the recommended development time the second set twice the time and the third group the suggested process time. Then compare the combined results of exposure and development and you will be able to clearly see which was developed correctly. It's worth the cost of a film to know that your films have been correctly developed.