Pages

Showing posts with label developed. Show all posts

Saturday, 14 November 2015

RO9 and the lens less camera.

All the photo's side by side
Over the last few months it looks like I have gone RO9s mad. I have! it is the new toy in my developing arsenal. I'm enjoying the quality of the negatives and not having to make up developer every time I want to process a film. It is still new enough for me to think I have forgotten to do something as I pour the liquid in the developing tank. With all this effort being spent on this developer it has made me think about its brother RO9 and it's attributes in connection with pinhole photography.

Image from PMK Pyro developed negative printed
on Ilford multi grade RC gloss.
Let me explain: RO9 is described as having a number of qualities, the main one here being, high acutance producing a very sharp looking image - a bit like sharpening a digital file in Photoshop. The idea that this developer may do this to the processed negatives has been a splinter in my mind for sometime, that I have been compelled to dust off my Zero pinhole camera to find out if it does make a difference.
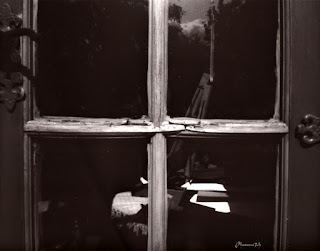


Image from RO9 developed negative.
Printed on Kentmere RC gloss
I always feel very relaxed after I have spent time making images with this camera, I should use it more often. Anyway I loaded it with Fomapan 100 set to a 6x6 negative size.

 With the twelve images made it was into the darkroom to process the film. It was developed in the RO9 for thirteen minutes. The density of the negatives was as expected. With the new crisp looking negatives hanging up to dry what should I compare them with? After searching back in my archive of negatives it looks like the only other developer I have used when making images with the Zero is PMK Pyro. This developer is not known for it's sharpness but at least I did not follow the method through by using an afterbath. Which can add a further softening of the image by adding tone.

Zero pinhole set to 6x6 120 negative size

My comparison was never going to be very scientific. It was always going to be a case of would I be able to see a difference with the naked eye. You may feel that the comparison is unfair and to a certain extent you are right. To counter this I will compare the RO9 negatives with those produced with a lensed camera. If the RO9 is a sharpening developer it should be noticeable.


Image made using a camera lens.
35 mm Agfa APX 100 developed ID11

When looking down the focus finder at the different developed negatives the difference in grain structure jumps out at you. The PMK Pyro neg's are so smooth it is difficult to bring the the grain into sharp focus. Where as the RO9 grain looks like boulders. So does this defined structure indicate that the negatives will be sharper?

I enlarged the negatives to fill the 9 x 12 Kentmere RC gloss paper, instead of the smaller 6X6 square format of the negative. I wanted to see if the grain would be more exaggerated by doing this. To my surprise they lack the graininess I was expecting. In fact they are very smooth and defined.

RO9 developed negative printed
on Kentmere RC gloss
Conclusion:

With all the photographs laid out side by side is there a visual difference in sharpness? The straight answer is Yes but not enough to say if you want sharper lens-less images use Ro9. When you compare the PMK negatives with the RO9 ones there is slightly better definition to the edges of the subject giving you the sense that the pictures are sharper. It does not take away that distinct soft focus you get with pinhole cameras. If you then put a lensed print beside the RO9 developed picture you can see that it is very soft in the pinhole tradition. It shows that when using RO9 there is a sharpened quality to the photographs.


PMK Pyro developed image printed on Fomaspeed
Variant 131


Tuesday, 30 October 2012

Mistaken identity Agfa APX developed in ID11


Agfa APX negatives developed in Ilford ID11
This is not the post I was expecting to write. I recently made up five litres of ID11 so I could develop a roll of out date HP5+. An extravagance you may think but really it was the catalyst for me to bring back an old friend into regular use. 


The other day I processed a roll of 35mm monochrome film but there was something wrong with the results. For starters the negatives looked wrong they didn't have the round look you get with a fisheye lens.  I could not get my head round how the fisheye two from lomography could change the look and shape of the negatives so completely. I'm going mad! a senior moment! brain in neutral! I need help! Up to this point I had been completely convinced that it was the roll of HP5. Then I noticed a black film canister on my desk, opened it and found a reel of HP5!! What the ...! what was developed then?? It turned out to be a roll of Agfa APX 100, that I had forgotten all about and mistakenly processed as HP5. Now this is a first for me, get it wrong and land on your feet! this has got to be one of the jammiest balls up ever!


Now I'm over the shock, I do not know why I should be surprised that they are a good set of negatives. Film emulsion has a large latitude of forgiveness before it looses its temper.  I checked what the timing should have been for Agfa APX and believe it or not my notes say that APX in ID11 at ISO 100 should be developed for thirteen and a half minutes at 20C. I had decided to process the out of date HP5 to fourteen mins.
Agfa APX  Film ISO 100
Developed in ID11 for 14 mins
Printed on silverproof matt
Developed in Moersch 6 blue tone.


So this has turned into a post about Agfa APX 100 developed in Ilfords ID11 results!


The method used:

         I did not use a pre-soak. 

         Develop for 14 minutes instead of 13.5. It would not have made much difference to the quality of the negatives.

         Invert for the first thirty seconds and then for ten seconds every minute (which is about four inversions)

         stop, fix and wash as usual.

The main test of a good negative is when it is printed. Showing you how much detail there is to be coaxed out of the high lights and shadows by dodging (holding back) and burning in (extra exposure) to arrive at that stunning final picture. 

  
For a film I had mistaken for another make, the results are excellent, I have no complaints!... except one; check what's written on the film canister first!

Friday, 9 December 2011

Checking development times?


How do you know that the negatives you are looking at are correctly developed and not under or over exposed. The only way to be sure is to do a test. What follows is a method to help you achieve this:
   Choose a subject like a view or still life to take a series of photographs.
   First you will need to determine what the correct exposure should be.
   Then set the camera settings to two stops under and take the picture.
   Follow this by setting it to one stop under and take another picture.
   Now enter the correct exposure settings and press the shutter.
   Next, one stop over and two stops over respectively.
   Once you have done this wind the film on two frames and repeat the procedure, once done do the same again with a two frame separation so you now have three test strips.
Once back in the darkroom cut the film into three strips. Give the first section of film half the recommended development time the second set twice the time and the third group the suggested process time. Then compare the combined results of exposure and development and you will be able to clearly see which was developed correctly. It's worth the cost of a film to know that your films have been correctly developed.