Pages

Showing posts with label print. Show all posts

Wednesday 4 January 2012

Test strips before printing.


The test strip is the foundation to obtaining a good final print. Unless you have one of RH designs excellent Analsyser Pro enlarging meters. If not the most common way of producing a test strip is with a sheet of card moved at timed intervals across light-sensitive paper. There are several things you need to set before doing the test: the size of the print, the aperture of the enlarging lens and making sure you have sharp focus.

10 x 8 test strip.
Once all this is done how big should the test print be? This is down to personal choice but you should consider whether the use of whole sheet, half, third or strips give the best test results. If using a test strip of about two inches (50 mm) you need to make sure that each segment includes a full range of tones from the lightest to darkest so you can see at which timed interval gives the best high values and shadow areas. It is much easier to achieve this with the larger test strip.

What should the time separation be? A good starting point for prints around the ten by eight size is five seconds. These intervals will give you a rough idea of what the exposure should be. This can be refined with further test strips of two and/or one second if needed.

On what grade of paper should you make the test print? Grade one is standard practice. If the method you use places your negatives at a particular grade In my case it is grade three then you should do your test print at that grade unless you are using the split grade method.

Related posts:

Evaluating your test strips

Monday 2 January 2012

Photographys. Bigger again?


To make enlargements over 50 x 60 centimeters requires a different working practice and a large darkroom.

If your negatives allow you to print them at 50 x 60 centimeters this is not the end of the story, you can go bigger with roll sized paper of 65, 100 and even 130 centimeters wide. But to go larger you will need a different method to produce them and a larger negative to start with which will increase the quality of the image projected by the enlarger. Your darkroom will need to be big enough to cope with the increased size of equipment. You will need an area of clear space that the enlarger can project the image onto whether it is the floor or a wall. Of the former the latter is the better way of doing things as you are less likely to get dust on the paper, it also makes it easier to dodge and burn if you need to.

Sunday 1 January 2012

Enlarging the negative. How big?


Depends on how crisp the negative is! If it is razor sharp there is no reason why you cannot enlarge it to its maximum. A thirty-five millimeter negative should be able to produce a 24 x 30 centimeter print with ease and in exceptional cases 50 x 60 cm. To check if the negative is of a good enough quality, enlarge part of the frame to 18 x 24 centimeters, if it looks a bit grainy the chances are that when the whole negative is enlarged to 50 x 60 cm and viewed from a meter away it will look good.

When enlarging to larger sizes you need to take into account the distance that people will see the picture from. Large photos are rarely viewed up close.

Thursday 29 December 2011

Printing. Basic amount of kit.


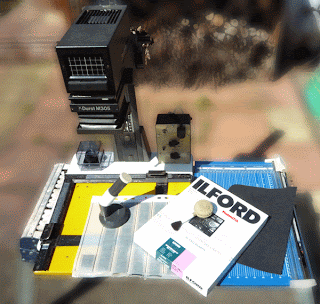
The minimum amount of kit you need to produce a photographic print.

  1. Enlarger with red filter and filter head (colour) or multi grade head. Without filter head separate multi grade filters. Enlarging lens.
  2. Enlarging frame 18 cm x 24 cm (7"x 9") two-blade.
  3. Orange/red safe light and ordinary light.
  4. Four dishes minimum size 18 cm x 24 (7"x 9").
  5. Three pairs of tongs, one each for developer,stop-bath and fix.
  6. Three funnels of different colours or marked dev'. stop and fix.
  7. A measuring jug of a 1000mls.
  8. At least three storage bottles for your chemicals.
  9. Timer with alarm or timer.
  10. Thermometer alcohol type times three but you can get away with one.
  11. Puffer brush.
  12. Multi grade paper.
  13. Paper cutter.
  14. Focusing device.


Tuesday 27 December 2011

Contact printing.


Now that you have your negatives safely stored and indexed, you need to sort out which negatives you are going to print. Trying to judge this by holding them up to the light or by laying them on a light box can be difficult. The best way is to produce a contact print showing all the frames on one sheet of photographic paper.

There are special frames that allow you to do this. You can buy contact print frames which consist of a glass top with film holders attached and a solid base with foam on that clips shut. For 35mm or 6x6 (medium format) which hold seven rows of six for 35mm or four row of three for medium format negatives. The frame holds the negatives so you can see the frame numbers on the print, you place them with the shine side up and put a soft grade light-sensitive paper on the base. Then shut the frame to bring the negatives in contact with the photographic paper, hence contact print.
Another method of contact printing is if you use clear plastic negative holders, you can place these directly onto the photographic paper. The problem with this method is it does not hold the negative completely flat to the paper which means that some of the pictures may be distorted. A way round it is a clean sheet of glass that is big enough to place over the negatives.

Sunday 25 December 2011

Test results for Agfa APX 100.


When taking pictures for the test it is best to choose a subject that is evenly lit. This will make the light reading more representative of the whole picture area. Unlike a high contrast view with deep shadows and strong highlights forcing you to take several light readings to find the average setting. It also makes it easer to evaluate the negatives once processed.
The processing of the film went well having spent all morning shuffling developing tanks, measuring jugs and developer bottles, the three strips of film have all been consistently processed. I am very pleased with the density of the negatives, when dry I will do a contact sheet so I can judge how well they will print.

You can see from the picture above, that the 13 minutes development time that digital truths massive dev chart suggests, is spot on. The results also show that you really do need to make a total and utter mess of things before you get a negative that will not print.
The light meter read negative at the centre
of the test strip.
There is a general guide to check whether a film has been correctly exposed and developed it should produce a continuously toned negative. The subjects deepest shadow should be perceptibly heavier than the clear of the film base. The areas that represent the brightest important detail in the negative must not be so dark that you can not read the printed words of a book through them on a sunny day as shown right. Its a quick way of checking to see if your negatives have been correctly developed.


The picture below shows the prints produced by the light meter read negatives in the centre of each of the test strips.

The difference between the top and centre is one and a half stops. bottom and centre is three-quarters of a stop. It is obvious that the longer you develop the less return you get for the time spent. Meaning that you will only get a slight improvement in the quality of your negatives for each minute of extra process time you give them over thirteen minutes.
These tests represent my own personal experiences I strongly encourage each individual to check this film out for themselves. The experiments I have carried out are not exhaustive and should only be used as a starting point.


Related posts:

Sorting out the test strips

Monday 19 December 2011

Dust in the darkroom.


If you look at a beam of light whether projected from your enlarger's negative carrier or a shaft of light shinning across a room you will notice lots of particals floating in the air. Dust over the course of time will settle on the upper surface's of your enlarger and lens.

It does not take long for a considerable amount of dust to build up on the surface of your lens greatly reducing the brilliance of light passing through it. You should make it a rule that once or twice a year you clean the lens thoughly. It is also a good idea to cover the enlarger at the end of each session with its cover if it has one or a black plastic bag this will greatly reduce the dust build up.

If you have a window in your darkroom that needs to be blacked out it is not a good idea to use curtains as these are dust traps. You are better off using a wooden shutter made of hard board painted matt black or a roller blind made of light tight material that has some way of being sealed along the sides.

What you have on the floor is also important. If it is carpet it needs to be removed, as this is a dust trap too. It should be an easy clean material like lino if you have floor boards or garage floor paint for concrete floors these keep the dust at bay making it easy to mop the floor with water, it also means that you do not have to vacuum very often leaving more time to print.

Tuesday 6 December 2011

The story behind the Winter Picnic Photograph.


It was round about this time last year (November/December 2010) that the UK was in the grip of the worst cold spell for as it turns out a hundred years. The country may have just missed coming to a standstill but it stopped me in my tracks literally, as I couldn't get the truck off the drive. The ice was a solid two inches thick not allowing for any grip!

The snow brought a brand new look to the area that I had not seen before, so I thought I would go out and take some photographs of this fresh, clean new wonderland of soft edges. Armed with my Bronica SQAi 120 format camera loaded with FP4 film I trudged gingerly off into the countryside.

Picnic
I was quite surprised to find there we a lot of people out and about with the same idea, walking the dog, playing and enjoying their enforced day off work. As I strolled further afield the numbers thinned until I was alone enjoying the crisp white land the snow had laid out for me to photograph; so engrossed with the scenes before me I forgot how bitterly cold it was until my throbbing freezing fingers sent SOS messages to my brain and brought me back to reality -“Shhahhhoi!!! Its cold.!” Pulling my gloves on the best I could I made off in a hurry to warm up.

Briskly walking up a path by one of the lakes the path turns a corner at the top where there is a bench and from a distance it looks like someone is sitting there! As I got closer I could see it was two people! -”they must be mad!- and it looks like they are having a picnic!” As I got closer I could see steam from their cups as they ate their mince pies! An idea for this picture was forming as I approach them to ask if they would mind being in the photograph. They did not mind, so I walked back down the track a bit, set up the camera on the mono pod, took a light reading and pressed the shutter. You're right! I only used one frame, no back up or bracketing, the view that came to mind is the one I took. After the shot was taken I walked back and chatted for a while. Apparently they don't let a little bad weather get in the way of them coming to their favourite spot! I wish them the best of the season and moved on. Not so mad after all! I wish I had thought to bring a hot drink with me!

I am pleased to say that Picnic was one of the Pictures chosen for this years Film and darkroom users Year Book. Which can be obtained from Blurb.

FADU year books