Pages

Showing posts with label image. Show all posts

Friday, 4 December 2015

Redeveloping the negative.


You will at some point in your developing career, come across a negative(s) that has so much contrast that no matter what you do, you cannot get a decent print. There is a method you can use to retrieve the situation by redeveloping the negative(s).

To start with you will need to make up a solution of halogenizing bleach as follows:

  • 10 grams of Potassium permanganate.
  • 10 grams of Potassium Bromide.
  • 1 litre of cool water.
  • Stir this until all is dissolved in the water.

This can be carried out in a normally lit area so you can see the change in the negative. It takes about 5-7 minutes for the black silver on the film to be converted to a yellowish precipitate. You can remove the film from the bleach when the strongest high lights have gone a pale grey and wash well in running water. Now place in a soft compensating developer. When the highlights return to a greyish yellow remove the film and place in an acid stop bath for 30 seconds. Then fix, wash and dry as you would normally. This should produce a softer easier negative to print.

It is probably better to use a farmers reducer which subtracts the density from a
processed negative.They come ready mixed, you only add the right amount of water. This process can be repeated as many times as needed to get the right density; it's not a one shot approach. Allowing you to do a test print at each stage. There are three to types:

  • Kodak R-4a is best used for over exposed negatives and is easy to control. Acts on shadows first, then mid-range and then highlights. Mainly used for clearing fog from film and reducing prints.
  • Kodak R-4b is best for over developed negatives; it removes equal amounts of deposited silver from the highlight and shadow areas.
  • Kodak R-15 This is a super reducer, striping the highlights and not the shadows. For seriously over developed negatives and is the most difficult to control.

This is just a basic outline on the subject and will require further reading.
Saturday, 23 June 2012

The Focus finder.


This is a wonderfully simple piece of darkroom equipment. Basicly it is a magnifying glass and mirror. It provides the user with the optimum sharpness for the enlargement by focusing on the grain of the negative. 

Also known as a grain magnifier it rests on the masking frame where it diverts a small amount of light from the projected negative to your eye as you look through the small magnifying lens. With one hand on the focusing control of the enlarger you gently turn the knob until the grain becomes sharp in the mirror. This translates to a sharp image at easel level; to maintain this accuracy a piece of waste photographic paper should be placed in the masking frame with the magnifier on top. It is easiest to focus on the grain with the enlarging lens set at its widest aperture and then re-checked at the working aperture. To make sure that the focus has not changed. 


Some focus finders can only be used in the central area of the projected image. This is because the angle of the light is more severe at the edges and corners. If you wish to check these areas to make sure that the whole negative is in focus you will need a magnifier that allows for this with a wider mirror and tilting aim.

Monday, 2 April 2012

Processed print faults


Exhausted Developer
With all the processes that need to go well when producing a print in the darkroom it is surprising that faults are not more common. Even so the odd  one comes along to de-rail a good printing session. It does not matter how experienced you are sods law trips us all up!


Exhausred stop


Here are some of the most common faults: 


         Chemical fingers - this where odd irregular marks appear on the finished print usually at the edges. Make sure your hands are free from chemical contamination and dry before you handle photographic paper.

         Exhausted developer - fails to produced a full image once it has reached its completion time.
Exhausted Fix

         Wrongly diluted developer - produces faint grainy image. A bit like the above.

         Exhausted stop - leads to a purple tone to the white areas of the print.

         Exhausted fix - the slow brownish toning of the finished print in day light.


Related Posts:

Sunday, 5 February 2012

Mirror -image reversal


This is where the film is placed in the negative carrier with the emulsion side upper most obtaining a left right inversion, a mirror image. Negatives suited to this treatment cannot have any writing in them otherwise it gives the game away.

Which one of these images has been reversed?


Thursday, 26 January 2012

Dodging and burning.


A selection of dodgers 
They are darkroom tools to help bring out all the detail from your negatives when printing. 


Holding back


No matter how well you expose and develop your negatives, when it comes to making a positive you will need to equalize the exposure by holding back and burning in to keep the detail in the highlights and shadow areas. In a lot of cases it is not possible to alter the overall exposure time to take these deficiency's in to account. In these cases dodgers as the name implies will help you get round this problem. You can use your hands, fingers, pieces of card, a length of wire with a cut out of  card stuck to it and cards with holes in them. 
Burnning in
Dodgers work by casting a shadow over the area that needs less exposure than the rest of the picture. Likewise dodgers with holes in them are used for burning in areas that require more light than the rest of the photograph. This is also a type of holding back as it stops the correctly exposed picture from becoming over exposed. When using a dodger you must keep it moving otherwise it will produce a hard outline to the area you are trying to correct. It can be moved from side to side or up and down to stop this happening. The amount of time you use your dodger for will depend on what your test strip shows.  If you have not got a test strip then it will be trial and error taking a number of prints before you get it right. With experience the amount of error will diminish. 
Dodgers are not just for correcting problems, they are there also for creative purposes for example to bring out some extra drama in the scene, add a shaft of light where there was none or to bring two pictures together where one maybe lacking any sky detail.

Thursday, 19 January 2012

Evaluating your print test strip.


low contrast
High contrast
correct contrast
Now that you have your test strip what are you looking for? You are looking to see which of the timed sections gives you blacks that are really black without making the whites look grey, with a good separation of the greys in-between. If the picture looks grey overall with no defined blacks then the paper grade is too soft, meaning lack of contrast. On the other hand if the blacks dominate the picture then the grade of paper is to hard - too much contrast! If you need to change the grade of paper you will need to make another test strip. It should be noted that test strip evaluation is best carried out when they are dry as wet ones tend to hold back some of the more subtle grey tones which may encourage you to pull or push the expose time needed. While checking this you should also be ensuring that the focus is accurate.

When your test strip is pin sharp with good clear highlights, defined shadows and the right amount of contrast, you are ready to make a print.

Tuesday, 17 January 2012

Colour film well out of date.


The friend that gave me the out of date colour film did so in part for the removal of a partly exposed roll of film from her Dads camera a week or so earlier. She was not sure if it had become stuck or not.
The camera was an Olympus OM707. The battery carrier lid was broken and held in place with sticky tape and not working. The batteries were flat, so I tried some new ones but there was still no life which is a shame as it was in good order otherwise and had been in regular use up until eight years earlier. I had not come across this camera before so was not sure if I would be able to unwind the film manually. I found a re-wind button on the base plate, pressed it and went into the darkroom and opened the back. I took the cassette out first then gently pulled on the film and to my surprise it started to unwind. Once the film was fully removed I wound it back into the cassette.
A couple of weeks later I found out that the film had been developed and to her surprise it had produced some excellent results. It just goes to show even with a partly exposed colour film that has been sitting in a camera for eight years and extremely out of date, it can still produce some unexpectedly good results!
Yes I will admit that it is a risk when using film well outside the bbd; even more so with colour but I do not believe, like some, that you should only use this film with a so called toy camera as it suggests that if it goes wrong then it's “OK!” You just have to look at the lomograph site to see some excellent photographs. Personally you should have the courage of your conviction, use the best camera you can lay your hands on and embrace the results no matter what!
The colour pictures attached to this post were taken on my F5 on Agfa vista neg film that could have been out of date by fifteen years or so and kept in “iffy” conditions. So I walked into Lincoln on a warm sunny day with this film     and an open mind.  If I had listened to the doom and gloom merchants it was likely a waste of time! As it happens it was a good result even though I would have liked some colour shift to the pictures.


Related Posts:


Friday, 6 January 2012

Film storage.


Out of date colour film.
Upto four years on some
boxes
The recent receipt of ten rolls of out of date colour negative film from a friend has prompted me to share my experience with issues around the storage and freshness of film.


How do you define fresh? A film that has a long expiry date, one that has been kept refrigerated most of its life or even in the deep freeze. It is true to say that film used before the manufactures expiry date, which by the way is a conservative indication of when it should be used by, will yield the best results provided that it has been kept properly. The manufacturers suggest that  normal conditions are temperatures of no greater than 24 degrees C (75 F) and a relative humidity of 40% to as much as 60% in some cases. At temperatures and humanities greater than this will cause the emulsions to age far quicker. Normal conditions also refer to the fact that the film should only be removed from, in the case of 35mm from its plastic container and roll film from its foil wrapper just prier to use. Once the film has been exposed the rate of deterioration increases so you should not leave it to long after the roll is finished, to develop the latent image. It is reasonable to say that  monochrome film is more robust relatively speaking to colour film which has a greater number of   delicate layers for the atmosphere to attack and if stored badly will increase the likely hood of a colour shift.
Fg 1
Film 35mm, FP4, developed in ID11.
Printed on Ilford MGr paper 

Freezing is an extreme method of slowing the ageing process and can cause  problems with condensation and ice particles. Refrigeration is the most popular with film photographers but should be treated with care and common sense. At one time I used this method but not any more as it is not suitable with the way I work. Instead I use a floor standing Cabernet that is out of direct sunlight and away from direct heat. I have used this method for years with no ill affects. I also pay little attention to expiry dates as experience has shown me that it has had little affect on my results thus far.

FG 2
Same as above.
A couple of years ago I was sorting out some boxes of darkroom kit when I came across some containers of FP4 that was about twenty years out of date. I say twenty but on thinking back it's probably closer to thirty years or longer. The pictures (fg1 & fg2) are the results from one of those rolls of FP4 which was mistakenly exposed at ISO 400. Half the film was developed in ID11 and timed for HP5 and the other was developed in Rolie R3 developer and timed  for 400 iso. With results like this it makes me wonder whether refrigeration is necessary for monochrome emulsion if stored with care.

 It would seem that all film users over estimate how quickly film deteriorates. Each person needs to look at the way they use film and what sort of climate they live in, then take the appropriate action to comply with normal conditions. 


Related Posts:

Colour film out of date

Wednesday, 4 January 2012

Test strips before printing.


The test strip is the foundation to obtaining a good final print. Unless you have one of RH designs excellent Analsyser Pro enlarging meters. If not the most common way of producing a test strip is with a sheet of card moved at timed intervals across light-sensitive paper. There are several things you need to set before doing the test: the size of the print, the aperture of the enlarging lens and making sure you have sharp focus.

10 x 8 test strip.
Once all this is done how big should the test print be? This is down to personal choice but you should consider whether the use of whole sheet, half, third or strips give the best test results. If using a test strip of about two inches (50 mm) you need to make sure that each segment includes a full range of tones from the lightest to darkest so you can see at which timed interval gives the best high values and shadow areas. It is much easier to achieve this with the larger test strip.

What should the time separation be? A good starting point for prints around the ten by eight size is five seconds. These intervals will give you a rough idea of what the exposure should be. This can be refined with further test strips of two and/or one second if needed.

On what grade of paper should you make the test print? Grade one is standard practice. If the method you use places your negatives at a particular grade In my case it is grade three then you should do your test print at that grade unless you are using the split grade method.

Related posts:

Evaluating your test strips

Thursday, 29 December 2011

Printing. Basic amount of kit.


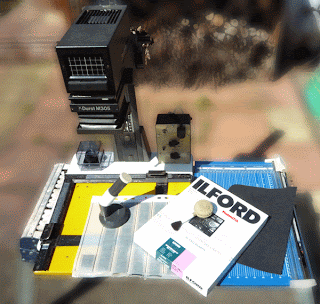
The minimum amount of kit you need to produce a photographic print.

  1. Enlarger with red filter and filter head (colour) or multi grade head. Without filter head separate multi grade filters. Enlarging lens.
  2. Enlarging frame 18 cm x 24 cm (7"x 9") two-blade.
  3. Orange/red safe light and ordinary light.
  4. Four dishes minimum size 18 cm x 24 (7"x 9").
  5. Three pairs of tongs, one each for developer,stop-bath and fix.
  6. Three funnels of different colours or marked dev'. stop and fix.
  7. A measuring jug of a 1000mls.
  8. At least three storage bottles for your chemicals.
  9. Timer with alarm or timer.
  10. Thermometer alcohol type times three but you can get away with one.
  11. Puffer brush.
  12. Multi grade paper.
  13. Paper cutter.
  14. Focusing device.


Wednesday, 21 December 2011

Agfa APX sorting out the test strips for development..


With the test film exposed it's finding the time to process the strips. I have enough equipment that allows me to develop them one after the other. I will need at least a morning for cutting the film into lengths, setting out the chemicals and kit, develop,stop, fix and wash. Not forgetting that PMK Pyro developer can only be mixed in each case just before use.
The film was inserted into a Nikon F5 with automatic load which is a bit of a pain. If it was manual loading you would be able to mark the film before you shut the back and wind on to the first frame. I know from experience that the F5 has about 150 mm (6") lead before the first frame which would be an extra two shot if it was manually loaded making Agfa's APX a forty picture film. Each test strip is five frames long with two blanks to allow for error when cutting it to lengths of 235 mm (9").
This is the first time I have had to use my new darkroom in full black-out as I usually use a changing bag to load film into the process tank. I'm pleased to say there were no light leaks. So I could see where to cut the film in the dark I laid a rule on the work top with two bits of tape attached to it at 150 mm and 235 mm respectively. All I needed to do was pull the film from the cassette and cut to length at the tape marks. It surprised me how well this method worked. The remaining exposed film I wound back into the film holder to be processed later when I know the development time is right.
My working method for producing the test negatives:
  • Add Part A of the developer mix to 250 mls of filtered water (tap water will do) and wait till the temperature reads 21 degrees C.
  • Pre-soak for 1 minute. I have found that PMK Pyro developer is prone to air bells/bubbles forming on the film that are not always dislodged by taping the tank on the work top.
  • Add part B of the developer and make up to 300 mls in doing this it will bring the temperature down to its working level of 20 C. stir and pour into the processing tank.
  • Invert continuously for the first minute and tap tank on work top at the end.
  • Invert once ever 15 seconds. For 6.5 minutes.
  • Stop, fix and wash as normal.
  • Repeat the above twice more with developing times of 26 and 13 minutes respectively.
If all goes well you will get a set of beautifully toned negatives.


Related posts:

Test results

Sunday, 18 December 2011

What next for PMK Pyro?


This year I decided to push the boundaries of my black and white film photography with a bit of dangerous living; well, flamboyant then!!. By using three makes of film I have not tried before: Agfa's relaunched APX 100 35mm, Adox CHS 100 35mm and 120, Fuji neopane 400 35mm. All of whom are going to be finessed with PMK Pyro staining developer in to reveling their latent images.
The first of these to receive Pyro's tender kiss is Agfa's APX. I have had a quick look at Digital truth massive dev chart ( thanks guys) and have discovered that the data they hold could be out dated as it is for the original film emulsion. A quick film test (quick! just joking) as described in another post, to check the time and if needed adjust it. I'll be using the suggested dilution formula of 1+2+100 and the 13 minutes as the normal process time for comparison.
It is a fine bright warm day just right to choose a subject and take pictures for the test. Wow! that's the fastest 22 frames I've taken in a long time! So as not to waste the rest of the film I took a walk round the local area to use up the other frames. Film is becoming expensive. Now all I have to do is find the time to process the film.

Wednesday, 14 December 2011

Fixing negatives and papers


It is important to fix your negatives fully, this will ensure their longevity.

Fixing removes the last of any light-sensitive material from the negatives stabilising and securing the images so they can be viewed in day light. The temperature of the fix should be the same as the developer and stop bath, 20 degrees C.
Most fixers nowadays are rapid fixers supplied in liquid concentrate form and will complete the fixing process in about two to five minutes. (always check the instructions on the bottle) over fixing will start to bleach the negative. These fixers are usually suitable for film and paper. There is a chance in the case of warm tone papers that they may suffer from bleaching of their warmth with rapid fixers, it would therefore be better to use a more traditional fixer made up from a powder to ensure no loss of tone.


Sunday, 11 December 2011

Agitating the developing tank.


The main reason for inverting the developing tank is to make sure that the film gets equal treatment in the developer. One of the best ways of achieving this is to tumble the tank by turning it from end to end.

Why do we agitate the tank? The developer interacts with the emulsion of the film. It vigorously attacks the silver it come into contact with and becomes exhausted. By inverting the tank you refresh this action, producing evenly developed negatives. It is
important to get this right. To little agitation will allow by-products of the process to build up, leaving pale-toned streamers as they slide to the bottom of the tank. Likewise excessive inversions will produce currents in the developer, creating uneven development. Most process times allow for agitation.
Once the developer is added you should agitate the tank for the first thirty seconds but before you put the tank down give it a slight twist and tap it on a hard surface ( it is a good idea to lay a soft towel down so you do not damage the tank) so you dislodge any air bells/bubbles that may have attached themselves to the film. Then you need to agitate for ten seconds in every minute of the process time about four inversion per ten seconds or as the developer manufacturers instruction advise. For example PMK Pyro recommend one inversion every fifteen seconds. 
I have used this inversion method from the start of my developing career ( no pun intended) and has produced consistent results every time. Once you have found a method that works for you; you should stick to it.

Friday, 9 December 2011

Checking development times?


How do you know that the negatives you are looking at are correctly developed and not under or over exposed. The only way to be sure is to do a test. What follows is a method to help you achieve this:
   Choose a subject like a view or still life to take a series of photographs.
   First you will need to determine what the correct exposure should be.
   Then set the camera settings to two stops under and take the picture.
   Follow this by setting it to one stop under and take another picture.
   Now enter the correct exposure settings and press the shutter.
   Next, one stop over and two stops over respectively.
   Once you have done this wind the film on two frames and repeat the procedure, once done do the same again with a two frame separation so you now have three test strips.
Once back in the darkroom cut the film into three strips. Give the first section of film half the recommended development time the second set twice the time and the third group the suggested process time. Then compare the combined results of exposure and development and you will be able to clearly see which was developed correctly. It's worth the cost of a film to know that your films have been correctly developed.

Tuesday, 6 December 2011

Film Developing faults.


The most common faults that crop up in the course of processing a film.

    • Spots on the negative indicate two things: there was dust on the film at the time of exposure and/or fairly large round spots on the negative indicate that air bubbles were trapped against the film during the process and suggests insufficient agitation. This can be avoided by agitating for thirty seconds at the beginning of development and by tapping the tank on the bench. (some developers require longer agitation). It must be stressed that too vigious and lengthy agitation can induce the same problem. A way of helping to reduce air bubbles is to use a pre-soak. Some developers like PMK Pyro and Rollie's R3 require a pre soak as standard.
    • Black crescent-shaped kinks and clear patches more common with roll film but can happen with 35 mm cassettes, this happens where the film has been forced into the spiral making the film kink and touching the film beside it.
    • Lines are most commonly caused by the film running across a small piece of grit on the cassette opening. It can also happen by over tightening the film in the cassette and bad handling. One of the most common, which has happened to me, is the use of a squeegee to dry the film. I have not used one since.
    • Finger marks on negatives are caused by handling the film with wet, dirty and contaminated fingers. This can be eliminated by using disposable gloves during the wet process and cloth cloves when handling dry negatives.
    • White marks are caused by grease and fixer before development and dark marks by fingers covered in water or developer. Slight damage can be retouched.
    • Reversal of negative image is due in part or total to solarization making the negative into a positive; this happens when light gets to the unprocessed film during development. Care must be taken with the processing tank that the lid is fully secure before inverting.
    • Uneven image density is a sign that there is not enough developer in the tank or lack of agitation. A low-level of developer in the tank will show as a dark unprocessed line along the top edge of the film.
    • Reticulation is a lot of fine cracks in the emulsion this is caused by washing in too high a temperature or solutions greatly different in temperature. This can be avoided by making sure that the solutions only have a few degrees difference between them.
    • Deposits on the negative and discolouration. Hard water may cause a chalky deposit on the negative that cannot be washed away in water. It can be treated with a two percent solution of acetic acid, then washed in clean water. The same sort of problem may be due to the fix losing its acidity. A treatment would be to harden the negative in one percent solution of formalin, then wash in sodium carbonate followed by water. Yellow-white negatives may be due to deposits of sulphur from a decomposing fixer, it can be remedied by hardening in a one percent formalin solution and washing in a ten percent sulphite solution at thirty-eight degrees.

Friday, 2 December 2011

What does developer do?


The function of the developer is to bring out the latent image held in the emulsion. This is achieved by a chemical reaction, acting on the silver, producing dark areas where it is light and bright areas where there is shadow. The negative is reversed later with the print. The two most important things to keep at the front of your mind are: the development time and the temperature. It is these two factors that ensure the ultimate image quality you later produce in the print. Too short a development time will produce too thin a negative, like wise too long a process time will make the negative too dence, leading to very short and very long print times.