Pages

Showing posts with label Agfa. Show all posts

Monday 23 January 2017

Welcome to the New Year

 On a grey and dull day I am going to say a big, bright THANK YOU to all my follows, subscribers and supports for visiting the blog over this last year. Views are up big time even though it has been a bad year personally.

As is the custom for this time of year I have a new header picture that shows a hand picking up or putting down an Agfa Isolette I will leave it up to you how you interpret my intent. If any of you have any suggestion please share your thoughts.

As I sit here writing this, it is peeing down with rain, which has inspired me to set up my pinhole camera to make an image that will take eighteen minutes to expose. Not the longest exposure I have made but getting there. This is  the start of my rediscovery of the wonders of  pinhole photography and the Zero camera in   articular which I hope to use more this year  instead of leaving it in the camera bag. A new   years resolution of sorts!

Talking of new year resolutions photograph wise -  have you set any? I don't as a rule but this  year is  going to be different I have two things I  could like  to achieve one I have already  mentioned the  other is to spend more time in the darkroom  printing, something that I can neglect. I find it  difficult to spend anytime at all during the  summer months in the darkroom I  o not like  wasting time inside if the weather is  bright and  warm, even in the evenings. I  suspect I'm not the  only one. What are your thoughts? 


I'm looking forward to seeing you all again this year. Don't be shy if you drop by - have a chat (leave a comment) - always interested in what you get up to. I shall leave you now as my mistress the darkroom is calling! I will chat with you all again later. Before I leave I would like to wish you all the best for the year ahead. 

Saturday 17 October 2015

Black developer!?

I have gone back to using 35mm film, in so doing I have resurrected an old and long running project of portraits. I have never been backward in coming forward to ask people I meet if I can take their picture. When asking my chosen subject I'm polite and friendly with a little charm. It is not often that I receive a straight rejection. I've noticed that it tends to stop people for a moment, at which point I tell them it's a film camera. It appears that this is a reason for them to say yes when chatting with them.

This new interest in lugging my Nikon F5 around with me has also reunited me with a long time favorite film Agfa APX 100. I cannot remember exactly the last time I used this film but I do know it was back in the days when I regularly used ether ID11 or PMK Pyro. I still have both these developers on the shelf in powder form. Which led to a bit of a  dilemma once the new roll of
APX was ready for developing. Should I make up a new batch of these old friends to keep the look of the negatives the same or go with the current ones???.
                                                        

I chose to go with RO9 partly because I wanted to see what sort of negative it would produce with the APX.                                                                      
Agfa APX  negatives developed with
RO9 special.
Before starting I made up a litre of fresh stop, fix and 300 mls of developer. I processed the film for the suggested thirteen minutes. The time counted down, as I poured out the developer, I was shocked to see this black liquid fill the measuring cylinder what the Hell! My first thought was that all the emulsion had come off, stupid I know but it always interests me what thoughts come into your head when things take you unaware. Needless to say that when I looked at the negs after they were fixed, all was OK. The negatives are nicely toned. I am not sure yet how grainy they are as Ro9 tend to be more grain than ID11.


It's just another colour to add to an increasing list of used developers.


Friday 17 April 2015

RO 9 Special developer.

Recently, I had an unexpected back log of film to process It can be difficult to find the time to do them especially when it is more than a couple of rolls. Anyway a gap opened up so I dived into the darkroom to load two of the rolls ready for development. As I reached for the RO9 my attention was attracted to a couple of bottles of developer standing behind it. RO9 Special and Studional which as it turns out are one and the same along with Rodinal Special. While I was boxing up the first couple of film I had a rush of blood to the head and decided to give the RO9 Special a try. There was method in my madness.

At the time of my decision I had no background knowledge of this developer apart from how it was marketed and the information on the side of the bottle which is sparse to say the least. The blurb stated that RO9s was the finer bread brother of RO9 which was what attracted me to it in the first place. Part of my madness had been influenced by a cassette of HP5+ I had been given to process.

120  FP4+ Negs Developed in RO9s
In stead of jumping in at the deep end with both feet, I thought it prudent to check the very short developing times printed on the side of the bottle by processing a roll of 120 FP4+. Because I have a tendency to slightly under expose my negatives the suggested time of three and a half minutes at a dilution of 1 to 15 was increased to four. I used my standard agitation method of twelve inversions for the first thirty seconds and then four every minute. As there was no indication to the contrary. As soon as the fix was poured out of the tank I checked to see if they had developed properly. From what I could see they looked perfect. I had not intended to do a grain comparison for this film, it was purely to see if the times on the bottle worked in my favour.

The info on the side of the bottle for HP5+ suggested four minutes at 1+15 - I processed the film for five; as it turns out it was a good move. I think the negatives would have been a bit thin otherwise.

I have now researched process times and developer information for RO9s Something I should have done first with a visit Digital truths Dev chart for more times. They tell you to look at Studional.

HP5+ Negs developed in RO9s
 
Something else I had not been aware of was once the developer had been made up you could use it again. I had a suspicion it could be used again because the concentrate had a syrupy look when I poured it out. In fact you can process up to twelve rolls of mixed formats per litre. The most interesting thing about this developer is that there is no time compensation if you do more than one roll of film on the same day. You only add a compensation factor the longer the working developer in stored. Up to three months.


Developer Data:

RO9 Special/Rodinal Special and Studional.

Characteristics: Fine grain sharp negatives with good contrast. Once diluted can be stored for multiple use. Short process times.

Mixing instructions: Dilute concentrate with water 1+15

Number of Film per Dilution: 10-12 35mm or 120 format per Litre.

Temperature: Is best kept between 18 C and 24C with + or – adjustments as needed to the length of the development time.

Agitation: Tilt the tank for the first minute continuously and then once every minute. You should avoid developing times under three minutes.

Shelf Life: Concentrate should last 2 years in original bottle with no air gap. Once Diluted it should last 3 months without air gap in it's own container.

Time increases for multiple use: To keep speed yield and contrast consistent the diluted developer should be kept in brim full tightly capped bottles if this is achieved the following will apply:

Idle time between
two batches
Development lengthened
by
few hours (but development none *on same day)
None *
1 – 3 days
5.00%
4 – 8 days
10.00%
1 – 2 weeks
15.00%
over 2 weeks
20.00%

* with Atomal FF: + 10 %.

The extra times given above do not change if several films are simultaneously processed in one batch.

Suggested development times for use with RO9 special, Rodinal Special and Studional:


Film type
Time *
Speed
Agfapan APX 100
4 min
ISO 100/21°
Agfapan APX 400
6 min
ISO 400/27°
Fuji Neopan 400 Prof.
3 min
ISO 320/26°
Fuji Neopan 1600 Prof.
3 min
ISO 800/30°
Ilford PAN-F Plus
3 min
ISO 50/18°
llford FP 4 Plus
3.5 min
ISO 100/21°
Ilford HP 5 Plus
4 min
ISO 400/27°
Ilford Delta 100
3.5 min
ISO 160/23°
Ilford Delta 400
4.5 min
ISO 400/27°
Ilford Delta 3200
6 min
ISO 1250/32°
Ilford SFX 200
4 min
ISO 125/22°
Kodak Plus-X
5 min
ISO 125/22°
Kodak Tri-X
3.5 min
ISO 400/27°
Kodak T-MAX 100
5 min
ISO 80/20°
Kodak T-MAX 400
5 min
ISO 400/27°
Kodak T-MAX p3200
6 min
ISO 1250/32°
Kodak Recording 2475
6 min
ISO 640/29°

  • Small tank or tray processing at 20 °C.
  • Information above supplied by Agfa.

Almost forgot the reason for the rush of blood to the head if you had not already guessed it was to do with the 35 mm HP5+ I find that this films emulsion tends to produce rather grainy negatives with standard RO9. As I intend to enlarge these negatives to 9 x12 the finer developer should make the prints less grainy. I am pleased to say the strategy worked, the negatives have a much finer grain than the standard RO9. The proof of the pudding will be in the printing of the FP4+ and HP5+ negatives. I will share more prints in another post.

9 x 12  photograph from 35mm HP5+ negatives developed in RO9 special


Saturday 6 July 2013

Using the Agfa Isolette camera


Carrying on from a previous post on the Agfa Isolette The opportunity to use the camera was provided by a break in the weather - it cleared enough not to be soaked as soon as you leave the house.


The flip out film holder makes it easy to load a new roll of film. There are in built springs that provide friction, so the film is kept tort, keeping it as flat as possible at the focal plane reducing distortion. The film back clicks shut with a reassuring clunk. It also has a little red window in the back with a sliding cover in which to view the film numbers as you wind on. The film is advanced with a knob on the top right hand side of the camera that has a built in reminder to wind on after each exposure otherwise the shutter will not set.

To reveal the lens you press a button on the top left hand side. In this case the lens followed by the bellows leaps forward from the front of the camera with an enthusiasm that can knock it out of your hands if you are not prepared for such athleticism. Once the front is open you are presented with the five main controls: lens focus, a full set of apertures from F4.5 all the way up to F32. A limited number of shutter speeds: B, 25th, 50th, 100th and 200th A self timer and most importantly a lever that primes the shutter for release. The only other thing present is a connection for flash.

On the top of the camera is the shutter release that allows a remote cable to be fitted, a cold shoe for a range finder or other accessories and another knob that has four settings marked Col NK, NT, K and T. (I do not have a clue as to what they represent.) As far as I can tell it has had no affect on my negatives. It has a viewer and a tripod mount.


After I got used to the idea of guessing what the distance should be set to and then remembering to alter it for different views, I found myself taking shots quickly almost like an automatic. I did take light readings to start with but it became clear that the light levels were stable enough not to need checking for each shot.

It became clear that there was a problem once the negatives had been developed. Some how light was getting into the camera. Having checked it carefully before hand I should have carried on and cut a piece of light sensitive paper to fit the camera and left it for a minute to make sure. Once the paper had been developed in the normal way it would have shown that light was leaking in from the bottom right corner of the exposure chamber indicating a problem with the bellows.


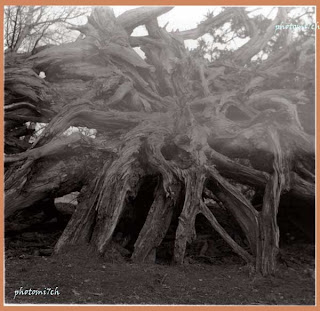
I'm a little disappointed with myself for not doing this check in the first place. If I had followed through with the test, I wouldn't have had a duff set of negs'!. It would have made an interesting set of prints as the gremlin's face in the tree roots shows.


Saturday 23 March 2013

An Agfa Isolette has laneded


Recently a package arrive from a friend that was giving away a number of Agfa  Isolette cameras. I put my name down for one, not quite expecting to have my name pulled out of the hat. As it turned out not that many people were interested. The cameras were advertised as not tried and tested so you could end up with one that may not be in proper working order. However they are easy to repair if there is a problem.

 As it turns out, the one I have does not have any faults that I can find apart from needing a major clean. It has the dustiest insides I have seen in a long time with the bellows being full of fluff.  I have carefully cleaned it out using compressed air and a damp cotton bud. Having first earthed myself to reduce the static in my body. The lens was slightly dirty which has been gently cleansed with lens fluid on a cotton bud.

 
The Agfa Isolette was introduced in the 1950. It produces a 6x6 negative making it a member of the 120 medium format family. The camera pictured is an Isolette 2 With the press of a button the front flips open to reveal an 85 mm Apotar 1.4,5 lens that shuts down to F22 and has a shutter speed range from B to 200 hundredths of a second.  For a completely manual camera it is well designed and sophisticated, even by today’s standards. It has a number of features that shows its quality, firstly with a film holder that flips out of the camera back to allow the easy installation of a new roll. A shutter lock on the winding mechanism that can only be removed by advancing the film, helping to prevent double exposures. Although the lens has a focus ring it is not a range finder and therefore distances have to be guestimated. A range finder device was produced as an extra that clipped into the shoe on the top. It's compact size makes it just right to slip into the pocket of a gentleman's jacket, although the all metal construction makes it a little bit heavy for comfort.


With all the cleaning and checking done, all that remains is some good weather so the camera can be put through its paces.

Tuesday 30 October 2012

Mistaken identity Agfa APX developed in ID11


Agfa APX negatives developed in Ilford ID11
This is not the post I was expecting to write. I recently made up five litres of ID11 so I could develop a roll of out date HP5+. An extravagance you may think but really it was the catalyst for me to bring back an old friend into regular use. 


The other day I processed a roll of 35mm monochrome film but there was something wrong with the results. For starters the negatives looked wrong they didn't have the round look you get with a fisheye lens.  I could not get my head round how the fisheye two from lomography could change the look and shape of the negatives so completely. I'm going mad! a senior moment! brain in neutral! I need help! Up to this point I had been completely convinced that it was the roll of HP5. Then I noticed a black film canister on my desk, opened it and found a reel of HP5!! What the ...! what was developed then?? It turned out to be a roll of Agfa APX 100, that I had forgotten all about and mistakenly processed as HP5. Now this is a first for me, get it wrong and land on your feet! this has got to be one of the jammiest balls up ever!


Now I'm over the shock, I do not know why I should be surprised that they are a good set of negatives. Film emulsion has a large latitude of forgiveness before it looses its temper.  I checked what the timing should have been for Agfa APX and believe it or not my notes say that APX in ID11 at ISO 100 should be developed for thirteen and a half minutes at 20C. I had decided to process the out of date HP5 to fourteen mins.
Agfa APX  Film ISO 100
Developed in ID11 for 14 mins
Printed on silverproof matt
Developed in Moersch 6 blue tone.


So this has turned into a post about Agfa APX 100 developed in Ilfords ID11 results!


The method used:

         I did not use a pre-soak. 

         Develop for 14 minutes instead of 13.5. It would not have made much difference to the quality of the negatives.

         Invert for the first thirty seconds and then for ten seconds every minute (which is about four inversions)

         stop, fix and wash as usual.

The main test of a good negative is when it is printed. Showing you how much detail there is to be coaxed out of the high lights and shadows by dodging (holding back) and burning in (extra exposure) to arrive at that stunning final picture. 

  
For a film I had mistaken for another make, the results are excellent, I have no complaints!... except one; check what's written on the film canister first!

Tuesday 17 January 2012

Colour film well out of date.


The friend that gave me the out of date colour film did so in part for the removal of a partly exposed roll of film from her Dads camera a week or so earlier. She was not sure if it had become stuck or not.
The camera was an Olympus OM707. The battery carrier lid was broken and held in place with sticky tape and not working. The batteries were flat, so I tried some new ones but there was still no life which is a shame as it was in good order otherwise and had been in regular use up until eight years earlier. I had not come across this camera before so was not sure if I would be able to unwind the film manually. I found a re-wind button on the base plate, pressed it and went into the darkroom and opened the back. I took the cassette out first then gently pulled on the film and to my surprise it started to unwind. Once the film was fully removed I wound it back into the cassette.
A couple of weeks later I found out that the film had been developed and to her surprise it had produced some excellent results. It just goes to show even with a partly exposed colour film that has been sitting in a camera for eight years and extremely out of date, it can still produce some unexpectedly good results!
Yes I will admit that it is a risk when using film well outside the bbd; even more so with colour but I do not believe, like some, that you should only use this film with a so called toy camera as it suggests that if it goes wrong then it's “OK!” You just have to look at the lomograph site to see some excellent photographs. Personally you should have the courage of your conviction, use the best camera you can lay your hands on and embrace the results no matter what!
The colour pictures attached to this post were taken on my F5 on Agfa vista neg film that could have been out of date by fifteen years or so and kept in “iffy” conditions. So I walked into Lincoln on a warm sunny day with this film     and an open mind.  If I had listened to the doom and gloom merchants it was likely a waste of time! As it happens it was a good result even though I would have liked some colour shift to the pictures.


Related Posts:


Thursday 5 January 2012

400TX: Agfa APX 400 in Prescysol

I came across this post while looking up a friends blog. It is worth a read as Jeffery Smith makes some interesting points. I must say that my use of the newly released Agfa APX 100 with PMK Pyro has not shown the signs of graininess he refers to with the faster film. But then I'm not sure that the new film is of the same make up as the discontinued one. He also did not say whether or not he used an after bath when processed his films.

400TX: Agfa APX 400 in Prescysol

Sunday 25 December 2011

Test results for Agfa APX 100.


When taking pictures for the test it is best to choose a subject that is evenly lit. This will make the light reading more representative of the whole picture area. Unlike a high contrast view with deep shadows and strong highlights forcing you to take several light readings to find the average setting. It also makes it easer to evaluate the negatives once processed.
The processing of the film went well having spent all morning shuffling developing tanks, measuring jugs and developer bottles, the three strips of film have all been consistently processed. I am very pleased with the density of the negatives, when dry I will do a contact sheet so I can judge how well they will print.

You can see from the picture above, that the 13 minutes development time that digital truths massive dev chart suggests, is spot on. The results also show that you really do need to make a total and utter mess of things before you get a negative that will not print.
The light meter read negative at the centre
of the test strip.
There is a general guide to check whether a film has been correctly exposed and developed it should produce a continuously toned negative. The subjects deepest shadow should be perceptibly heavier than the clear of the film base. The areas that represent the brightest important detail in the negative must not be so dark that you can not read the printed words of a book through them on a sunny day as shown right. Its a quick way of checking to see if your negatives have been correctly developed.


The picture below shows the prints produced by the light meter read negatives in the centre of each of the test strips.

The difference between the top and centre is one and a half stops. bottom and centre is three-quarters of a stop. It is obvious that the longer you develop the less return you get for the time spent. Meaning that you will only get a slight improvement in the quality of your negatives for each minute of extra process time you give them over thirteen minutes.
These tests represent my own personal experiences I strongly encourage each individual to check this film out for themselves. The experiments I have carried out are not exhaustive and should only be used as a starting point.


Related posts:

Sorting out the test strips

Wednesday 21 December 2011

Agfa APX sorting out the test strips for development..


With the test film exposed it's finding the time to process the strips. I have enough equipment that allows me to develop them one after the other. I will need at least a morning for cutting the film into lengths, setting out the chemicals and kit, develop,stop, fix and wash. Not forgetting that PMK Pyro developer can only be mixed in each case just before use.
The film was inserted into a Nikon F5 with automatic load which is a bit of a pain. If it was manual loading you would be able to mark the film before you shut the back and wind on to the first frame. I know from experience that the F5 has about 150 mm (6") lead before the first frame which would be an extra two shot if it was manually loaded making Agfa's APX a forty picture film. Each test strip is five frames long with two blanks to allow for error when cutting it to lengths of 235 mm (9").
This is the first time I have had to use my new darkroom in full black-out as I usually use a changing bag to load film into the process tank. I'm pleased to say there were no light leaks. So I could see where to cut the film in the dark I laid a rule on the work top with two bits of tape attached to it at 150 mm and 235 mm respectively. All I needed to do was pull the film from the cassette and cut to length at the tape marks. It surprised me how well this method worked. The remaining exposed film I wound back into the film holder to be processed later when I know the development time is right.
My working method for producing the test negatives:
  • Add Part A of the developer mix to 250 mls of filtered water (tap water will do) and wait till the temperature reads 21 degrees C.
  • Pre-soak for 1 minute. I have found that PMK Pyro developer is prone to air bells/bubbles forming on the film that are not always dislodged by taping the tank on the work top.
  • Add part B of the developer and make up to 300 mls in doing this it will bring the temperature down to its working level of 20 C. stir and pour into the processing tank.
  • Invert continuously for the first minute and tap tank on work top at the end.
  • Invert once ever 15 seconds. For 6.5 minutes.
  • Stop, fix and wash as normal.
  • Repeat the above twice more with developing times of 26 and 13 minutes respectively.
If all goes well you will get a set of beautifully toned negatives.


Related posts:

Test results

Sunday 18 December 2011

What next for PMK Pyro?


This year I decided to push the boundaries of my black and white film photography with a bit of dangerous living; well, flamboyant then!!. By using three makes of film I have not tried before: Agfa's relaunched APX 100 35mm, Adox CHS 100 35mm and 120, Fuji neopane 400 35mm. All of whom are going to be finessed with PMK Pyro staining developer in to reveling their latent images.
The first of these to receive Pyro's tender kiss is Agfa's APX. I have had a quick look at Digital truth massive dev chart ( thanks guys) and have discovered that the data they hold could be out dated as it is for the original film emulsion. A quick film test (quick! just joking) as described in another post, to check the time and if needed adjust it. I'll be using the suggested dilution formula of 1+2+100 and the 13 minutes as the normal process time for comparison.
It is a fine bright warm day just right to choose a subject and take pictures for the test. Wow! that's the fastest 22 frames I've taken in a long time! So as not to waste the rest of the film I took a walk round the local area to use up the other frames. Film is becoming expensive. Now all I have to do is find the time to process the film.