Pages

Showing posts with label 6x6. Show all posts

Tuesday, 16 February 2021

Zero double take project first results.


Zero 6x9 pinhole camera.


As I sit here reviewing the first batch of photographs from double take, the wind and the rain is still lashing the property - something it has been doing for the last twenty four hours. I'm pleased to be inside in front of a warm fire with Tabatino who is stretched out in front of it like a rug. 


Zero 6x9 pinhole camera.


The contact print shows that the second exposures are quite weak and will require dodging and burning to make their presence felt. With this in mind I  have been using half page test strips  so I can see how much more exposure is needed to bring out the weaker parts of the negative. This has given me a better overall idea of how much extra time the weaker parts of the picture need so I can get as close as possible to what the final print will look like. Having  chosen to use 6x6 negatives I find myself cropping them to a landscape frame size giving me more choice over which parts of the negative make the final composition and partly to get the best use out of the paper size. I'm using Silverprint's gloss proof paper mainly because I believe it has added something to the overall expression of the photographs.
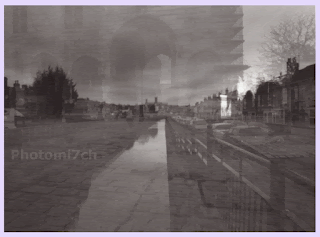

Zero 6 x 9 pinhole camera.


The results of this first film have been a pleasant surprise in that most of the negatives have produced picture combinations that work well. Whether this is down to luck or the pre-planning in the picture combinations only time will tell. The day I took the pictures was a challenge in that it was windy with a broken cloud sky that was fast moving making metering each shot difficult. By the time I had worked out the shutter speed and opened it the scene in some cases had gone from bright sunshine to dull and overcast or vice versa. It just goes to show how forgiving film is when it comes to exposing it in rapidly changing light conditions over extended periods. These were printed at grade 3 and not my more common split procedure.


Technical data: 

Film 120 FP4+ set to 6 x 6 negative size, developed in PMK Pyro, Printed on silverproof paper, developed in Ilford warmtone developer.

Saturday, 23 March 2013

An Agfa Isolette has laneded


Recently a package arrive from a friend that was giving away a number of Agfa  Isolette cameras. I put my name down for one, not quite expecting to have my name pulled out of the hat. As it turned out not that many people were interested. The cameras were advertised as not tried and tested so you could end up with one that may not be in proper working order. However they are easy to repair if there is a problem.

 As it turns out, the one I have does not have any faults that I can find apart from needing a major clean. It has the dustiest insides I have seen in a long time with the bellows being full of fluff.  I have carefully cleaned it out using compressed air and a damp cotton bud. Having first earthed myself to reduce the static in my body. The lens was slightly dirty which has been gently cleansed with lens fluid on a cotton bud.

 
The Agfa Isolette was introduced in the 1950. It produces a 6x6 negative making it a member of the 120 medium format family. The camera pictured is an Isolette 2 With the press of a button the front flips open to reveal an 85 mm Apotar 1.4,5 lens that shuts down to F22 and has a shutter speed range from B to 200 hundredths of a second.  For a completely manual camera it is well designed and sophisticated, even by today’s standards. It has a number of features that shows its quality, firstly with a film holder that flips out of the camera back to allow the easy installation of a new roll. A shutter lock on the winding mechanism that can only be removed by advancing the film, helping to prevent double exposures. Although the lens has a focus ring it is not a range finder and therefore distances have to be guestimated. A range finder device was produced as an extra that clipped into the shoe on the top. It's compact size makes it just right to slip into the pocket of a gentleman's jacket, although the all metal construction makes it a little bit heavy for comfort.


With all the cleaning and checking done, all that remains is some good weather so the camera can be put through its paces.

Sunday, 22 April 2012

Zero pinhole camera Project double take.


Camera Zero 6x9 delux
FP4+ 120 format, 6x6 neg,
 developed in PMK Pyro no afterbath,
Printed on silver proof paper gloss
Developed in Moersch 6 blue tone.
My attitude when using the Zero camera has become very relaxed. My approach is to look at the scene, roughly point the camera at the subject, take a light reading, calculate the exposure and open the shutter for about the right amount of time. Once taken move on to the next one. I'm not sure if this is such a good thing as I'm making a number of double exposures, which have turned out well more from luck than design.


Camera Zero 6x9 delux,
FP4+ 120 format, 6x6 neg,
developed in PMK Pyro with afterbath
printed on silver proof paper matt
 developed in Ilford warm tone
This has led to project double take but lets be honest basing an idea on a set of lucky mistakes does not bode well for the results. But then history is littered  with stumbled upon ideas that have gone well. With this in mind I'm going to carry on with the blindfold method of not winding on. I could be more controlled by making single shots and then combining the negatives in the enlarger to produce a double exposure but  this may take away the element of surprise and randomness to the results. With that said there needs to be some planning to the picture taking, so I'm going to use a location I know quite well in order to make the combination of double exposures easier to plan cutting down time looking for shots. It will be hit and miss anyway with this approach but hopefully not so many misses. The first roll is going to be a bit of an experiment so I'm not expecting many good printable photographs. But in this context what is going to be a good picture I think it will boil down to how well the combinations work together; once the first film is developed I'll be able to refine my method.


I'm setting the zero 6x9 deluxe to 6x6 neg size, loading FP4+ which will be developed in PMK Pyro using my revised method of inverting with an after-bath. I may not continue the bath for subsequent rolls if the photos look to soft. And so the project begins.

Tuesday, 3 January 2012

Enlarging a section of the negative.


Picture from a 120 FP4+ ISO125 6x6 negative
 developed in ID11 and printed on Ilford MG paper
 Processed with Ilford MG Developer.
Landscape format
There are no rules when it comes to enlarging your negatives. Cropping, re-formatting and partial enlargement are all part of the creative process. Changing horizontals to verticals and diagonal is also part of this rich tapestry of creativity. The only time I feel this looks odd is with waterscapes and their horizons.
Portrait format


As one of those people that works with 6x6 negatives, cropping and reframing is all part of making the picture fit the paper. I'm not complaining but the fact is all paper sizes are oblong. I think this has helped me in getting the best from my pictures. I do not waste time in trying to make the whole negative fit the page; this is heresy to some who believe that having carefully framed the view that you should print as you saw it! This is not always possible, especially when you have a certain size of print in mind. Sometimes this careful framing once projected on the enlargers baseboard may look better with horizontal or vertical framing. Do not be afraid to play.

Square Format
Which do you prefer?