Pages

Showing posts with label monochrome. Show all posts

Saturday 14 January 2017

Living with Tetenal Eukobrom AC

Developer
Tetenal new Eukobrom AC is proving to be a delight to work with. I did not realize how much of a irritant the smell of the developer was until it had been removed from the equation. I no longer have developers nose where the smell lingers long after I have left the darkroom. 

In an early article on this developer I had a couple of questions: Personally the main questions yet to be resolved are its keeping qualities and whether or not the image will be warm when the developer starts to deplete. One of these has now been answered, that is it's keeping qualities. I have been using it in my slot processor, at the end of each print session I leave the developer in the slot and cover it with the lid. The amount of time between each print session varies a lot from days to weeks sometimes months.

Slot processor
 Two things have come to light. If you leave the developer in the slot you should give it a stir before you start using it again. The active ingredient can separate out dropping to the bottom. I was caught out thinking that the developer had come to the end of it's working life because it had been left for two weeks. Something I did regularly with Ilfords multigrade without loss of usability.


Something else I have not experienced before was a black and white crystalline substance on top of the stop bath. It was a very heavy build up making it difficult to remove the top off the stop. The stop it's self was clear and still at the level it had been left at, turning out to still be working even so I changed it. This maybe an interaction with the vitamin C - something to keep an eye on.

The other question about the warming of the prints as the developer depletes still remains unanswered. This due to the fact I have not processed enough prints with the fresh developer. Once I notice I'll let you know.


Finally I have used this developer with a number of makes of paper now - RC and FB, natural, warm, cool tone and tinted papers - With great results, so if you have not tried it yet, do so! you can get it in 250 ml shots which is More than enough to get a feel for the way it works and looks.


Technical Data:

Developer Tetenal Eukobrom AC, paper Kentmere RC gloss. 


Saturday 10 December 2016

What can Contact prints tell you.

I have written on this subject before outlining the advantages of making a contact print for your negatives. The subject has come to the fore because a recent example shows that the negatives are poorly exposed and possibly have a higher than normal amount of contrast.


 So where to start? With the sheet of negatives. The first thing you notice about them is that they are well developed with good tone and detail but on the dense side, meaning they could be over exposed / developed. Something that can sometimes be difficult to judge from the neg's only.
 
The contact print is saying that the negatives are well and truly over exposed and or over developed meaning that to get a balanced image is going to require a longer than normal exposure. It is also suggesting that the images are hard (a lot of contrast) How much will not become apparent until the segmented test print has been produced.


My normal exposure set up for the enlarger is F8 at grade 3 this is my datum point to which I judge how well I have exposed and developed the film. The first test print confirms that the negatives are very over exposed, requiring a second test because the results are so weak. I must admit that I was a bit blasé with my pinhole camera exposure times. This camera tends to bring the worst out in me when it comes to proper control but then it is all part of the fun.


I have already compensated for the longer exposure time by opening up the enlarging lens to F5.6 doubling the amount of light I would usually need. I also know that the contrast is higher than normal from a previous set of exposed photographs. It is to do with the Studional I used to develop the negatives in. A previous session showed that the softer grade 2 would give better results.


Without the contact print I would have spent much longer in the darkroom making test prints to find what the base exposure should be, if I had not been pre warned. It also indicated that the completely white looking skies would require a lot of burning in to bring the detail out shown on the negatives.


For me making a contact print ensures that I get the most out of my printing session. It allows me to preplan what I need to do to get the best out of each negative without wasting a lot paper and time. The later for me is always in short supply.


Technical data:

Zero pinhole multi format 120, tripod used, Film Fomapan 100, ISO 100, Developed in Studional, Printed on Ilford multigrade gloss RC 8 x 10, Developed in Tetenal Eukobrom 
AC.


Unintended double exposure.


Saturday 3 December 2016

Freestyle printing session


I don't know about you but sometimes I find the constraint of having to make a segmented test print to determine the right exposure for each negative tiresome. I sometimes feel that it interferes with the creative process. On these occasion in the darkroom I put myself to the test with what I call free printing. I can see some of you shaking your heads at such a notion. It is a way of pushing your instincts creatively. 

Let me lay out the rules of this creative freedom. I pick a random sleeve of negatives, run my eye over them to see what catches my attention. Load that negative into the enlarger and then make a half sheet test strip at five second intervals. This will be the only test strip of the session providing the starting point for each subsequent negative I opt to print. I give myself two attempts at getting the exposure right using my experience and knowledge (best guess) to refine it with dodging and burning. This is where your print technique is put to the test and your ability to choose negatives of the same density.
First print.
 

Into the darkroom. I have chosen a set of 35mm negatives that have a selection of landscapes I made while I was in the lake district and the one that took my eye was looking across the lake into the sun. As gooder place as any to start the printing session.


After adjustments

With this negative loaded I set up the enlarger as follows: the lens to F8 and the paper grade to three. These are the most common settings I use when printing. The paper used is silverproof matt. With the test strip made I look carefully at it to work out the overall exposure and how much more light may or may not be needed for a balanced print. 


The mountain into the sun image is the one I made the test strip for. Even so it proved difficult to get right. I chose to print overall at 32 seconds adding an extra 15 secs for the sky. This did not allow for the mountain slops on the left of the picture which needed less light to stop them completely blocking out. The burning in of the sky did not take into account the brighter area to the center right leaving it a bit blown out. So for the second print the mountain slops to the left were held back for -7 secs and the off center sky received a further +15 secs.

Before adjustments

After adjustments


The second negative chosen was the fence post into the sun. I already knew that overall this would require less light to print, the trick here would be by how much, after a bit of consideration I opted for 27 secs. Which worked well but I felt it needed even less. Overall the second print was exposed for 24.5 secs with an added 5 secs for the sky. Not much of a change, but the affect on the foreground was positive.


Before

After

Right first time no adjustments


The third negative is of the dog in the lake. I chose 25 seconds for this because the negative looked a bit dark indicating some over exposure. I was too bold with my exposure time as the print is a bit washed out with no sky. So I up it to 28 secs and added +28 for the sky. In cases where the sky is whited out I double the amount of light when burning in. Overall a much better picture.


The final image looking through the trees is a straight print, the overall time is 27 seconds. I'm happy with the print, yes I could adjust a couple of bits, but they would not add much to the overall look.

Free flow printing sessions are not always successful but it does free my mind especially if I'm having a bad time getting a picture the way I want it. 

Saturday 19 November 2016

Picture Post Fisheye.

I am very pleased to be able to share these images with you. From time to time I'm asked to process and print for an artist friend. This is my first exclusive you will not find any photographs by this artist anywhere else on the net.


Technical Data:

Camera lomograph Fisheye 2, hand held, Film Fomapan 400, box speed, developed in RO9, Printed on Kentmere VC RC gloss 9x12, developed in Tentenal Eukobrom AC.

All the images I print are chosen by the artist from a contact print of the whole film. I'm instructed not to dodge or burn  unless it is really necessary. 


Sunday 6 November 2016

Studional first use.

Negatives developed
in Studional.
The darkroom is beckoning again, with the death of my father the will or the inclination to do anything connected with film photography has been at a stand still. It is as though my creative energy has been knocked out of me. It was the childhood wonder I had in his fold out camera that peaked my interest in photography in the first place. Spurred on with the little camera he then gave me. Which was later given away.


The darkroom has suffered with my long absence. It is a dusty dirty hole in need of some maintenance. I have also neglected to replace used up materials: film developers, photo papers etc. etc. It has taken time getting things back into shape, for now I will have to make do with what I've got materials wise. Which just happens to be a fresh bottle of Studional.


This is A&Os formulation of the once dead developer. It is advertised as a fine grain, clean working general developer - that can be used in deep tanks?? - or single use. I have interpreted deep tank to mean batch development where a number of film can be processed from a single batch of diluted developer. It suggests dilutions of 1+15 to 1+30 for one shot use. So I am assuming the same for batch production.

Grain pattern produced by Studional on FP4+.
The colour cast represents printing grade three.

I have been told that this developer is akin to RO9s and can be treated in the same way. This is the first time I have used it so I will do as suggested - which is not my usual way of working - I tend to do what my instincts tell me; I must still be out of sorts!!


I have a number of rolls of 120 FP4+ and 35mm Fomapan 400 to process. Checking through the dilution chart it suggests a dilution for the above films as being 1+15 with a developing times of 3.5 and 6 minutes for the Foma. (Digital truths dev chart is a good place to go for dilutions and times.)


I have made up a litre of the developer at 1+15 and intend to use it as though it was RO9s that means on the day of dilution you can process 12 film of mixed formats in a litre with no time compensation. The developer is good for three months with compensation factors for how long the developer has been stored diluted. (Adjustments: 1-3 days 5%, 4-8 days 10%, 1-2 weeks 15%, 2 weeks to 3 months 20%.) I know it sounds a bit flaky but true, I have already tested this with RO9s so I know it works, with no degradation in the quality of the negatives. Like RO9s you will need to protect you hands when using it. It has a caustic bite, this is the second developer that I have experienced this with.


On the day of dilution I processed four films: Two FP4+ and two Fomapan 400 both were exposed at box speed. I developed the Foma for the suggested time and the FP4+ at 4 minutes. Using my standard agitation method: 12 inversion in the first min and then 4 each min after that. Short developing times like that of FP4+ always makes me feel there is something missing. I think it is because I'm used to using longer times. The results are clean and crisp with a good tonal separation. They also look to have more contrast than what I'm used to.

I didn't know at the time of making up the developer that it would take a month till I would use it again. This time with a couple of rolls of 120 FP4+ and Foma 100. In this case I added the 20% compensation. After the first set of neg's had been processed I checked them. No change in the tone or quality which was good news for those that followed. In all, the developer produced ten good sets of negatives before the three month suggested time period was up, without any noticeable changes to contrast etc.


I have contact printed all of the film processed in the Studional. Out of the hundred and seventy negatives only a couple show signs of air bells (bubble marks) which is not bad, I have experienced a lot worse. The contact prints were made on Ilford multigrade RC gloss, developed in Tetanal new Eukobrom AC.

Having printed some of the individual negatives I can confirm that there is an increase in contrast and that it has a fine grain structure. It has helped to produce some finely toned photographs. It has also helped me regain some of my creative spark that has been missing over the months. I cannot say the same for writing these articles I am still finding it difficult to get started.
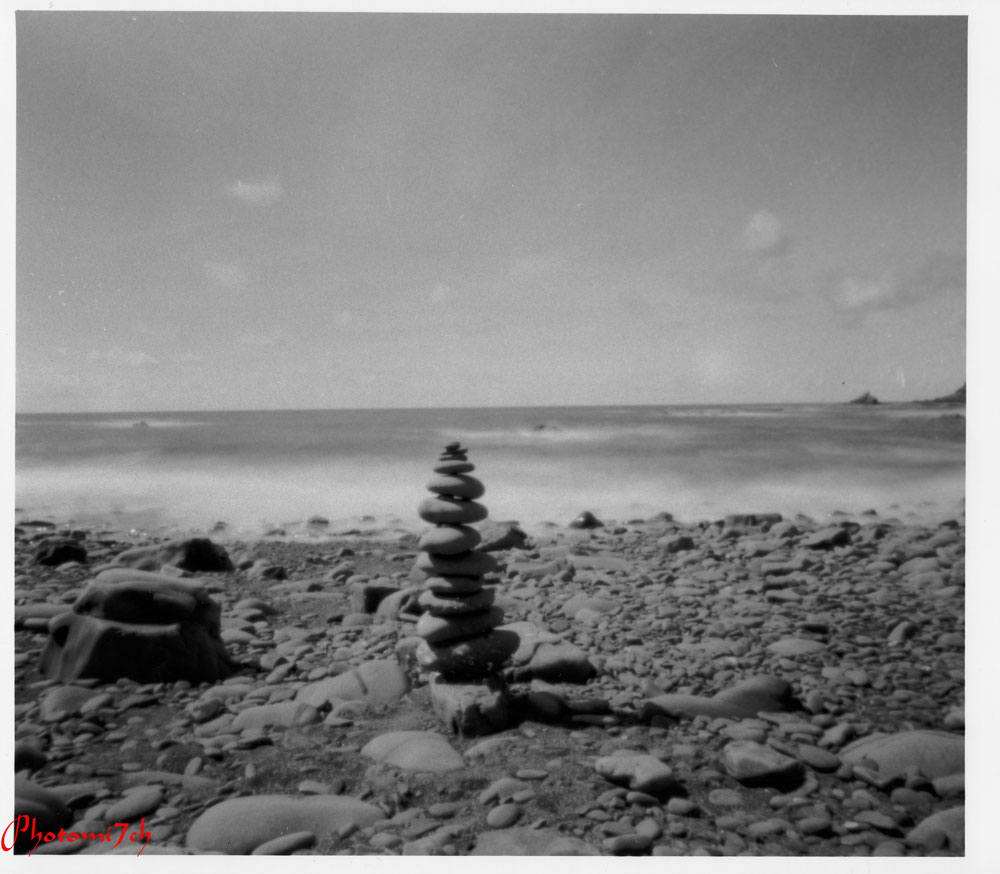


Technical Data:

Bronica SQAi Hand held, Film FP4+ @ 125 ISO. Box speed, 120 format 6x6 negative, Printed on Ilford Multigrade gloss RC 10 x 8 @ grade 2 developed in Tetanal Eukobrom AC.


Friday 28 October 2016

Picture Post Zero

It has been sometime since my last article reasons behind this absence will become clear in later posts.

To get things going here are some images I made with a Zero pinhole camera multi-format.  


Technical Data:

Zero multi format, Negative size 6x6, Film FP4+, Developed in ID11 (first five), Developed in RO9 (last three) Printed on Ilford multigrade RC gloss, Grade 3, Developed in Multigrade.


Wednesday 16 March 2016

H. BC word of wisdom 2


Photography seems like an easy job but it demands a strength of concentration together with an enthusiasm and a particular discipline of mind. It is through great economy of means that simplicity of expression is attained. One must always take photographs with the greatest respect for the subject and from one's point of view.


This is my personal choice: from this I have a very strong prejudice against photographs that seem ' pre-arranged' or 'set up' 

By Henry Cartier Bresson

Monday 7 March 2016

Picture Post Introduction The Forgotten.

This is the first in a new series. This is where the image has center stage and the writing takes a bit of a back seat. I may include some thoughts on the pictures but will be kept to a minimum.

  To give you an idea of what I mean:

This series of images were made in a church grave yard in a small village not far from me. A place I have visited a number of times over the years. It has a quiet air that encourages you to sit and contemplate for a moment or two. On this occasion I could not resist making a few images, it was the way the light was streaked across the ground catching the frost making it sparkle that set the camera to my eye.


After I had processed the negatives I scanned them to the computer to sort out the levels and tone of the pictures, a feeling of sadness came over me. As I studied each image that was worked on I had a strong sense that these were now the forgotten.


Technical data:

Nikon FM, lens 80-210 zoom with macro, film HP5, ISO 400, developed in ID11 for 14 mins.


Friday 4 December 2015

Redeveloping the negative.


You will at some point in your developing career, come across a negative(s) that has so much contrast that no matter what you do, you cannot get a decent print. There is a method you can use to retrieve the situation by redeveloping the negative(s).

To start with you will need to make up a solution of halogenizing bleach as follows:

  • 10 grams of Potassium permanganate.
  • 10 grams of Potassium Bromide.
  • 1 litre of cool water.
  • Stir this until all is dissolved in the water.

This can be carried out in a normally lit area so you can see the change in the negative. It takes about 5-7 minutes for the black silver on the film to be converted to a yellowish precipitate. You can remove the film from the bleach when the strongest high lights have gone a pale grey and wash well in running water. Now place in a soft compensating developer. When the highlights return to a greyish yellow remove the film and place in an acid stop bath for 30 seconds. Then fix, wash and dry as you would normally. This should produce a softer easier negative to print.

It is probably better to use a farmers reducer which subtracts the density from a
processed negative.They come ready mixed, you only add the right amount of water. This process can be repeated as many times as needed to get the right density; it's not a one shot approach. Allowing you to do a test print at each stage. There are three to types:

  • Kodak R-4a is best used for over exposed negatives and is easy to control. Acts on shadows first, then mid-range and then highlights. Mainly used for clearing fog from film and reducing prints.
  • Kodak R-4b is best for over developed negatives; it removes equal amounts of deposited silver from the highlight and shadow areas.
  • Kodak R-15 This is a super reducer, striping the highlights and not the shadows. For seriously over developed negatives and is the most difficult to control.

This is just a basic outline on the subject and will require further reading.

Friday 23 October 2015

RO9 special/ Studional three months on.

Out of date Fomapan 200
Another month on and I'm back to using the turquoise Studional and a further cutting from the Fomapan 200, only this time there are couple of dozen images to muck up. The chances of something going wrong diminishes as you get used to the way the developer works, the only spanners are out of date film and senior moments, if it all go's wrong I may learn my lesson.


Out of date Fomapan 200
So far the developer has been used seven times without it missing a step. When comparing the negatives with the naked eye or in this case a magnifier the density between the batches looks to be identical. As far as the compensation factor is concerned this is uncharted territory for me. The question is, does 20% allowance still apply two months on? Thinking on it carefully the answer is yes. My reasoning is that to increase it without knowing whether the suggested compensation worked or not does not make sense. I should test the information and not do my own thing.
 

The information on this developer states that once it is diluted one litre should be good for three months or 12 film processes which ever you arrive at first if stored properly. I will admit that the bottle this is stored in is to big leaving an air gap that will allow the developer to deteriorate more quickly according to the data sheet. I have not done this on purpose I didn't have a container the right size and yet it still works well. Obviously it is better to do what manufacturer recommends to get the best results but in the real world we all make compromises. So is it such a surprise that I'm getting good results? The real test will be at four, five or six months after dilution.


Out of date Fomapan 200
 I processed the negatives as previously mentioned and the results are just as good so much so that I also developed a roll of Agfa APX 100. It just so happens that the dilution for this film is 1+15 (the same as HP5+) or 1+31 for 4 and 8 minutes respectively at 100 ISO. With the 20% adjustment added it took all of five minutes in the developer to receive another set of good looking negatives.


The more I use this developer the more impressed I am with it.


 The table below shows ten popular film that use the 1 +15 dilution. The ones marked with * are the ones I have had good results with at the suggested times with the compensation added.

The double ** is my suggested time for this film at this dilution.


Dilution of 1+15


Film
ASA/ISO
TIME
Adox CHM125
100
3.5
Agfa APX 100 *
100
4
Fomapan
100
10
Fomapan **
200
6
FP4+ *
125
4
HP5+ *
400
4
Neopan
400
6
PAN F+
50
3
Rollei Retro S
400
8.5
Tri-X
400
05/03/05

All the images that appear in this post were Developed in RO9 special
Studional.

This image is from the Agfa APX 100 film mentioned.