Pages

Showing posts with label chemical. Show all posts

Friday 4 December 2015

Redeveloping the negative.


You will at some point in your developing career, come across a negative(s) that has so much contrast that no matter what you do, you cannot get a decent print. There is a method you can use to retrieve the situation by redeveloping the negative(s).

To start with you will need to make up a solution of halogenizing bleach as follows:

  • 10 grams of Potassium permanganate.
  • 10 grams of Potassium Bromide.
  • 1 litre of cool water.
  • Stir this until all is dissolved in the water.

This can be carried out in a normally lit area so you can see the change in the negative. It takes about 5-7 minutes for the black silver on the film to be converted to a yellowish precipitate. You can remove the film from the bleach when the strongest high lights have gone a pale grey and wash well in running water. Now place in a soft compensating developer. When the highlights return to a greyish yellow remove the film and place in an acid stop bath for 30 seconds. Then fix, wash and dry as you would normally. This should produce a softer easier negative to print.

It is probably better to use a farmers reducer which subtracts the density from a
processed negative.They come ready mixed, you only add the right amount of water. This process can be repeated as many times as needed to get the right density; it's not a one shot approach. Allowing you to do a test print at each stage. There are three to types:

  • Kodak R-4a is best used for over exposed negatives and is easy to control. Acts on shadows first, then mid-range and then highlights. Mainly used for clearing fog from film and reducing prints.
  • Kodak R-4b is best for over developed negatives; it removes equal amounts of deposited silver from the highlight and shadow areas.
  • Kodak R-15 This is a super reducer, striping the highlights and not the shadows. For seriously over developed negatives and is the most difficult to control.

This is just a basic outline on the subject and will require further reading.

Sunday 23 September 2012

A fixing question.


This is the second most important part of the process after development. Proper fixation ensures the longevity of your prints and negatives. Fix works by removing the unused silver bromide particles from the film or paper. If not done properly, over time they turn black ruining the image.
 

The way the fix works on the emulsion is to chemically convert the remaining silver bromide into complex argentothiosulfate an insoluble  and unstable compound which after a few seconds can be seen on the film  as a milkiness (not visible on prints) this should be allowed to continue until it has disappeared otherwise the negatives will turn black. As the process continues the fresh hypo from agitation turns the insoluble into soluble sodium  argentothiosulfate which can be washed away in water. The fixing of the image is quite quick, it is turning the by products into a water soluble compound that takes the time.

The darkroom practitioner needs to be carefully when choosing a fix as some cause staining when being used with paper. There are three types: alkali, plain, and acid.

         Alkali are the most modern and efficient with today’s emulsions. They are the easiest to wash out of papers and cannot be over fixed.

          Plain is a mix of Hypo (thiosulfate) and water that should be used as part of a two bath system, then only as a second one as it can cause staining and other problems.

         Acid fixes are known to be quick and should be timed carefully as they can cause bleaching. Hence the reference rapid.

Some fixes come with hardening and should not be used if you are thinking of toning prints. Otherwise it is down to personal choice.


Film Fixing.
 

A lot of people ask how long will the fix stay fresh and how many rolls it will process. I mix up  1000 ml or 1200 ml  depending on how many rolls of 35mm and or 120 format I think will be processed at the same time. ( I  use a different fix for paper) I keep the fix until I have developed a mix batch of between twelve and fourteen rolls. Which can take some months to achieve.

 
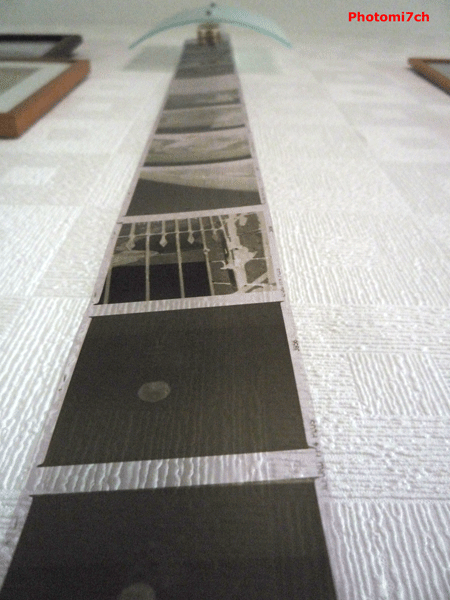
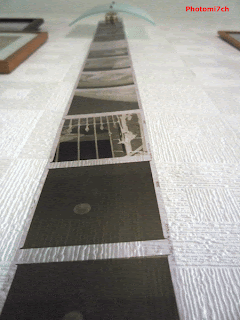
The film has a milky look after one minute in the fix
There is a more scientific way of being sure what the limits of the fix are for yourself. It can only be done with a fresh batch of fix. After the film has been in the fix for a minute you open the process tank, checking to see if the milkiness has cleared. If it has then give the film a further three minutes this will also establish the time the film needs to be fixed for. You will need to do this check  with subsequent films until the clearing time is double what it was when the fix was fresh. Having kept a check on how many films you have processed this will give you a safe number per litre for the future, hence removing the need to check each time. There are other method for checking fix life which will be posted later.


Paper fixing.


There are two methods to choose from.

         Two bath method. This where two lots of fix are made up and set side by side. The first bath does all the work, with the second bath removing any argentothiosulfate that have not  been converted to sodium argentothiosulfate in the first place, making for a more complete final wash. Once the first bath is exhausted (which you will need to test for), the second bath becomes the first and a new one is mixed for the second. When the second now first bath is exhausted both should be ditched and two fresh fixes made up.


I use this method occasionally If I'm toning. To get round all the testing you need to know how many prints you can get out of the fresh  bath and the partly used second, for each of the sizes you print most often. It is a lot of work to start with.
 

         Single bath. Is a fast acting concentrated fix that takes one minute to do the job. This method needs to be timed exactly; to leave it longer will negate  its advantages. Most of the fixing is done in the first fifteen seconds, to leave it longer than one minute will allow complex compounds to build up making them difficult to wash out.
 

I use this method most of the time partly because I do not have a lot of time to spend when printing and the other is I do not do a lot of toning.


Please note: when fixing papers you should check what the manufacturer suggests in the instruction provided with the paper. I have noted the recommendations have changed since writing this article.  


Wednesday 27 June 2012

Making up PMK Pyro from Raw.


This is the first time I've mixed a developer from scratch. I find when  preparing for something that is new, it seems to take an inordinately long time to set up. This has been no different and I can understand why more people do not mix for themselves.
Before you start.
If you have just purchased new scales it is a good idea to check how accurate they are. First thing to do is place the scales where you plan to make up the mix and zero them.The table that follows is a simple and affective way of checking the accuracy.

These weights came from the royal mint:

Coin test
        ●         1p – 3.56 grams.
         2p – 7.12 grams.
         5p – 3.25 grams.
         10p – 6.5 grams.
         20p – 3.0 grams.
         50p – 8.0 grams.
         £1 – 9.5 grams.
         £2 – 12 grams.

An alternative to using scales is the Twenty P mix. This is where twenty p coins are used as a counter balance to weighing out the powders. While talking about alternative ways of measuring out you can use measuring spoons. This could be a more reliable way of ensuring that each mix is consistent. If you measure out the chemicals with number of spoons it will not matter that the powders have changed in volume by absorbing moisture or drying out.


With the checks out of the way what next? How much are you going to make up as stock solution? I know from previous use that it will keep for a very long time, even years. I personally prefer only to have small amounts of developer on the shelf ready for use. This is partly because I use several different film and paper developers.  Anchells Darkroom Cookbook  suggests that you make up part A at 750 mls and part B at 1400 mls; well that is a large amount for a first mix not only that what happens if you get it wrong  or heaven forbid it does not work. Luckily Trevor Crone has published the weights for a smaller amount:


Solution A to make 250mls:
         Metol 2.5 grams
         Sodium metabisulphite 5.0 grams.
         Pyrogallol 25.0 grams.

Solution B to make 500mls

         Sodium Metaborate 125 grams.
Stock solution should be made up with distilled/de ionised water. EDTA-disodium is an optional ingredient It adds gold tone to the silver of the film.

Trevor suggests a reduction of 10 grams for solution B to help combat separation when mixed. He has also said that to his knowledge it has not affected the quality of his negatives.  I can confirm the drop out is reduced but I think this is mainly due to the reduction of powder. Although these quantities are more reasonable  I made my batch up at half these weights.


Other bits
Paper cup cake holders are a good idea for pouring the powders into when it comes to measuring out but they will only cope safely with small weights. You can get plastic cups to do the job which maybe a better route to take if you plan to mix all your own chemicals.

Common sense should prevail when it comes to measuring out these powders. Gloves and a breathing mask should be the minimum safety precautions taken. If the powder gets air born it will irritate the lining of your nose. Also if you get it on your hands it  will irritate or burn your skin. So please be sensible.  


Adox CHS 100 Pet ISO 100 35mm flim.
Developed in PMK Pyro,
Printed on silverproof paper,
Developed in Ilford warm tone.
Having purchased all the ingredients to mix it myself, is it more cost affective? The over the counter premixed price of PMK is about £9 for 10 litres. The cost of all the ingredients is around £39. The batch that I made up  was equivalent to ten litres and saved about 50p. Taking every thing into account scales, time, safety etc. etc., it may not be worth all the trouble and money as a one off. There are advantages to this method such as the flexibility of making up the quantities of developer, stop and fix you require and being able to try out other developers you would not normal be able to get from the mainstream. The main purpose for me was to ensure a ready supply of PMK Pyro. Now that I have started down this road as my stop,fix and other developers run out they will probably be replaced with powdered formulas.


Acknowledgements and Thanks to the following:


Paul C, for the royal mint weights. 
Mr S. Nichols for the 20 P mix.
Trevor Crone for the reduced PMK Pyro mix.

Wednesday 6 June 2012

Pyro PMK Raw what is needed


I have been purchasing PMK Pyro as a set of pre-mixed powders just like ID11 and D76. Two of the most popular mass produced powdered film developers; just add water and away you go. Recently I have needed to replace my stock of PMK developer so went to Silverprint my regular supplier to replenish the stock, only to be told that they no longer did mixed batches for sale over the counter. They advised me they stock all the ingredients for self mixing. This took me aback, several expletives entered my head (which were not expressed) what was I going to do! I have a number of tests planned for developing other makes of film let alone the projects on going.


Raw chemicals to make up PMK Pyro
I raised the question on the film and darkroom forum and after the responses  came back (thank you all) I decided to buy the individual ingredients; it is quite expensive to set up, partly due to the way the powders are sold but should make it cheaper over time. This raised the thought of making up all the chemicals I used in the darkroom from powder, meaning they will be as fresh as possible at the point of use. 


What will you need? To start with a set of scales, they do not have to be that expensive but should be able to read very small amounts. The relevant powdered chemicals which are, Metol, Sodium Bisulphite (Sodium metabisulphite), Pyrogallol, EDTA di-Sodium (optional) and Sodium Metaborate (Kodalk).

Saturday 5 May 2012

Light striped prints


Another printing fault is light pollution known as fog. This is assuming it hasn't happened in the camera.


The dark line you see running up this picture
 it the result of light
getting to the light sensitive material. Fogging .

         It Could be where stray light from a darkroom not properly blacked out has found its way to the light sensitive side of the the paper you're using.

         Your safe light is too close to the enlarger and or the wrong colour.

         It can also happen if your enlarger leaks light when being used.

         Badly stored and out of date paper can also be fogged.

The causes of these faults, also point to ways of curing them. This post suggests a way of detecting light induced fog.

Monday 2 April 2012

Processed print faults


Exhausted Developer
With all the processes that need to go well when producing a print in the darkroom it is surprising that faults are not more common. Even so the odd  one comes along to de-rail a good printing session. It does not matter how experienced you are sods law trips us all up!


Exhausred stop


Here are some of the most common faults: 


         Chemical fingers - this where odd irregular marks appear on the finished print usually at the edges. Make sure your hands are free from chemical contamination and dry before you handle photographic paper.

         Exhausted developer - fails to produced a full image once it has reached its completion time.
Exhausted Fix

         Wrongly diluted developer - produces faint grainy image. A bit like the above.

         Exhausted stop - leads to a purple tone to the white areas of the print.

         Exhausted fix - the slow brownish toning of the finished print in day light.


Related Posts:

Wednesday 4 January 2012

PMK Pyro a working solution


I am no stranger to making up developers from powders into stock solutions. The first thing you notice is the very small amount it makes up. Next, it comes in two parts and last, the powder needs to be mixed into distilled/de-ionised water ( used for car battery top ups ).
Solution A mixes up as follows:
Pour 80 mls of de-ionised water at room temperature into a measure. Open the packet marked A inside there are two sachets, take the smaller one and mix that in until it dissolves, do the same with the second one. It is important that they go in, in the right order. Make the solution up to a 1oo mls once done pour into a small storage container.
Solution B
Pour 160 mls of de-ionised water at room temperature into a measure. Add the contents of packet B slowly to the water stirring all the time until dissolved. Then top up to 200 mls. Again pour into small storage container.
Some notes:
By the time all the powders are mixed in, the amount of top up will be very small. The distilled/de-ionised water helps it to stay fresh and will keep well in partly filled bottles. Solution B has a bit of drop out and will need to be shaken clear before use. Makes up to 10 litres of working developer.
Freshly made PMK Pyro
Making up a working solution:

A normal mix is as follows,
   One part A + two parts B to One hundred part of water.
e.g: To make 600 mls of working developer. Measure out 500 mls of water add 6 mls of solution A then add 12 mls of solution B and top off to 600 mls and stir. It is important that they go in in this order.

Notes:
   When you add part B to the water it will turn a straw colour, if this happens it's OK to use.
   Working temperature should be 20- 21 degrees C depending on which make of film you are using. You can check this with Digital truths massive dev chart.
Used PMK Pyro
developer.You reuse this at the
end of the process to add extra
stain to the negatives.
   Prepare everything else before you make up the working developer then use it straight away as it oxidises very quickly.
   When you pour the developer out at the end of the allotted time the solution will be very dark brown.
   It is a 'use once and throw away' developer.
   It is not necessary to re-dip the film in the developer after it has been fixed to increase staining.
   Make working solution up with filtered tap water.

Wednesday 14 December 2011

Fixing negatives and papers


It is important to fix your negatives fully, this will ensure their longevity.

Fixing removes the last of any light-sensitive material from the negatives stabilising and securing the images so they can be viewed in day light. The temperature of the fix should be the same as the developer and stop bath, 20 degrees C.
Most fixers nowadays are rapid fixers supplied in liquid concentrate form and will complete the fixing process in about two to five minutes. (always check the instructions on the bottle) over fixing will start to bleach the negative. These fixers are usually suitable for film and paper. There is a chance in the case of warm tone papers that they may suffer from bleaching of their warmth with rapid fixers, it would therefore be better to use a more traditional fixer made up from a powder to ensure no loss of tone.


Tuesday 13 December 2011

Stop bath


Does what is says on the bottle! It is used instead of a wash as it helps to prolong the life of the fix and stops the developing process straight away. You must be careful not to contaminate the developer with stop, it will destroy it.

Stop can be obtained in two types of concentrated solution. One is odorless made from citric acid and the other acetic acid with a vinegar smell which can be quite pungent if used for prolonged periods in the darkroom, when processing prints in trays. Both have a colour change indicator added to the solutions so you can tell when it is exhausted.

Dilute the concentrated Stop one part solution to nineteen parts water (or as instructed on the bottle.) say 50 mls stop to a litre of water with a process time of one to two minutes, you will not gain anything by extending the stop time it is most active in the first few seconds. Agitate for the first thirty seconds, this ensures the developer has been completely deactivated, then ten seconds in every minute if you stop for two minutes.

Monday 12 December 2011

Developer shelf life.


The keeping qualities of photographic chemicals to a degree is dependent on the dilution of the mix. In the first instance you should always follow the manufactures recommendation when mixing stock solutions by only adding the chemical to that quantity of water thus giving you a known starting point. If you require a more dilute working developer you should only make this up just before you are about to use it. Once used it should be discarded.

Reusable developers are poured back into their containers when finished with. Each time you pour it back a little bit is used up, it is a good idea to keep these containers full to stop the developer going off. This can be achieved in several ways if it is a plastic bottle you can squeeze the air out just before you nip the cap up, add glass marbles to the bottle so increasing its level, use a concertina bottle or the plastic bag out of a wine box ( if using one of these make sure it has been thoroughly cleaned.)

Remember that developer that has been used is likely to go off more quickly. It is a good idea to keep a record on each bottle of how many film or prints and what format has been developed. When you think you have reached the maximum usage discard it and make a fresh batch.

Sunday 11 December 2011

The Thermometer.


This is one of the most important pieces of kit in the darkroom. As already mentioned temperature is one of the main controlling factors in the processing of your films and prints. It is important that you have good quality thermometers that are graduated to at least half a degree but a quarter of a degree is better and one that has a thicker line at the vital 20 degrees C. It is a good idea to have a thermometer for each of the chemicals you use in the processing of your films and prints as it will stop cross contamination.Also there will be no hold ups if you break one. It is recommended that you keep to one type, preferably alcohol as it is safer than mercury. If a mercury thermometer breaks it will contaminate the chemicals it comes into contact with and fog any prints that are being processed at the time.

Friday 9 December 2011

Farmers reducer.


This is a follow on from my last post on reduction.

Over developed or over exposed negatives may need to be reduced to make them a better printing prospect. This is achieved with chemicals that strip silver from the final image. Like developing, reducing a negative requires practice so you get an idea of how much to take away. It is best carried out in a place that is well ventilated with diffused light so you can see the process at work. It is a good idea to pre-soak the film it will allow you more control by slowing the process down. With experience you will get to know at what point to remove the negative. The chemicals do not stop working instantaneously. Because you can repeat this procedure it is better to reduce the negative in small steps so as not to over do it.

Reducers can be supplied ready mixed or you can mix your own. The formula that follows is a proportional reducer for overdeveloped negatives:

Stock Solution A

  • Potassium Ferricyanide 7.5 grams.
  • Water 1 litre.

Stock Solution B

  • Sodium thiosulphate (Hypo crystals) 200 grams.
  • Water 1 litre.

Notes: Ferricyanide has good keeping qualitys if kept out of strong sun light. Once you have mixed the chemicals you should use immediately. If you are using a stepped method of reduction do not contaminate solution A with Solution B as it will stop working. Working temperature of 20 degrees. You can place a dry negative in solution A but will need to watch the process carefully for between 1-4 minutes then transfer to solution B for about 5 minutes.

Potassium ferricyanide is a poison. Avoid contact with your skin and do not breathe the fumes.

Friday 2 December 2011

Single shot developers.


One shot developers do what they say on the box! They are for single use and have a quality advantage over reusable ones, also removing the worries about usability. I know this may sound wasteful in these times of rising prices, but what cost do you apply for peace of mind when developing those precious negatives.


The advantages:

  1. Fresh developer each time.
  2. Ensures constant quality.
  3. Consistant developing times.
  4. No need to use replenisher.

In most cases these days most developers can be used as single shot, in the case of PMK Pyro and RO9 it is the only way.

What does developer do?


The function of the developer is to bring out the latent image held in the emulsion. This is achieved by a chemical reaction, acting on the silver, producing dark areas where it is light and bright areas where there is shadow. The negative is reversed later with the print. The two most important things to keep at the front of your mind are: the development time and the temperature. It is these two factors that ensure the ultimate image quality you later produce in the print. Too short a development time will produce too thin a negative, like wise too long a process time will make the negative too dence, leading to very short and very long print times.

Friday 11 November 2011

Wet side of the darkroom.


On this side of the room you will have laid out your developing dishes in the following order: developer, stop-bath, fix, print washer and/or sink. These may have heaters under them or you can have a slotty laid out in the same way. Obviously this will take up less space.
Typical wet side layout


This is where you keep your chemicals, it is also the place that the solutions are poured out and back into their storage containers. The height of this table needs to be right so you can work comfortably in the standing position. It is a good idea to store these chemicals under the table if there is a leak it will go on the floor and not drip into your working dishes ruining your prints. For safety reasons it is not a good idea to lean over your dishes to retrieve items from shelves above while your working as you may knock the contents of the dishes over yourself.

Remember that these chemicals need to be treated with care and you should follow the safety advice recommended by the manufacturer.

Safety in the darkroom


There are some health and safety issues in the darkroom. The most commonly used chemicals are no more dangerous than household detergents and bleaches, some of the more specialized chemicals can be hazardous. Here are some do's and don'ts to make things safer.
Do's
  • Wear gloves ( rubber or Latex), protective cloths and use eye protection.
  • Wash spillage's to skin and eyes quickly with lots of water.
  • Keep a tap hose for this purpose'
  • Clearly label everything.
  • Make sure there is good ventilation.
  • Dispose of solutions safely' seek advice if needed.
  • Mix chemicals slowly and in the right sequence.
  • Filter water and home-made solutions to remove bits especially for film processing.
  • KEEP ALL CHEMICALS OUT OF THE REACH OF CHILDREN.
Don'ts
  • Eat, drink or smoke when mixing chemicals.
  • Inhale dust from powders.
  • Fail to read instructions and warnings first.
  • Use kitchen scales for chemicals.
  • Use metal containers, mixers and trays.
  • Add chemicals together without knowing if the outcome is safe.
  • Add water to strong acids or alkali's ( e.g. caustic soda-Na OH). Always add them to water not the other way round and slowly.
  • keep large glass bottles on high shelves.