Pages

Showing posts with label colour. Show all posts

Monday, 6 September 2021

Out of date film Home truths.

The use of out of date film has become very popular over the last few years. So much so that it has become a bit of a sub culture within the film world, with some photographers stating that it is all they use. I get the impression that in some cases there is a bit of grand standing, look at me, my photography is better because of it! If it has improved your picture making then all well and good, but I have to say that some of the images I have seen makes me wonder why did they bother! I personally see no advantage in using out of date, apart from the fact it is slightly less expensive than fresh. 

Lets be honest about this how often do you end up with a blank film?

But then again there is a certain extra thrill in the knowledge that when you take the lid off the developing tank and view the wet film with nicely exposed negatives, a sense of relief at your gay abandonment to the natural order of things was worth the risk. In my experience the risk is very small but if you read some blogs it is a step to far to contemplate.


120 Fujicolour Superia
out of date by 10 years.
So why would you treat out of date film to a different set of process times?

I have always used out of date film long before it became popular. I just keep using the film stock till it runs out. It was not until recent times that I have taken note of the process before date and now that I have that knowledge it has not made any difference to the way I make images and process the film. When comparing them to in date negatives of the same make I can see no difference.


120 Fujicolour Superia
out of date by 10 years.
So how do you store your film?

There is a lot of myth and misunderstanding about how to store your film after you have purchased it. The one thing that destroys film faster than anything else is humidity. Even in these situations, as long as the film is kept in its sealed containers and wrappers (medium format) it will remain in good condition. So common sense would suggest that you only break the film out when you are about to use it. Surely? 


So why would you need to store it in a fridge or freezer?

I used to do this until I was caught out by not getting the film from the fridge the day before. I seriously questioned whether there was any advantage to doing it. Common sense suggested that the weather in the UK never really gets that extreme so why bung the fridge up? -(there was a cheer from the other half when I removed it all!) - after all, I purchased it to use, not stock pile. Obviously everyone's circumstances are different. But I have found a growing number of people who store film in a draw find it more convenient and allows for spontaneity. Not having to second guess myself about will I or Won't I need a film tomorrow has freed up creativity.

 With this in mind I purchased a carton of out of date film. It is a mixed box of T max 400, Ilford delta 100, 3200 and XP2 400. I did this because I had been toying with the idea of trying out TMAX 400, but it then occurred to me that I had never used the others either. So now is my chance. I was told they had all been stored in a draw and were still in the sealed wrappers. Good enough for me! 

This selection of emulsions are a maximum of seven years out of process date. I have used so far the delta 100 and 3200 at box speed. Developed in RO9 @1+50 @20C using my usual method. The results are what I would expect from fresh stock.

There is a down side, it can go wrong occasionally, but it is a lot rarer than people would have you believe and it is more than likely to be human error than failure of materials. Some of you will be uncomfortable with the idea and I understand that reticence, especially if you are new to film photography.

I have written two other posts on the subject: Film storage - is a more technical look and colour out of date - which talks about an old film left in the camera for years. My view on film storage has not changed as these other post will reinforce. Remember do not be influenced by other peoples narrow mindedness. Photography is about being creative and that means there are no rules. 

Out of film Delta 3200, dev RO9,
 printed on Adox MCP

Here is a link to the delta film mentioned earlier in the article.

Updated 2022:

Since writing this there is a downside to out of date film. It is unexpected and inconsistent in its appearance and affects black and white 120 film so far. The main reason for it is the paper backing, for some reason it can produce a blotchy look to the negatives which is most noticeable in the sky detail.  


The following pictures show the affect: 


Technical data:

The black and white images were scanned from photographs. 

Camera used was a Bronica SQAi with a 120-format film back.

Black and white film used for the pictures above Fomapan 100 with the black backing paper. They have recently changed the paper to the same one Ilford use. you can see what the different backing papers look like here


Friday, 12 January 2018

Newton's rings. Updated


This effect can happen when using medium format and larger negative carriers as they use glass to keep the negative flat. Most carriers today use a frosted piece of glass above the negative known as anti Newton glass. 
The rings occur in the areas where two clear smooth flat pieces of glass lie next to each other but do not quite touch. The interference happens because the light rays are refracted, this produces irregular shaped dark rings in the projected image. This will happen more readily if any of the surfaces are wet. You can get round this by using a paper mask with the negative in the carrier. This will block out the light in the places where there is a gap between the glass surfaces. You will need to check the projected image to see if they are still visible.

Friday, 16 January 2015

Thinking in Black and white?


I don't know about you, but I find it difficult to get back into the swing of things after a break. I find it hard to get my brain out of park. It would seem that the longer I get in the tooth the more likely I am to make the silliest of mistakes. Take earlier in the year for instance.


One Sunday afternoon we thought we would take a trip out to the Humber bridge. The day had turned very warm with a light breeze and rolling clouds. Ideal for making pictures. Earlier that day I had cleaned my SQAi and loaded up all my film backs with fresh film. Not unusual in it's self, except one of the backs was loaded with an out of date colour film. I placed this back on the camera and thought no more about it.


It was a great day to walk across the bridge and along the way I made pictures of whatever took my eyes fancy, happy in the knowledge that they would make good mono-prints. After making twelve pictures I changed the film backs with one loaded with FP4+ and continued on my merry way.


When unloading the film backs at home I discovered that the unmarked back had colour film in it and not the Foma 100 I thought I was using. Ah! How would these pictures work in colour? The reason I ask this is because I think and see differently when using black and white film. Or do I?


An unexpected chance to test what I have been saying and doing. When the pictures came back from the lab, the first thing I noticed was the way they had been composed. In fact the colour does not add anything to some of the pictures. I would not have made any of these pictures in this way had I known it was colour film. It would have been a different set of pictures altogether. 


Sunday, 19 October 2014

The Monochrome print and the colour enlarger.

Many years ago I was in a position to purchase a medium format film camera. This led to a complication in the darkroom in that my then current enlarger was for only 35mm film. An extra expense I had not budgeted for! At that time multigrade headed enlargers were quite expensive second hand and a bit thin on the ground. By chance 'the other half' noticed an ad in the local paper, it was for a medium format colour enlarger that came with some other bits to do with colour printing. I had not considered that a colour enlarger maybe just as good. The person I spoke to did not know what size negatives it took. So going to have a look was a gamble but then I only had to go round the corner. To my surprise it was all in mint condition and the enlarger would deal with negative sizes up to 6 x 7 - I was hooked! Apparently the seller had only used it a few times and decided to go digital. We struck a deal and the rest as they say is history.

Once the enlarger was home I dismantled it and gave it a good clean and checked it was all in good working order, not that I expected to find a problem. The big surprise was how dusty the inside was. It was gently cleaned with a soft damp cloth and wiped dry so as not to leave any residue marks. 


The next thing I needed to know was how to set the filters values for use with black and white multigrade papers. I chatted to a friend who pointed me in the right direction. After a bit of digging in the library I came up with a number of values for different makes of enlarger my one included. I thought the values should all be the same. But have discovered that the values are a suggested starting point. I have a set of multigrade filters that I used with my other enlarger at least now I will not have to check them for dust.

 There is a lot of speculation on the subject of using colour enlargers with multigrade papers. They split into two camps - the purists that say the multigrade filters only give the papers true contrast and people like me who check things out for themselves. I am at an advantage in that I have used both methods. Personally I have not noticed a difference but then I have not done a like for like comparison. Would I do one? The only way I can answer this is to say If I was to become dissatisfied with my results I may check to see if there was a difference.
 
The following are the values for Variable contrast papers for different makes of enlarger. The values are for the yellow and magenta filters the Cyan should be set to zero at all times.

Ilford settings

1
2
3
4
Grade
Y
M
Y
M
Y
M
Y
M
0
150
25
92
16
75
12
110
16
0.5
110
33
74
22
55
16
73
22
1
85
42
56
28
42
21
57
28
1.5
70
55
46
37
35
27
46
36
2
55
70
36
46
27
35
36
46
2.5
42
80
28
53
21
40
28
53
3
30
90
26
60
15
45
20
60
3.5
18
112
12
75
9
56
12
74
4
6
135
4
90
3
67
4
90
4.5
0
195
0
130
0
97
0
130
5
0
200
0
130
0
97
0
130

The numbered columns represent different makes of enlarger
  1. Dunco, Devere, Chomega, Beseler, Jobo, Kaiser, Omega, Paterson, LPL,Kodak.
  2. Durst.
  3. Meopta
  4. Leitz
  5. kodak
  6. Durst

Kodak
Grade
5
6

Y
M
Y
M
0
130
0
130
0
1
75
10
65
15
2
50
20
40
35
3
30
35
20
60
4
10
100
10
100
5
0
200
0
180

It has been many many years since I obtained my enlarger and the resulting prints I have produced with it I have been pleased with, so much so that I have not tested the accuracy of the enlargers filters with Ilfords set. If it ain’t broke why try to fix it!
Since writing this ilford have introduced multigrade five making the above tables relevant to multigrade 4 only.  when purchasing paper you should always check the manufactures tables that come with the paper for the latest filter values.


Print 1
Print 2
Print 4
Print 5


Technical data:


  1. 35mm film, Agfa apx, iso 100, developed in ID11, Printed on Ilford multigrade RC gloss. developed in multigrade.
  2. 120 format FP4+ iso 125  , 6x6 negative, developed in ID11,  Printed on Ilford multigrade RC gloss. developed in multigrade
  3.  120 format FP4+ iso 125, 6x6 neg, developed in ID11, Printed on Ilford multigrade RC gloss. developed in multigrade.
  4. 120 format fomapan 100, iso 100, 6x6 neg, ID11, Printed on Ilford FB gloss natural tone, developed in multigrade.


Saturday, 22 March 2014

Dogs Dinner.

Well not quite, a dogs water bowl! There is no chance of it falling in his dinner because his head is in the bowl before it hits the floor. The film was more likely to become a chew.

I noticed that two film containers were sitting on the kitchen table. Thinking they were empty I picked them up to throw away, to discover that they were not. I opened one and out dropped a roll of exposed colour film. Butter fingers here managed to drop the roll of film! The consequence of these finger fumbling, was splash! straight into the dogs water bowl. My wife said that she had not seen me move that fast since my superman days. I need reminding, what superman days?

After a bit of dancing around to shake the water out, it was off to the local supermarket for development. An outlet we had not tried before. The film was also long out of date - nearly a decade. If it had not been for the fact I was on my way out I would have blacked out the darkroom and removed the film for drying. These things always happen when you're short of time.

As it turns out the water had destroyed nearly half the frames on a film of twenty four. The up shot of this was we only had to pay half the normal fee. There was also colour shift on some of the prints. This I put down to the water damage.

Am I disappointed? No! Not really, but I am with myself for the butter fingers, but not with the results we have, as neither of us could remember who, what, when or which camera was used in the first place. The big disappointment is with the quality of the processing and paper used. 

Sunday, 26 January 2014

Angles of view with different lenses..

The diagram shows angle of view or angle of acceptance.

I have been looking back through my college notes and came across this series of pictures. I used the colour film you find in the pound/ budget shops. I have had no problems with the way the film has performed.


These pictures show how much of the view in front of the lens is depicted at the negative. As the focal length of the lens increases the angle of view reduces but the object size gets bigger. Therefore as you go up the focal range so the depth of field lessens.

View at 35mm

View at 50mm

View at 80mm

View at 135mm and the cold is getting to me.

View at 210mm

Friday, 11 October 2013

On a personal note.


120 negatives.
Welcome to the blog and thank you to all who have taken the time to read it. First of all, Photo Mitch was a phrase that my friends used to shout at me whenever they wanted their picture taken. In those days I was the only one in the group who went out with a half decent camera and interested enough in photography to do so. Now a days everyone is a budding David Bailey. Who is he?


My Dad introduced me to the wonders of Photography and encouraged me with a 120 format Instamatic range finder, this gave me the freedom to take pictures whenever. It was not until my late teens that I was in a position to buy my first SLR camera that turned out to be a Nikon, this improved my picture-taking skills to a level that allowed me to take on commissions. After some years in the doldrums, my wife encouraged me to take a C&G photography course, which re-ignited my interest for photography.

Featured in Black and white
photography magazine


My photography has been influenced over the years by the art world and artists like Dali, Matisse, Picasso, Andy Warhol. As well as photographers like Fox Talbot for his early pictures, William Egglestone for his get it right in one frame of mind, David Bailey for his belligerence,  Paul Fusco, Henri Cartier Bresson for watching and waiting, Roger Hicks for his no nonsense approach and the architecture of the Art Deco movement for its bold lines. Which makes for a bit of an eccentric attitude to picture making. 

Digital

Having been introduced to film at a very young age I still take a large number of pictures in black and white. This does not mean I shun digital, I use it a lot, it's another format that allows me to express my view of the world. 


I hope what you find posted here interesting and helpful, I know it talks about out dated methods that a lot of people feel should be dead and buried; but it is the foundation to the digital age, with many aspects in common.


This picture was taken on
Zero pinhole camera.
From a personal point of view, blog posts that run to thousands of words make my heart sink no matter how interesting or well written they maybe. I believe that posts should be snippets of information; with this in mind my posts will be shortish if that is possible. Subjects that need more explanation will be done over a series of posts.

The time of year will influence my post rate. Put another way, if the suns out so will I.


Saturday, 7 July 2012

The masking frame


Also called an easel they come in different sizes. It is a good idea to pick one that is larger than your current needs therefore not limiting the proportions of your enlargements. The main reasons for using a masking frame are to hold the paper flat, to reconfigure the composition, allow the margins to be adjusted to the various format sizes you wish to use and to crop out some of those bits that creep in at edges, that you didn't see before you pressed the shutter. 

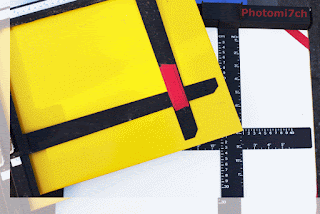
The frames come with two or four independently adjustable blades on a yellow or white base. I have noticed that some blades are not set at right angles to each other so it is a good idea to check them at various settings with a set square to make sure they are true. Also make sure that the edges of the blades are not bevelled under. This will reflect the light and produce a thin black line around the edge of the picture. It can be a nice affect but one you should have control over. The light colour of the baseboard is so you can see the projected negative, enabling you to frame the image before you put the photo paper in place.

When using single weight papers on a white baseboard, it is possible for the light to pass through the paper and be reflected back, changing the value of the exposure. You can stop this by laying a dark coloured card on the baseboard with the light sensitive paper on top.

The most versatile of the masking frames is the four blade, it allows you to mask the image by only having to move the blades of the frame without having to re-a line the whole easel each time. It also gives better control over how big or small you make the margins and in some cases gives you the ability to produce borderless prints. The versatility of these frames makes them quite expensive to purchase.

Monday, 18 June 2012

Post cards from the Humber!


Recently I teamed up with my wifefor a bit of an experiment and road trip. I loaded the Olympus mju compact with a roll of eight years out of date colour film. The idea was to share the camera between us taking pictures as we went along. Once the roll was finished I took it in to be developed at snappy snaps. No special instructions were given. The results speak for themselves. What if the film had been blank? Notch it up to experience and move on. Wouldn't it have been a waste of time and money? No! we still have the memories of an afternoon well spent, plus we had the 'mystery' to look forward too!


Sunday, 29 January 2012

Choosing an enlarger.


This is the most important tool in the darkroom after the enlarging lens. With this in mind you need to consider the following: 

1.   The number of negative sizes you may wish to print. It is a good idea to get a multi format enlarger even if you are only going to use 35mm.
2.   The most appropriate lens size and quality.
3.   What type of negative illumination. Diffuser or Condenser.
4.   The maximum size of print you are likely to make.
5.   Whether you may want to do colour at a later date. Colour headed enlargers can be used with multigrade papers. 

As mentioned in “3” the type of negative illumination you choose is worth  a lot of consideration -  there are positive and negative points to both. Here are some of the pros and cons: 

Diffuser enlarger: 
Diffuser light box
This type of enlarger design is used with colour and multigrade heads. The light travels through a mixing box and semitransparent screen above the negative. To counteract the drop off in light, these enlargers use a powerful quartz-iodide bulb.  This multi directional light passes through the negative and down to the paper. The affect of this will produce a gentler, softer quality to the  light, producing a less contrasty grade for grade photograph. As a result damaged and flawed negatives lose or soften some of their faults. 
There are tonal differences between diffuser and condenser produced photographs because of the way light passes around the silver particle's. This is negated when using Chromogenic monochrome and colour films as they rely on dyes to capture the light. 
Condenser enlarger: 

Condenser light box
Uses a plano-convex lens which spreads a bright hard illumination  evenly across the negative. Supplied from a opal tungsten lamp. The harshness of this light produces a contrast enhancement that appears to make  fine detail more exaggerated. This crisp appearance to the photograph has the negative affect of bringing into sharp focus the grain, any scratches, flaws and dust from the negative, meaning more time spent on retouching. These enlargers are subject to the Callier affect this is where the highlights in the negative scatter the light more than the shadow areas creating the increase  in contrast.