Pages

Sunday 30 September 2012

Alternative way to check your fix is still fresh.


Here are two simple and easy ways of checking that the fix is not exhausted. The bottom line is if in doubt, throw it out.

  1. Take a drop of fix and place it on some blue litmus paper, if it turns red the fix is still active, if the paper remains blue it is exhausted. Rapid acting fixes by their nature will get exhausted more quickly than an ordinary one. When fixing paper you may expect to get thirty to forty 18 x 24 cm ( 8”x 10”) sheets per litre.
  2. Take ten ml of fix and add ten drops of potassium iodide solution to the measuring jar and stir. If the milky solution does not clear after it has been shaken then the fix is exhausted and a new batch should be made up. If it clears the fix is OK to use. Make up your Potassium iodide solution from two point five grams of powder and add a thousand ml of water and mix. This method does not apply to rapid fixes.

These methods will work for your film fixes as well. But the milk test you do for film will not work with paper as you cannot see this stage with paper.

Sunday 23 September 2012

A fixing question.


This is the second most important part of the process after development. Proper fixation ensures the longevity of your prints and negatives. Fix works by removing the unused silver bromide particles from the film or paper. If not done properly, over time they turn black ruining the image.
 

The way the fix works on the emulsion is to chemically convert the remaining silver bromide into complex argentothiosulfate an insoluble  and unstable compound which after a few seconds can be seen on the film  as a milkiness (not visible on prints) this should be allowed to continue until it has disappeared otherwise the negatives will turn black. As the process continues the fresh hypo from agitation turns the insoluble into soluble sodium  argentothiosulfate which can be washed away in water. The fixing of the image is quite quick, it is turning the by products into a water soluble compound that takes the time.

The darkroom practitioner needs to be carefully when choosing a fix as some cause staining when being used with paper. There are three types: alkali, plain, and acid.

         Alkali are the most modern and efficient with today’s emulsions. They are the easiest to wash out of papers and cannot be over fixed.

          Plain is a mix of Hypo (thiosulfate) and water that should be used as part of a two bath system, then only as a second one as it can cause staining and other problems.

         Acid fixes are known to be quick and should be timed carefully as they can cause bleaching. Hence the reference rapid.

Some fixes come with hardening and should not be used if you are thinking of toning prints. Otherwise it is down to personal choice.


Film Fixing.
 

A lot of people ask how long will the fix stay fresh and how many rolls it will process. I mix up  1000 ml or 1200 ml  depending on how many rolls of 35mm and or 120 format I think will be processed at the same time. ( I  use a different fix for paper) I keep the fix until I have developed a mix batch of between twelve and fourteen rolls. Which can take some months to achieve.

 
The film has a milky look after one minute in the fix
There is a more scientific way of being sure what the limits of the fix are for yourself. It can only be done with a fresh batch of fix. After the film has been in the fix for a minute you open the process tank, checking to see if the milkiness has cleared. If it has then give the film a further three minutes this will also establish the time the film needs to be fixed for. You will need to do this check  with subsequent films until the clearing time is double what it was when the fix was fresh. Having kept a check on how many films you have processed this will give you a safe number per litre for the future, hence removing the need to check each time. There are other method for checking fix life which will be posted later.


Paper fixing.


There are two methods to choose from.

         Two bath method. This where two lots of fix are made up and set side by side. The first bath does all the work, with the second bath removing any argentothiosulfate that have not  been converted to sodium argentothiosulfate in the first place, making for a more complete final wash. Once the first bath is exhausted (which you will need to test for), the second bath becomes the first and a new one is mixed for the second. When the second now first bath is exhausted both should be ditched and two fresh fixes made up.


I use this method occasionally If I'm toning. To get round all the testing you need to know how many prints you can get out of the fresh  bath and the partly used second, for each of the sizes you print most often. It is a lot of work to start with.
 

         Single bath. Is a fast acting concentrated fix that takes one minute to do the job. This method needs to be timed exactly; to leave it longer will negate  its advantages. Most of the fixing is done in the first fifteen seconds, to leave it longer than one minute will allow complex compounds to build up making them difficult to wash out.
 

I use this method most of the time partly because I do not have a lot of time to spend when printing and the other is I do not do a lot of toning.


Please note: when fixing papers you should check what the manufacturer suggests in the instruction provided with the paper. I have noted the recommendations have changed since writing this article.  


Sunday 9 September 2012

To be sharp or not, how is the question.

Fg 1.
Film FP4+ developed in ID11 printed
on Ilford MG RC gloss.
A subject that is talked about by all photographers. No matter how you like to label it DOF or boken I am surprised that depth of field can be expressed by some in the terms of good and bad. Surely it is subjective and down to the person who has composed the picture.


So what is depth of field and how does it work?

Depth of field relates to the area of the image that is sharp. So the subject  you focus on in the view finder will be in the middle of the sharpness. How much this extends in front of or behind it, is dictated by the aperture you use. Small F number (large opening) very shallow, large F number (small opening) very wide. The other factor to have a bearing is the focal length of the lens used.  For example, with a wide angle 28 mm lens you would not require the focus to be exact because the depth of field would be quite considerable in front of and behind the point of focus even at small f numbers (large apertures). But with a Telephoto lens of 200 mm the point of focus needs to be precise as the depth of field is quite narrow even at large f numbers (small apertures).


Fg 2.
Kodak colour plus negative. scanned
 from print.
In understanding the way depth of field works you need to know that when you focus on the subject it is at that point the reflected light arrives at the focal plan as fine points of light (sharp). The subjects closer to the lens do not resolve as sharp until they are beyond this point and those further away reach pin sharp before they arrive, because of this they arrive as discs known as circles  of confusion. The larger the circles the softer the images appearance. By making the aperture smaller (large F number) you reduce the circles of confusion giving the picture the appearance of full depth of field. (sharp from front to back). The eye considers points of light as large as 0.25 mm diameter as sharp. The same applies to the dot pitch of a computer screen. When it come to the manufacturer of lenses for 35mm format cameras this figure is much smaller 0.08, this is because the maker has worked out  that on average a 35 mm negative will be enlarged by twenty times (a print size of 10 x 8.)


The good thing about using a film camera is that  you can check on how heavy the points of confusion will be by pressing the depth of field preview button. The advantage I have is I know what to expect from my lenses at particular apertures. This allows me to compose the picture with the amount of soft focus  I think will enhance it.

For example the three pictures included with this post.

         Fg. 1 The main reason for the cats paw being out of focus is to add depth and a sense of being very close.

Fg 3.
FP4+ developed in ID11 printed on
Iford MG RC gloss
         Fg. 2 The main reason for blurring the background is to exclude a large group of people walking towards me. They did not add anything to the picture I had in mind. By adjusting the aperture to a lager one (small F number) they have been removed making for a much better shot.

         Fg. 3 The depth of field in this picture is very narrow. It took a bit of time in making sure that the whole of the ball was sharp and nothing else.


When taking a picture I consider the 'out of focus' as important as the area to be sharp.


Sunday 26 August 2012

The perfect print; possible?


It is still one of the most talked about subjects Visit any forum to do with photography digital or traditional and you will find threads relating to the perfect negative or capture. What developer to use, how to manipulate the raw file, what does a well exposed negative or histogram look like and so on. But this post is not about our digital friend or for that matter the negative it is to do with the photograph - the positive end of the process. I cannot get there without some negative chat first though!

After the recent deluge it is nice to be sitting back in the garden office writing this post and enjoying the late afternoon sun with my friend the cat. It is quite surprising how peaceful it can be in such a built up area. Not as negative as you thought but I digress.
It was Ansel Adams and Fred R. Archer that gave us a proven method of producing a properly exposed negative every time with the zone system. They divided the black and white negative up into eleven sections if you include zero from pure white to full black. Adams then said that really there are only nine zones if you are in pursuit of the perfect negative and then only seven of those will give texture. This is all well and good if you are using a plate camera but most of us don't. We use cassette and or roll film where all our carefully exposed negatives get a one time fits all development. In a round about way Mr Adams is saying that film sees the world in a more limited way to us. So we have all engineered ways of finding our perfect negative. What do I look for? A negative that has detail from high light to shadow and a good density above base clear in other words defined rectangles of tones the length of the film.


The day was very bright that the light
meter read a six stop difference
between the house wall in the background
and the shadow cast by the barn. I
over exposed the negative by two and a
half stops.
We all strive to produce the perfect negative but it was not until recently that it dawned on me that it does not necessarily translate to the perfect print. So what is the perfect print? One that is easy to print but what do they mean by easy to print? One that does not require a lot of dodging and burning. A single exposure success wouldn't that be the perfect print! With the way the negative sees the scene in front of it and all the variables in its path is it not inevitable that you will have to manipulate the image projected onto the base board of the enlarger to produce the perfect print? 
 

Recently I came close to my interpretation of the perfect print, one that does not require a lot of manipulation. By placing the test strip in such a way that the area that needed burning in was exposed to several different timed exposure segments this allowed me to add the extra time for that area to the first print. With experience the hit or miss aspect of the test strip process is lessened. It still doesn't take away that bit of a buzz when it all falls into place. Something I've never had with digital.

Saturday 11 August 2012

Stop not buffer.


One of the most popular over the counter acid stops.
Made from citric acid with colour indicator.
Stop is the second part of the development process, but how many of us give it a second thought. Most of us when we come to developing our first film tend to do what the manufacturers, friends and teachers suggest without delving into what the relationship is between these elements in the process. There is nothing wrong with this approach we are all eager to get on and see those all important first images. With success, we continue settling in to a way of doing things that produce good results. It's not until we start printing that some faults with the negatives rear their heads. Dust and hair marks being the most common but then there are those odd black spots appearing in the skies here and there. This is when the controversy about how we stop the development process comes to the fore.


There are two main categories. The more aggressive with chemicals and the gentler water stop. The later is not a stop and it is misleading to call it such.   It dilutes the developer to the point where it no longer has an affect on the emulsion this can and does lead to unevenly developed negatives and I cannot understand why it is recommended (for film only) other than to increase the longevity of the fix, a buffer or as a way of creating a certain style to the negative. 

Have been processed using a citric acid stop.
I personally prefer the more aggressive chemical route, when the stop go's in, the developer is stopped in its tracks producing a clean crisp negative but you need to be careful.

A popular choice in the make up of developers is Sodium carbonate, an alkali. When this comes into contact with an acid based stop it produces carbon dioxide gas that leads to blistering of the more sensitive film emulsion,( not the case with enlarging papers). It manifests its self as a pinhole in the denser areas of the negative. There are ways around this by using developers that are formulated from mild alkalis either balanced or borax which do not produce the damaging over heating or gas when used with acid stops.


A reflection of St Pauls in London.
Processed and printed using all Ilford products
Stops are made from several different acids the most popular is acetic with a pH dye indicator. The others are citric and boric. You can also use a simple solution of sodium bisulfite. Be careful which stop you choose as some produce green staining with some enlarging papers. Another precaution is to use the stop bath at a lower working temperature to the developer; I know this is a controversial move but I have used this method for years without any of the problems suggested by others.

Saturday 28 July 2012

Sinkings in the Orkneys


German Fleet at Scapa flow
It is a grey day as a young lad stands near the cliff edge on Hay one of the Orkney islands. He looks out over Scapa flow that is crowded with ships. The German fleet has been interned. He has heard that the war is over and that is why they are all here at the Navy’s most northerly base and guard to the North Sea.


While the boy is sat a top the cliff eating a bread and dripping sandwich, his eyes are drawn to some flashing lights, it looks like all the ships are winking at each other, little does he know that this is the order from rear admiral Von Reuter to his commanders confirming orders to scuttle the fleet. He looks on day dreaming about what life may be like now that the war has ended. He suddenly notices that all the ships he can see are flying the Imperial German Ensign from their main masts. While he looks on there are lots of small boats moving between the ships, if only he had a telescope he would be able to see what is going on in more detail but he still hasn’t got enough pocket money saved.


Whaling boat stranded on Battle Cruiser Moltke
The German sailors had been preparing for the scuttling for some days by  drilling holes in the bulk heads to help the passage of water through the ships. Once the order was given sea cocks and flood valves were opened, internal water pipes were smashed and all water tight doors and portholes left open. It was not until midday that  the scuttling was noticed.  Friedrich der Grosse was seen listing heavily to starboard. What remained of British naval forces at Scapa flow navel base sprang into action, but they were limited in the force they could take since the leaving of the fleet the day before . It was not until twenty minuets after midday that Admiral Fremantle on manoeuvres with the fleet  received a message that the German fleet was sinking. He immediate turned round and steamed back at full speed to Orkney. He radioed ahead to order all available boats to try and stop as many ships sinking as possible. By the time Admiral Fremantle returned it was only the large battle ships that were still partly afloat. The last ship to sink was the battle-cruiser Hindenburg at five o'clock.
Battle cruiser Seydlitz


The young boy up on the cliff had lost all track of time it was getting late, he would be 'for it' by the time he got home, with a clip round the ear from his mum. He had resigned himself to it but had a great story to tell his friends when he got to school the next day. On his way home he wondered what those faint popping sounds were. The tragedy of those sounds were that nine Germans were killed and sixteen wounded when the British boarded their ships to stop the sinking's. 

Battleship Bayern listing heavily


I know you are probably thinking what has this got to do with photography. The funny thing is this was all sparked off by an article in Black and white Photography magazine about post cards. Which lead me to a box of  cards that was given to me by my Gran. In among them are a collection of twenty pictures of ships, of these fourteen show the sinking of the German fleet at scapa flow at the end of the Great War. The photographer who took these shots probably used 127 or 120 format film in a box Browne or fold out camera of the time.


For more information on the Sinking of the fleet.


Saturday 7 July 2012

The masking frame


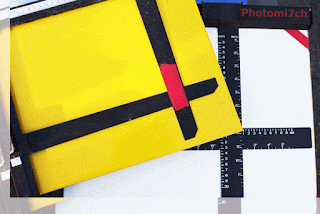
Also called an easel they come in different sizes. It is a good idea to pick one that is larger than your current needs therefore not limiting the proportions of your enlargements. The main reasons for using a masking frame are to hold the paper flat, to reconfigure the composition, allow the margins to be adjusted to the various format sizes you wish to use and to crop out some of those bits that creep in at edges, that you didn't see before you pressed the shutter. 

The frames come with two or four independently adjustable blades on a yellow or white base. I have noticed that some blades are not set at right angles to each other so it is a good idea to check them at various settings with a set square to make sure they are true. Also make sure that the edges of the blades are not bevelled under. This will reflect the light and produce a thin black line around the edge of the picture. It can be a nice affect but one you should have control over. The light colour of the baseboard is so you can see the projected negative, enabling you to frame the image before you put the photo paper in place.

When using single weight papers on a white baseboard, it is possible for the light to pass through the paper and be reflected back, changing the value of the exposure. You can stop this by laying a dark coloured card on the baseboard with the light sensitive paper on top.

The most versatile of the masking frames is the four blade, it allows you to mask the image by only having to move the blades of the frame without having to re-a line the whole easel each time. It also gives better control over how big or small you make the margins and in some cases gives you the ability to produce borderless prints. The versatility of these frames makes them quite expensive to purchase.