Pages

Showing posts with label black and white photography. Show all posts

Wednesday 12 January 2022

Bergger Pancro 400 a delightful surprise


I am writing this from the darkroom as I process the second roll of Bergger Pancro 400. It is being developed in Kodak HC 110 for 9 minutes I'm not sure how it is going to turn out as I forgot to soak it for a minute in clean water. I knew something was a miss. It is becoming a joke, nearly every film processed this year, has had a fault one way or another. I will be pleased to get back to the mundane predictability of old. In more ways than one.


Now with the film hanging up to dry I can get back to what I wanted to write. I'm pleased to say that the initial look over the negatives is good in comparison to one I did correctly. I will only know for sure when I start printing.


As you may have already gathered the film needs to be soaked for a minute before the developer go's in. When you pour the water out it has a very slight colour to it. Stop bath is as normal for those that use it but you must fix the film for six mins or longer depending on how old your fix is. Agitation for the developer is for the first 30 seconds (twelve inversions) and then for 5 sec's every 30seconds  ( two inversions.) If you tumble your tank instead of twiddling. When you open the top to pour away the developer there will be bubbles in the top so far I have not noticed any problem with the look of the negatives. 


The lock down has found me time to slow down and consider what I should do. While I mulled things over I did a bit of surfing those were the days now it is just the net for information on macro photography. It became clear that it would be best to use a fast film because of the drop off in light reaching the film plane when using a bellows. I'm in trouble I have no 400 ISO film in 120 while I was surfing down the pipe I came across references to film called Bergger. It did not take long before the screen was swamped with peoples opinion on this film. I scratched the surface to see what was said and looked at the pictures it produced. I was disappointed to find that most of it was scanned negative. One video I watch stated the negatives were flat. I'm pleased I took no notice as the results I have hanging up to dry show otherwise.


I have long held the view that one favourite film developer at a certain dilution should not be a catch all for all makes of film and that a comfort zone is the enemy of creativity and missed opportunity. Manufactures go to great lengths to produce a developer that best brings out the qualities of their film and as I have discovered Bergger is no different only in this case their film has a twin layer of emulsion giving it its full light sensitivity hence the name Pancro. Which would suggest a look all of its own. A comparison of their developer could be on the cards?


For instance I chose to use HC 110 to develop the film, it could quite easily have been Rodinal or one of the half dozen others I have on the shelf but had in mind the fine grain qualities of HC 110. Fast films are not known for there fine grain unless it is a T grain. I should add that the developer you choose has a big influence on the size of grain and the character of the negative and therefore should be given due consideration.

When doing something like this the first time it is a leap of faith that all the information about development is correct. I have found that the time suggested for HC 110 produces a negative that is a little on the thin side for me. It has shown its self in the darkroom with shorter than my usual exposure times. I may increase the development time but for now I'm going to let it stand until I have processed a few more rolls.  

I have exposed a number of rolls of Pancro 400 at box speed. Most of it in high contrast conditions. In some cases with the lens closed down to F 32 at 500th of sec. it has managed to capture a wide range of detail from darkest to brightest. All waiting for you to utilize when exposing it to your chosen paper if you wish. I have found printing these negatives to be some of the easiest. The whites are brilliant and detailed to a degree I have not noticed before with other film. The blacks are rich and pure but can also be very detailed. 


One note of caution it is quite easy to over expose the paper due to the extra tone and crisp detail. I have discovered that I am trying to have it all leading to overly dark and sometimes muddy photographs. With the saying less is more in mind it has lead to some wonderful photographs that are a joy to behold.

You should give Bergger Pancro 400 a go if you have not already done so and print it in the darkroom. Scanning does not do it justice.

A note of caution when using out dated 120 film it can become very grainy even with HC110 when pre soaking, I suggest not doing so to reduce the look of grain.


Technical Data:

All black and white images have been scanned from prints. Contact printed on Ilford MG 5 RC G. Key printed on Kentmere RC G, Containers of fruit printed on Ilford  MG FB, All developed in multigrade. 

The picture of the graduate is used HC 110.    


Wednesday 15 December 2021

20 x 24 photographic paper out of date challenge

I have been having a clear out in the darkroom. More like seeing what printing paper I have in stock and how close to date they were getting. While checking I came across a pack of Ilford multigrade 4 peal RC 20 x 24 to large to miss but I have managed not to notice it for a long time.

It has been over looked all this time partly because it is pearl paper and that I am unable to use paper this size. I know why, then why have you not cut it down to size? Without trying to make excuses it is difficult to cut any size papers when you only have enough space on the dry side of the darkroom for your enlarger and I did not want to waste it if I could help it. A sort of unintended waiting game for the right project only I did not think it would take about 15 years.


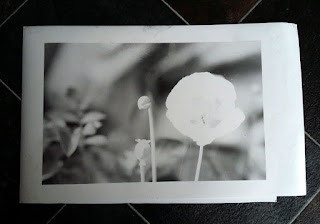
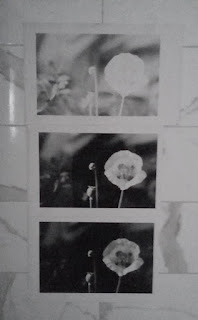
A few days ago I was setting up the enlarger to make some 9.5 x 12 prints from Kentmere 100 35mm film. That had some images of poppies made in the garden. All though they all turned out well. I had noticed, I was loosing about an inch or so off the side of the negative.

I started to speculate wouldn't it be nice to include that missing edge at the same ratio of enlargement without having to down size it to make it fit. This idea was going to be difficult to fulfill as my main sizes are 8 x 10 and 9.5 x 12. This left the 20 x 24 this maybe it's finest hour. 

After a certain point in time old paper starts to increase their latency. This means you need to start adding more exposure time (light ) to the paper to receive the same results you would get with the fresh stuff.

With paper this old you may as well chuck it in the bin. Yes! it is coming, if it was this article would be at an end. But! while I am processing anyway I may as well see if I can get any sort of image.


Where to start? a Segmented test print. Where you increase the amount of exposure at set times. The problem with this is you have no idea how many increments of light will be needed to arrive at the exposure. I short cut it by using the exposure time from the negative already set up using that exposure time as a starting point.

Fortunately the developer was fresh in that it had only half a dozen prints through it. To allow for the sluggish latency I would develop the print for two minutes. Twice normal for RC papers to give it a chance to produce tones.

Before we go any further we need to look at the negative I was using. It had been exposed to Foma 311 RC paper. It took 27 seconds at grade 3 with the lens set to F5.6. This would be the starting point then with one change the enlarger had to have the filter setting changed for multigrade 4.

After a little bit of contortionist cutting, the paper was in two bits of equal size well almost and the easel adjusted to allow for the new size, the paper was exposed. 

Surprisingly when I remove the paper from the processor after 2 mins there was a soft image, emboldened I increased the exposure to 30 secs. A slight increase but not enough. Time to get radical and doubled the light by opening the enlarging lens to F4.

The print was darker again but not enough to get a good black, so I opened the lens to f 2.8 at 30 secs. Effectively four time the light from when I started. When the print came off of the processor this time it was nearly perfect. I did another print adding 15 sec burn to the highlighted poppy. Done.

I did consider pre-flashing the paper this is where you add light to the point just before recording a tone to overcome the latency. I explain how it is done in a previous article link at the bottom of the page. You will properly have to make time changes from part seconds to seconds in the case of old papers. A case of testing to see what works to get the right result. There is also double grade printing a link at the bottom of the page explains this method as well.

A note of caution what works well for one pack of paper may not for another keeping your grey matter on its toes. It will be the case that no matter what is done you will not get the result you are looking for it is at that point a decision needs to be made to bin it.

I am pleased that I had a go with this paper. It has introduced me to a new format size for 35mm printing. I feel it is more pleasurable to look at with that bit of extra width. A sort of shortened panoramic feel.

When the same image is compared with the Foma 311 version it has a slight warmth to it which could be down to its age, if anything this adds to it. Making the Foma composition a little clinical looking. It is a unintended consequence of mixing different papers and throws up a question about creative choice. Which I'm go to leave you with to ponder.


All the photographs were reproduced using a phone camera and edited in Photoshop.

The first four pictures were made using Ilford multigrade 4 pearl RC.

The fifth is on Foma 311 gloss RC.

Links 

Paper flashing

Paper flashing more examples

Double grade printing


Tuesday 23 November 2021

Using the camera from Dresden part 2

The camera from Dresden has been a joy to use. A little quirky at first as my fingers got used to the placement of the controls. But, once mastered, it became intuitive when using the light meter and shutter. It is obvious that the controls lack the finesse of its Western counterparts, but that is part of its character.


CLICK! As the last frame on the Fomapan 200 is exposed - with this camera more than others I have used, you need to hold it correctly with your left hand supporting the body and lens, while the right grips the body and actuates the meter and shutter. With the camera turned upside down, I press the button that releases the wind on and slowly rewind the film back into the canister.

Now, to develop the film, it was always going to be HC 110 as it is the new kid in the darkroom. The more I use it, the better my understanding of what to expect from it with different film manufacturers.

The technical bit: Dilution 1:31 in 300 mls which equates to 9.7 mls of developer. The film was exposed at 200 ISO box speed, which means a time of 3 1/2 mins, but I extended it to 4. I also prolonged the fix time to 10 minutes after checking the film halfway through, as it still showed signs of fog. 


At first glance, the negatives appear to be on the thin side (under exposed). I think this is due to the built-in light meter. I noticed that if you held the meter on for more than a few seconds, the needle started to fall. I did, on occasion, allow for this - whether I should have or not, I’m not sure.

At the time of writing this, I still have not had the chance to contact print the negatives in the darkroom. This is the real test of how good your negatives are - this point being borne out by a new member of the FADU forum who has switched from scanning his negatives to processing them analogously and is having trouble getting his prints right. This illustrates just how much the scanning process compensates for the differences between the highlights and shadows.


I use the hybrid system myself (analogue to digital) and know it is far easier to get the results you want than in the darkroom, especially if there is a problem with density. But I prefer the wizardry of chemicals on paper to the click of a button on a screen.

Even though I’m not happy with the way these negatives look, I will still print some of them. As I print them, I consider the sense of disappointment I feel. Why should I be disappointed? The negatives are less than technically perfect, but what about creatively? In our pursuit of knowledge on the best way to produce our images, our minds become polluted with other people’s expectations of what constitutes a properly produced picture. Photography is, by its nature, technically based, but should we be sacrificing creativity for technical excellence? That’s my personal view, even though I am not for one minute suggesting sloppy workmanship.


My disappointment with these negatives is because they do not resemble what I have come to recognize as well exposed, but this should not be the whole story. When I started out with the MTL3, it was to be an adventure - some fun with out-of-date film. I, however, ignored the golden rule of not using old film that has been opened and partially used, which is asking for trouble. 

Taking into account all that has gone before, this film is a triumph in that there are images to be printed. In the old days I would have just filed these negatives, never to be seen again. Nowadays, I keep an open mind as to what may be possible. I am pleased that I did.


Technical data: 

All the black and white images were scanned from the contact print.


Sunday 14 January 2018

T max 400 a wonderfully smooth finish.

Whilst putting an order in and perusing a suppliers web site I suddenly had this urge to find out what the cost of using Kodak's T Max 400 would be in 120 format. I have no idea where this thought came from or why! Anyway I had a look and by chance it was out of stock. I still do not understand why I should want to use it. In the main I have not used film faster than 200 ISO for decades. I have been happy to go about my picture making at 100 or 125 ISO.

Some months later out of the blue I find myself buying ten rolls of 120 out of date Tmax 400 which just so happened to be part of a job lot. If I'm honest I would not have purchased them at all if it had not been for the Tmax. All I can gather is my creative subconscious has an idea of some sort that will reveal it's self over time!

I am no expert in the way the mind works but I get a sense of when it is the right time to get things done. I sometimes find myself sitting back waiting for that feeling to get on with projects, when it happens I find I am very creative for a short intense period of time. Once that need to be creative is fulfilled the project has to be more or less complete, which happened in this case with the images that accompany this article.

We had a pile of logs in the garden waiting for me to chop up when I had the time. They were starting to nag at me to get on with the job when I noticed the way a particular branch was lit - it brought out the texture of the wood in an interesting way. For some reason it also made me think of a severed arm the more I explored the pile of wood the more macabre it became to the point where another branch looked like a limbless torso. My god! my mind has gone into overdrive and it was not Halloween! It just goes to show how powerful your imagination can be - I could no longer bring myself to cut the wood up! 


Some weeks later I was looking out the window at the logs again - I know! But what struck me was the quality of the light. It was very bright in a soft way as though some one had put a soft box in front of the sun. I went out to look at the sky it was covered with very thin cloud, like a mist. All at once the idea for making images of the logs fell into place.

To make the images as surreal as possible I had to separate them from the landscape, which meant I had to set up a background in this case - I felt that white would do the best job. I worked as quickly as I could because I was not sure how long this wonderful soft light would last. I had no time to test the white background idea just go with the flow. The lumps of wood were very large and heavy for a set of still life images.

T Max 400 grain, film developed in RO9.
 As to what film I should use there were no second thoughts - the out of date T Max 400. I pulled a number of rolls out of the cupboard before I loaded them into my Bronica SQAi. I used my hand held light meter to check how bright it was. The rest as they say is history.

The light lasted the best part of the morning and a number of rolls of Tmax. Which was fortunate I was in a creative wonderland that stopped abruptly after about a couple of hours. The flow of ideas had gone so it was time to pack up and move on. The intensity of the project had left me worn out! The images do not convey the size and weight of the logs I had been moving around. It was time to sit down, regain my energy over a cup of tea and consider how they would be printed.

I was excited and apprehensive all at the same time. Excited to see how the negatives and prints turned out but also apprehensive at the possibility that the light readings could be wrong as there was not time to double check so the film could be empty of images. My other concern was with the development of the film. I had a time of 10 minutes at 1+50 for the RO9 I would be using. Having not used this film developer combination before I could not tell how well they would come out until the wet negatives were hanging up to dry. In these situations I process the film one at a time so I can adjust development if needs be.

I was shocked in a pleasant way when I first looked at the dripping negs. The detail and tone were superb. The superlatives kept coming as the printing got under way. The negatives have a super fine grain with great tone and detail. I printed them on Kentmere RC gloss paper because of the arctic white tint which tends to increase the contrast of the negatives. I would have used FB paper but I did not have any cool tone paper in stock so used the next best thing. I needed the bright white background to enhance the surreal look, not that they weren't that already.


It became clear that if I wanted to keep the stark white background then there would need to be some burning in of the light wooded areas to bring out the detail and maintain the softness to the shadow. It would have been criminal not to exploit all the fine details the negatives held. This extra work did not take away the Eminence pleasure it was to make these prints - even the ones that went wrong - believe me I make some stupid mistakes sometimes that I can't believe!

I really did not know what to expect from the T max 400 especially as I was using RO9 ( it depends on which manufacturer you use as some are finer working than others) not known for it's fine grain and less so with film as fast as 400 ISO. The grain produced is quite fine considering the developer used I suspect it would be even smoother with a developer noted for it. These T grain films really are a jump on from the more traditional emulsions. Is it better than Delta? it is difficult to say without doing a straight comparison between the two. I'm exceptionally pleased with the results.

Oh by the way the pile of logs are still there! Thanks to a friend the pile has grown in size and weight and will take even longer to chop up!


Friday 12 January 2018

Newton's rings. Updated


This effect can happen when using medium format and larger negative carriers as they use glass to keep the negative flat. Most carriers today use a frosted piece of glass above the negative known as anti Newton glass. 
The rings occur in the areas where two clear smooth flat pieces of glass lie next to each other but do not quite touch. The interference happens because the light rays are refracted, this produces irregular shaped dark rings in the projected image. This will happen more readily if any of the surfaces are wet. You can get round this by using a paper mask with the negative in the carrier. This will block out the light in the places where there is a gap between the glass surfaces. You will need to check the projected image to see if they are still visible.

Friday 13 December 2013

Is it a love affair?

This is the saucy minx of an F5  I use to take most of my photographs with, coupled with the sexy little prime of a 28 mm lens. Add a roll of Agfa APX to caress the back of the focal plane shutter and I'm in for a sensual day of picture making.

With camera in hand I stroll out into a bright day with a gentle heat, fanned by a breeze that shifts the leaves on the trees. Now looking at the image in the view finder that is alive with dancing shadows I wait with finger poised touching the trigger in growing anticipation, waiting, waiting for the right breath of wind to push the shadows into place to complete the composition the eye so lusts for.

Click! anticipation spent, I turn away moving to the next flirtatious view to seduce my eye and so the day is flirted away click by click. Before I know where I am an entrancing morning has been teased away.

 
Not quite what I had in mind when I started writing this cheeky post but it does sex up the thought process behind the taking of each image made. A bit of fun at my expense. Believe it or not there was such a day and the pictures that illustrate this post are the results. A full days exposure and legal too!


Sunday 7 October 2012

Paper fixing faults.


This post will be short, a sort of quick guide to paper fixing faults. They are listed in no particular order.
This picture shows the fix is exhausted

         Brownish areas: fix exhausted.
 
         Print becomes yellow after a while: Was not fixed for long enough and    or  washed for to short a time.
 
         Burnt out highlights: acid fix not diluted to the right strength. Left in the fix for to long. Not timed properly.
 
         Brownish spots, Lilac round the edges: Stop bath exhausted, incomplete fixing, forgotten to wash or use stop after the developer.
 
The blue stain shows that the stop is exhausted.
         Yellowish fog over the entire paper surface: Exhausted fix, developer contaminated fix, little or no agitation while fixing.


It is not unusual to be caught out by some of these faults. Even when you have years of experience.

Sunday 30 September 2012

Alternative way to check your fix is still fresh.


Here are two simple and easy ways of checking that the fix is not exhausted. The bottom line is if in doubt, throw it out.

  1. Take a drop of fix and place it on some blue litmus paper, if it turns red the fix is still active, if the paper remains blue it is exhausted. Rapid acting fixes by their nature will get exhausted more quickly than an ordinary one. When fixing paper you may expect to get thirty to forty 18 x 24 cm ( 8”x 10”) sheets per litre.
  2. Take ten ml of fix and add ten drops of potassium iodide solution to the measuring jar and stir. If the milky solution does not clear after it has been shaken then the fix is exhausted and a new batch should be made up. If it clears the fix is OK to use. Make up your Potassium iodide solution from two point five grams of powder and add a thousand ml of water and mix. This method does not apply to rapid fixes.

These methods will work for your film fixes as well. But the milk test you do for film will not work with paper as you cannot see this stage with paper.

Sunday 23 September 2012

A fixing question.


This is the second most important part of the process after development. Proper fixation ensures the longevity of your prints and negatives. Fix works by removing the unused silver bromide particles from the film or paper. If not done properly, over time they turn black ruining the image.
 

The way the fix works on the emulsion is to chemically convert the remaining silver bromide into complex argentothiosulfate an insoluble  and unstable compound which after a few seconds can be seen on the film  as a milkiness (not visible on prints) this should be allowed to continue until it has disappeared otherwise the negatives will turn black. As the process continues the fresh hypo from agitation turns the insoluble into soluble sodium  argentothiosulfate which can be washed away in water. The fixing of the image is quite quick, it is turning the by products into a water soluble compound that takes the time.

The darkroom practitioner needs to be carefully when choosing a fix as some cause staining when being used with paper. There are three types: alkali, plain, and acid.

         Alkali are the most modern and efficient with today’s emulsions. They are the easiest to wash out of papers and cannot be over fixed.

          Plain is a mix of Hypo (thiosulfate) and water that should be used as part of a two bath system, then only as a second one as it can cause staining and other problems.

         Acid fixes are known to be quick and should be timed carefully as they can cause bleaching. Hence the reference rapid.

Some fixes come with hardening and should not be used if you are thinking of toning prints. Otherwise it is down to personal choice.


Film Fixing.
 

A lot of people ask how long will the fix stay fresh and how many rolls it will process. I mix up  1000 ml or 1200 ml  depending on how many rolls of 35mm and or 120 format I think will be processed at the same time. ( I  use a different fix for paper) I keep the fix until I have developed a mix batch of between twelve and fourteen rolls. Which can take some months to achieve.

 
The film has a milky look after one minute in the fix
There is a more scientific way of being sure what the limits of the fix are for yourself. It can only be done with a fresh batch of fix. After the film has been in the fix for a minute you open the process tank, checking to see if the milkiness has cleared. If it has then give the film a further three minutes this will also establish the time the film needs to be fixed for. You will need to do this check  with subsequent films until the clearing time is double what it was when the fix was fresh. Having kept a check on how many films you have processed this will give you a safe number per litre for the future, hence removing the need to check each time. There are other method for checking fix life which will be posted later.


Paper fixing.


There are two methods to choose from.

         Two bath method. This where two lots of fix are made up and set side by side. The first bath does all the work, with the second bath removing any argentothiosulfate that have not  been converted to sodium argentothiosulfate in the first place, making for a more complete final wash. Once the first bath is exhausted (which you will need to test for), the second bath becomes the first and a new one is mixed for the second. When the second now first bath is exhausted both should be ditched and two fresh fixes made up.


I use this method occasionally If I'm toning. To get round all the testing you need to know how many prints you can get out of the fresh  bath and the partly used second, for each of the sizes you print most often. It is a lot of work to start with.
 

         Single bath. Is a fast acting concentrated fix that takes one minute to do the job. This method needs to be timed exactly; to leave it longer will negate  its advantages. Most of the fixing is done in the first fifteen seconds, to leave it longer than one minute will allow complex compounds to build up making them difficult to wash out.
 

I use this method most of the time partly because I do not have a lot of time to spend when printing and the other is I do not do a lot of toning.


Please note: when fixing papers you should check what the manufacturer suggests in the instruction provided with the paper. I have noted the recommendations have changed since writing this article.